

The last two weeks had us hopping with getting back to work, getting over our mild illnesses, and waiting on decent weather windows to do boat work. Our boat commute is about 75-90 minutes one way, and we watch weather closely as if we were sailing. 30 deg F weather with strong winds makes for very inhospitable conditions.
Our Webasto diesel heaters didn’t seem to work properly during the survey/sea trial in May 2021, so we are desperately trying to bring heat into the cabin while we do our projects. We use a small infrared heater/blower which is cheap and doesn’t really do much other than very localized warming. We just plug that into one of the 110V outlets on the boat and yippee. We have also used a small propane heater inside the cabin which produces 2x the heat output of the infrared heater, but that just seems a little too dangerous so we have abandoned that practice.
We’ve been back to the boat just a few times since the 1st of the year. But, we have been busy in the garage tinkering on other refit projects.
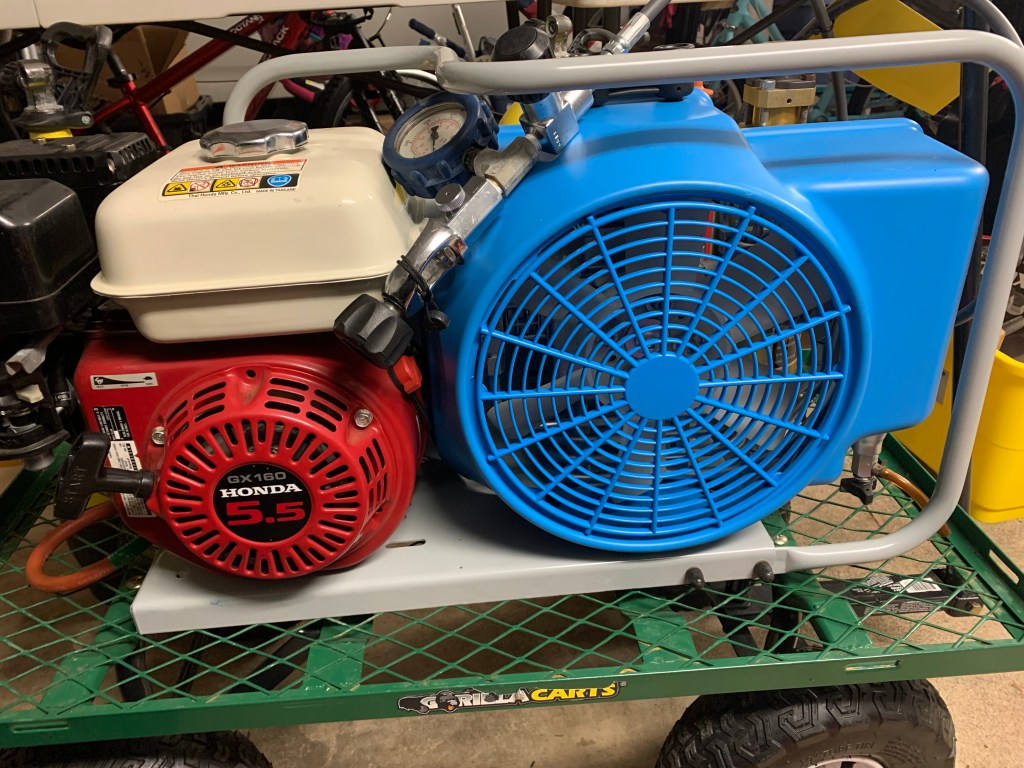
Bauer Jr II Dive Air Compressor
We finally complete the re-assembly of the dive air compressor. This Bauer Junior II was built in 2003 originally with an electric motor. One of the owners must have converted this unit to a gasoline motor (Honda GX-160 5.5 hp). The dive compressor normally sits inside the port teak box on the aft deck.
The refit included:
- Honda GX-160 5.5 hp engine
- Installing a new Honda carburetor
- Installing a new Honda air filter
- Installing a new throttle return spring
- Changing the oil
- Changing the spark plug
- Draining, removing and cleaning the fuel tank and blow out the filter
- Bauer Compressor
- Replacing all bolts, gaskets and fittings on the P0 filter with shiny new items
- Installing a new P0 filter element (internal)
- Replacing the stage 1 drain valve
- Installing a new air filter
- Replacing the inlet air tube
- Refilling with new synthetic oil
- Treating all surfaces for rust and priming/painting the entire compressor
- Installing a new pressure hose
- Frame/Overall Assembly
- Media blasting and powder coating the frame and handle
- Installing a new front fan guard
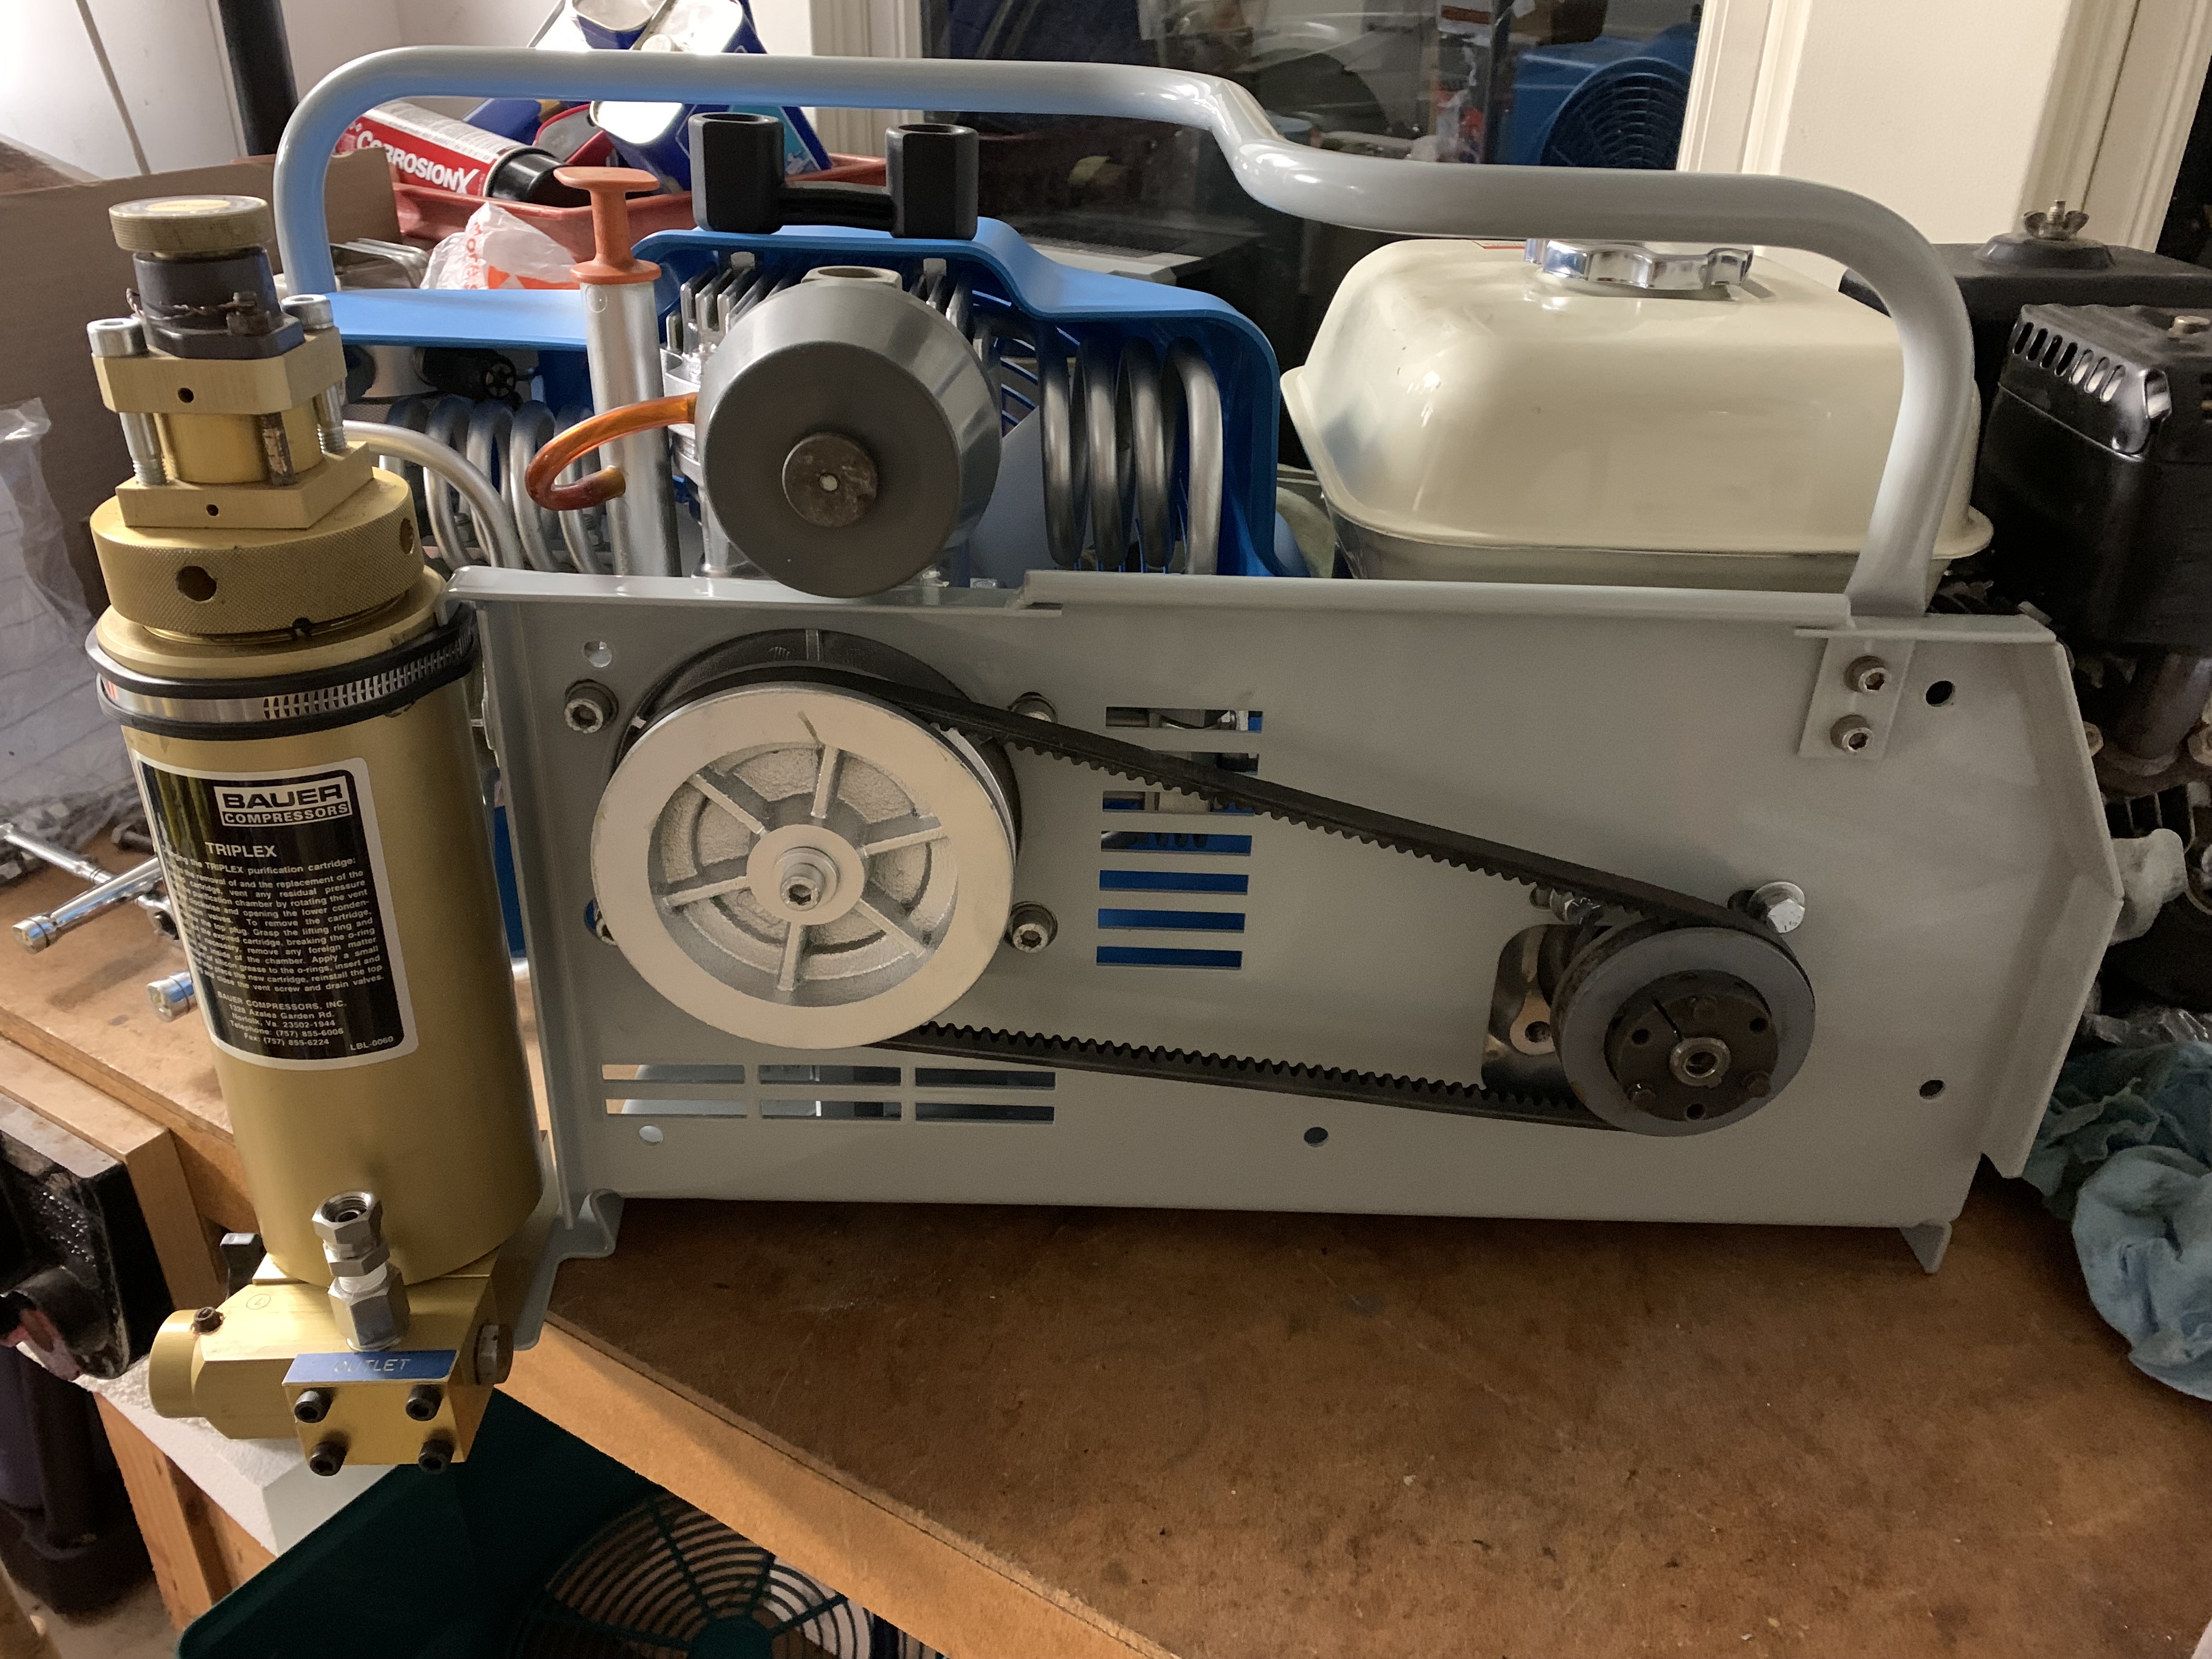
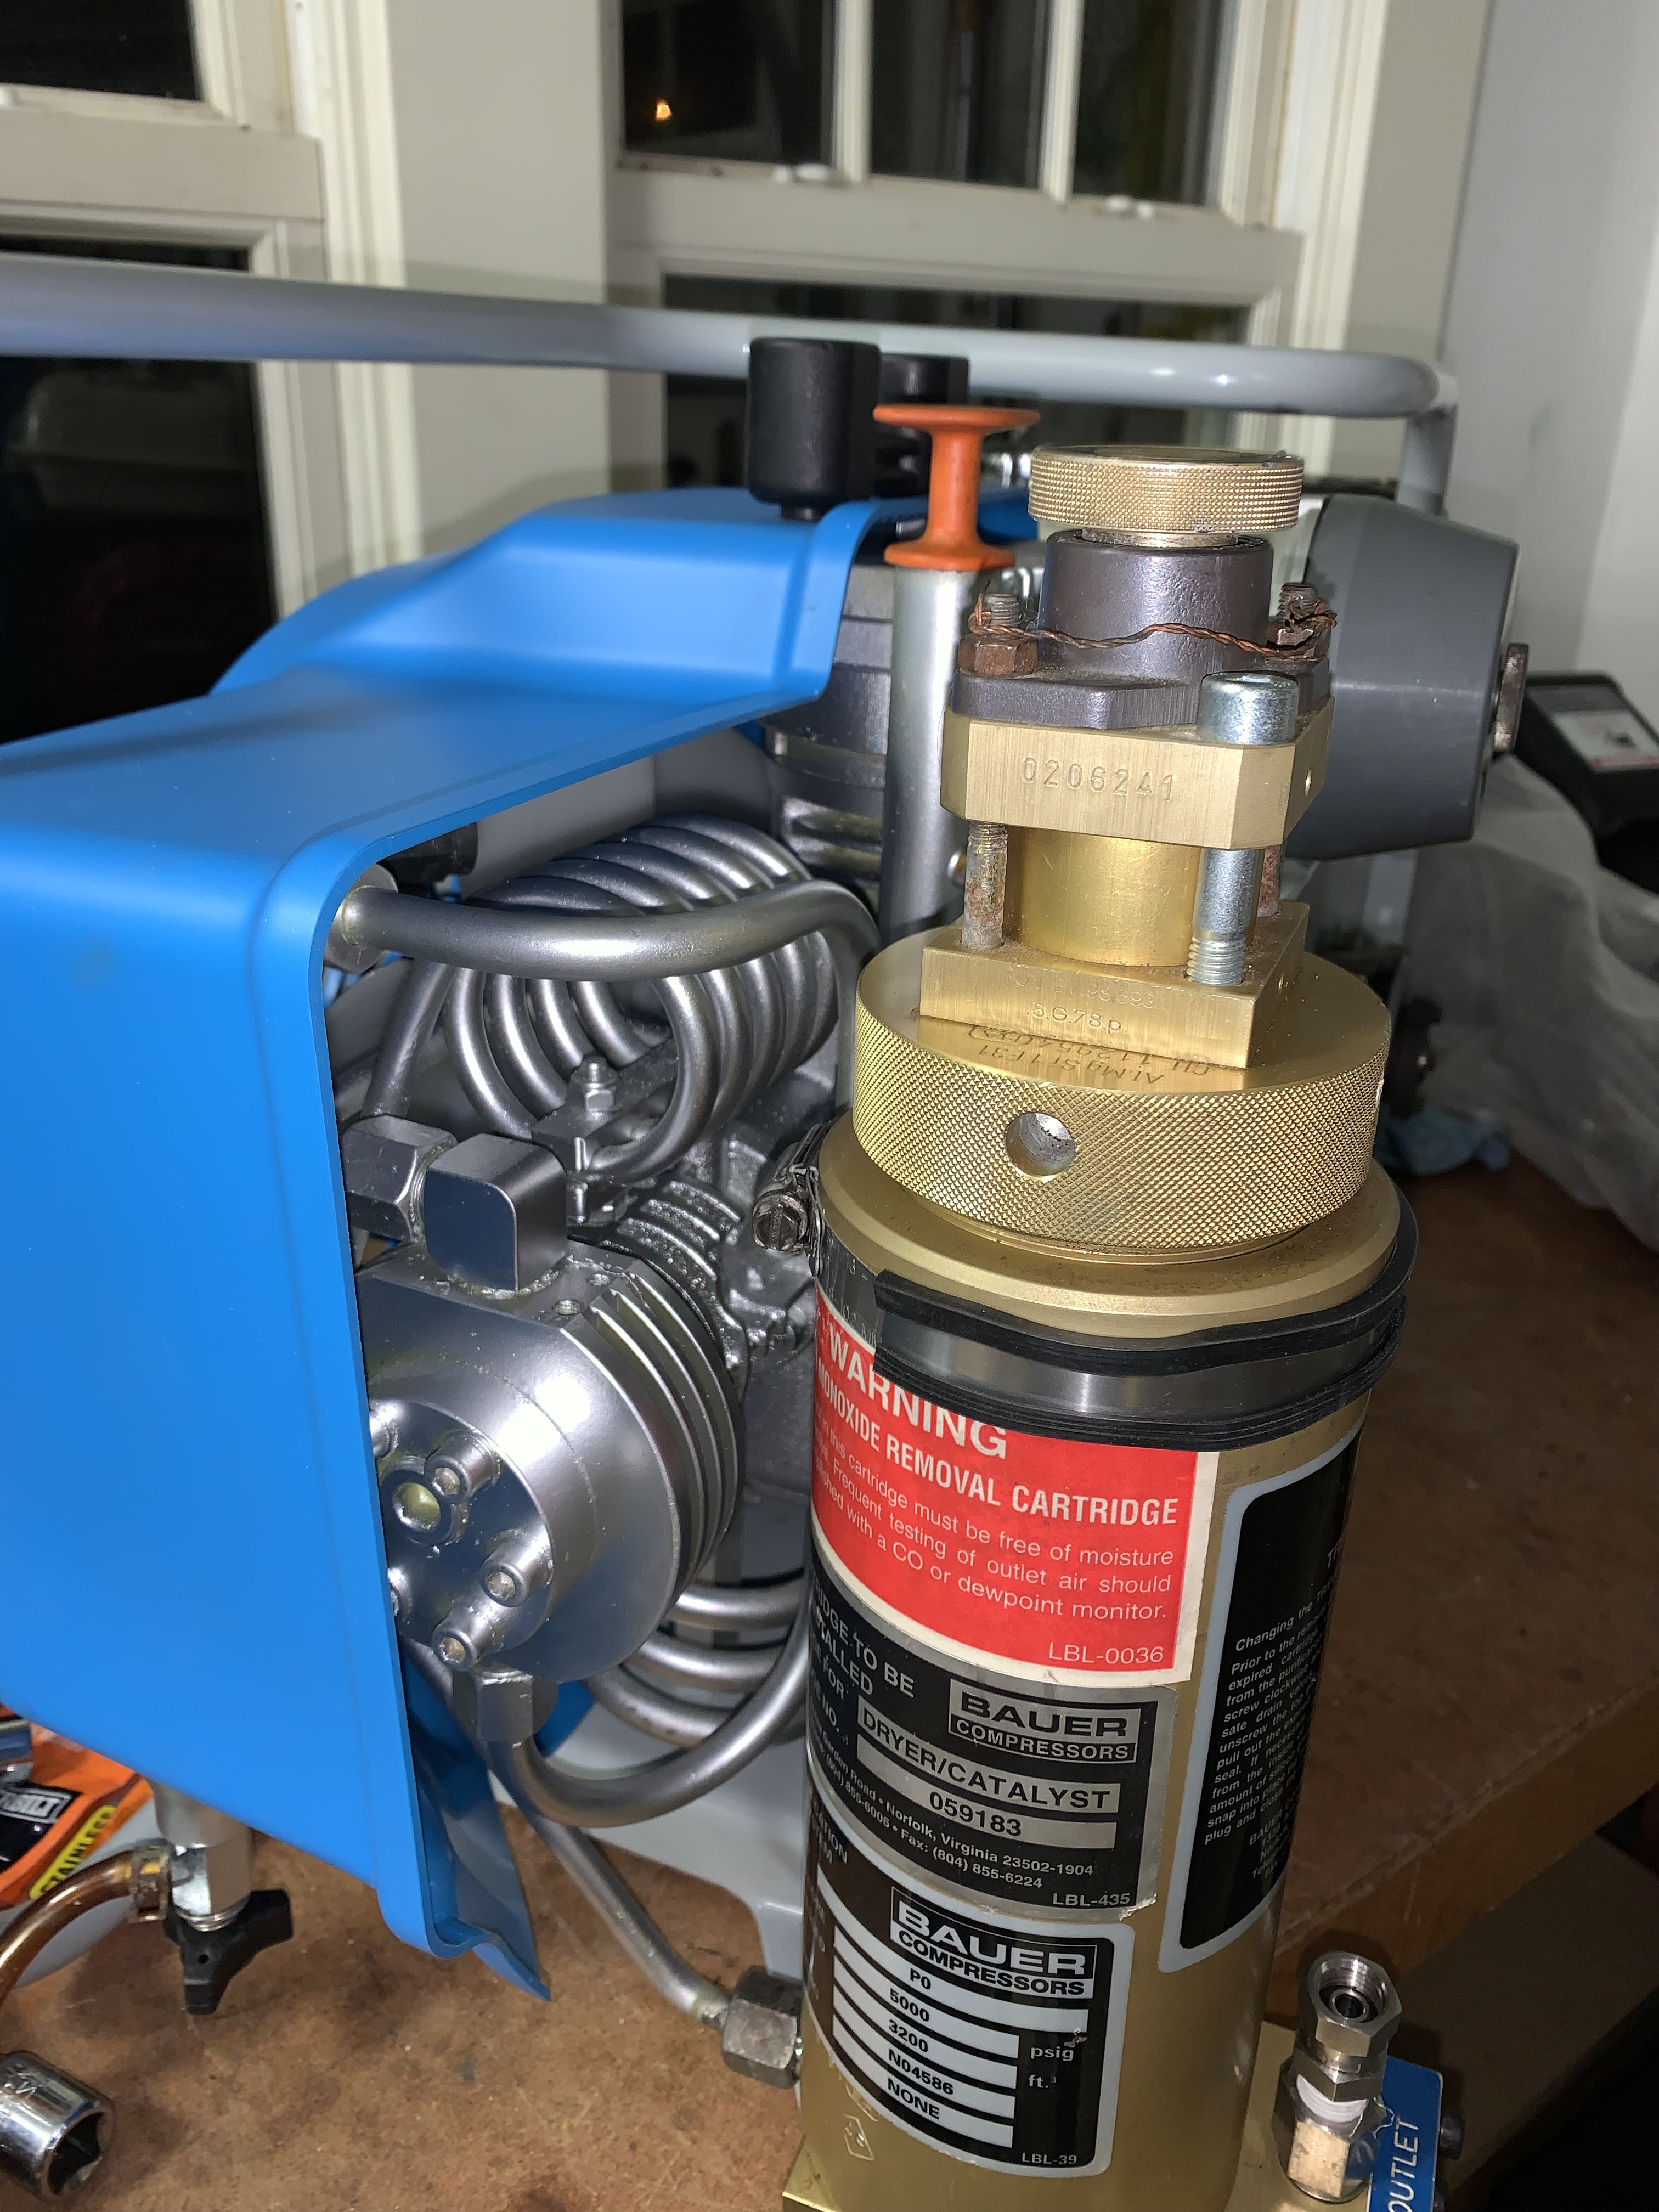
I’m pretty satisfied with how this project has turned out, and I am very impressed with Nicole at Air & Gas Technologies in Keyport, NJ. If only every marine parts and service company could have a Nicole working for them, life would be so easy. I may replace the rear belt shroud with a new plastic piece just to go overboard, but overall, this is a fine piece of equipment that is still running strong 19 years later. I think I’ll keep this in my garage until we sail away to minimize salt air exposure.
Webasto Diesel Heaters
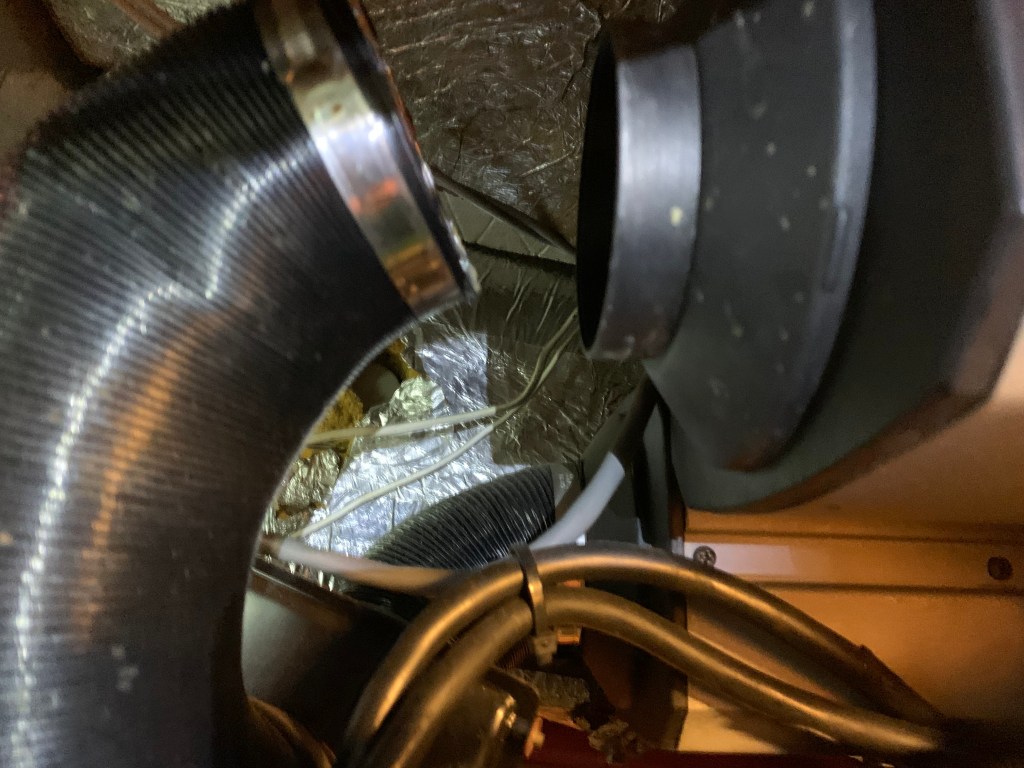
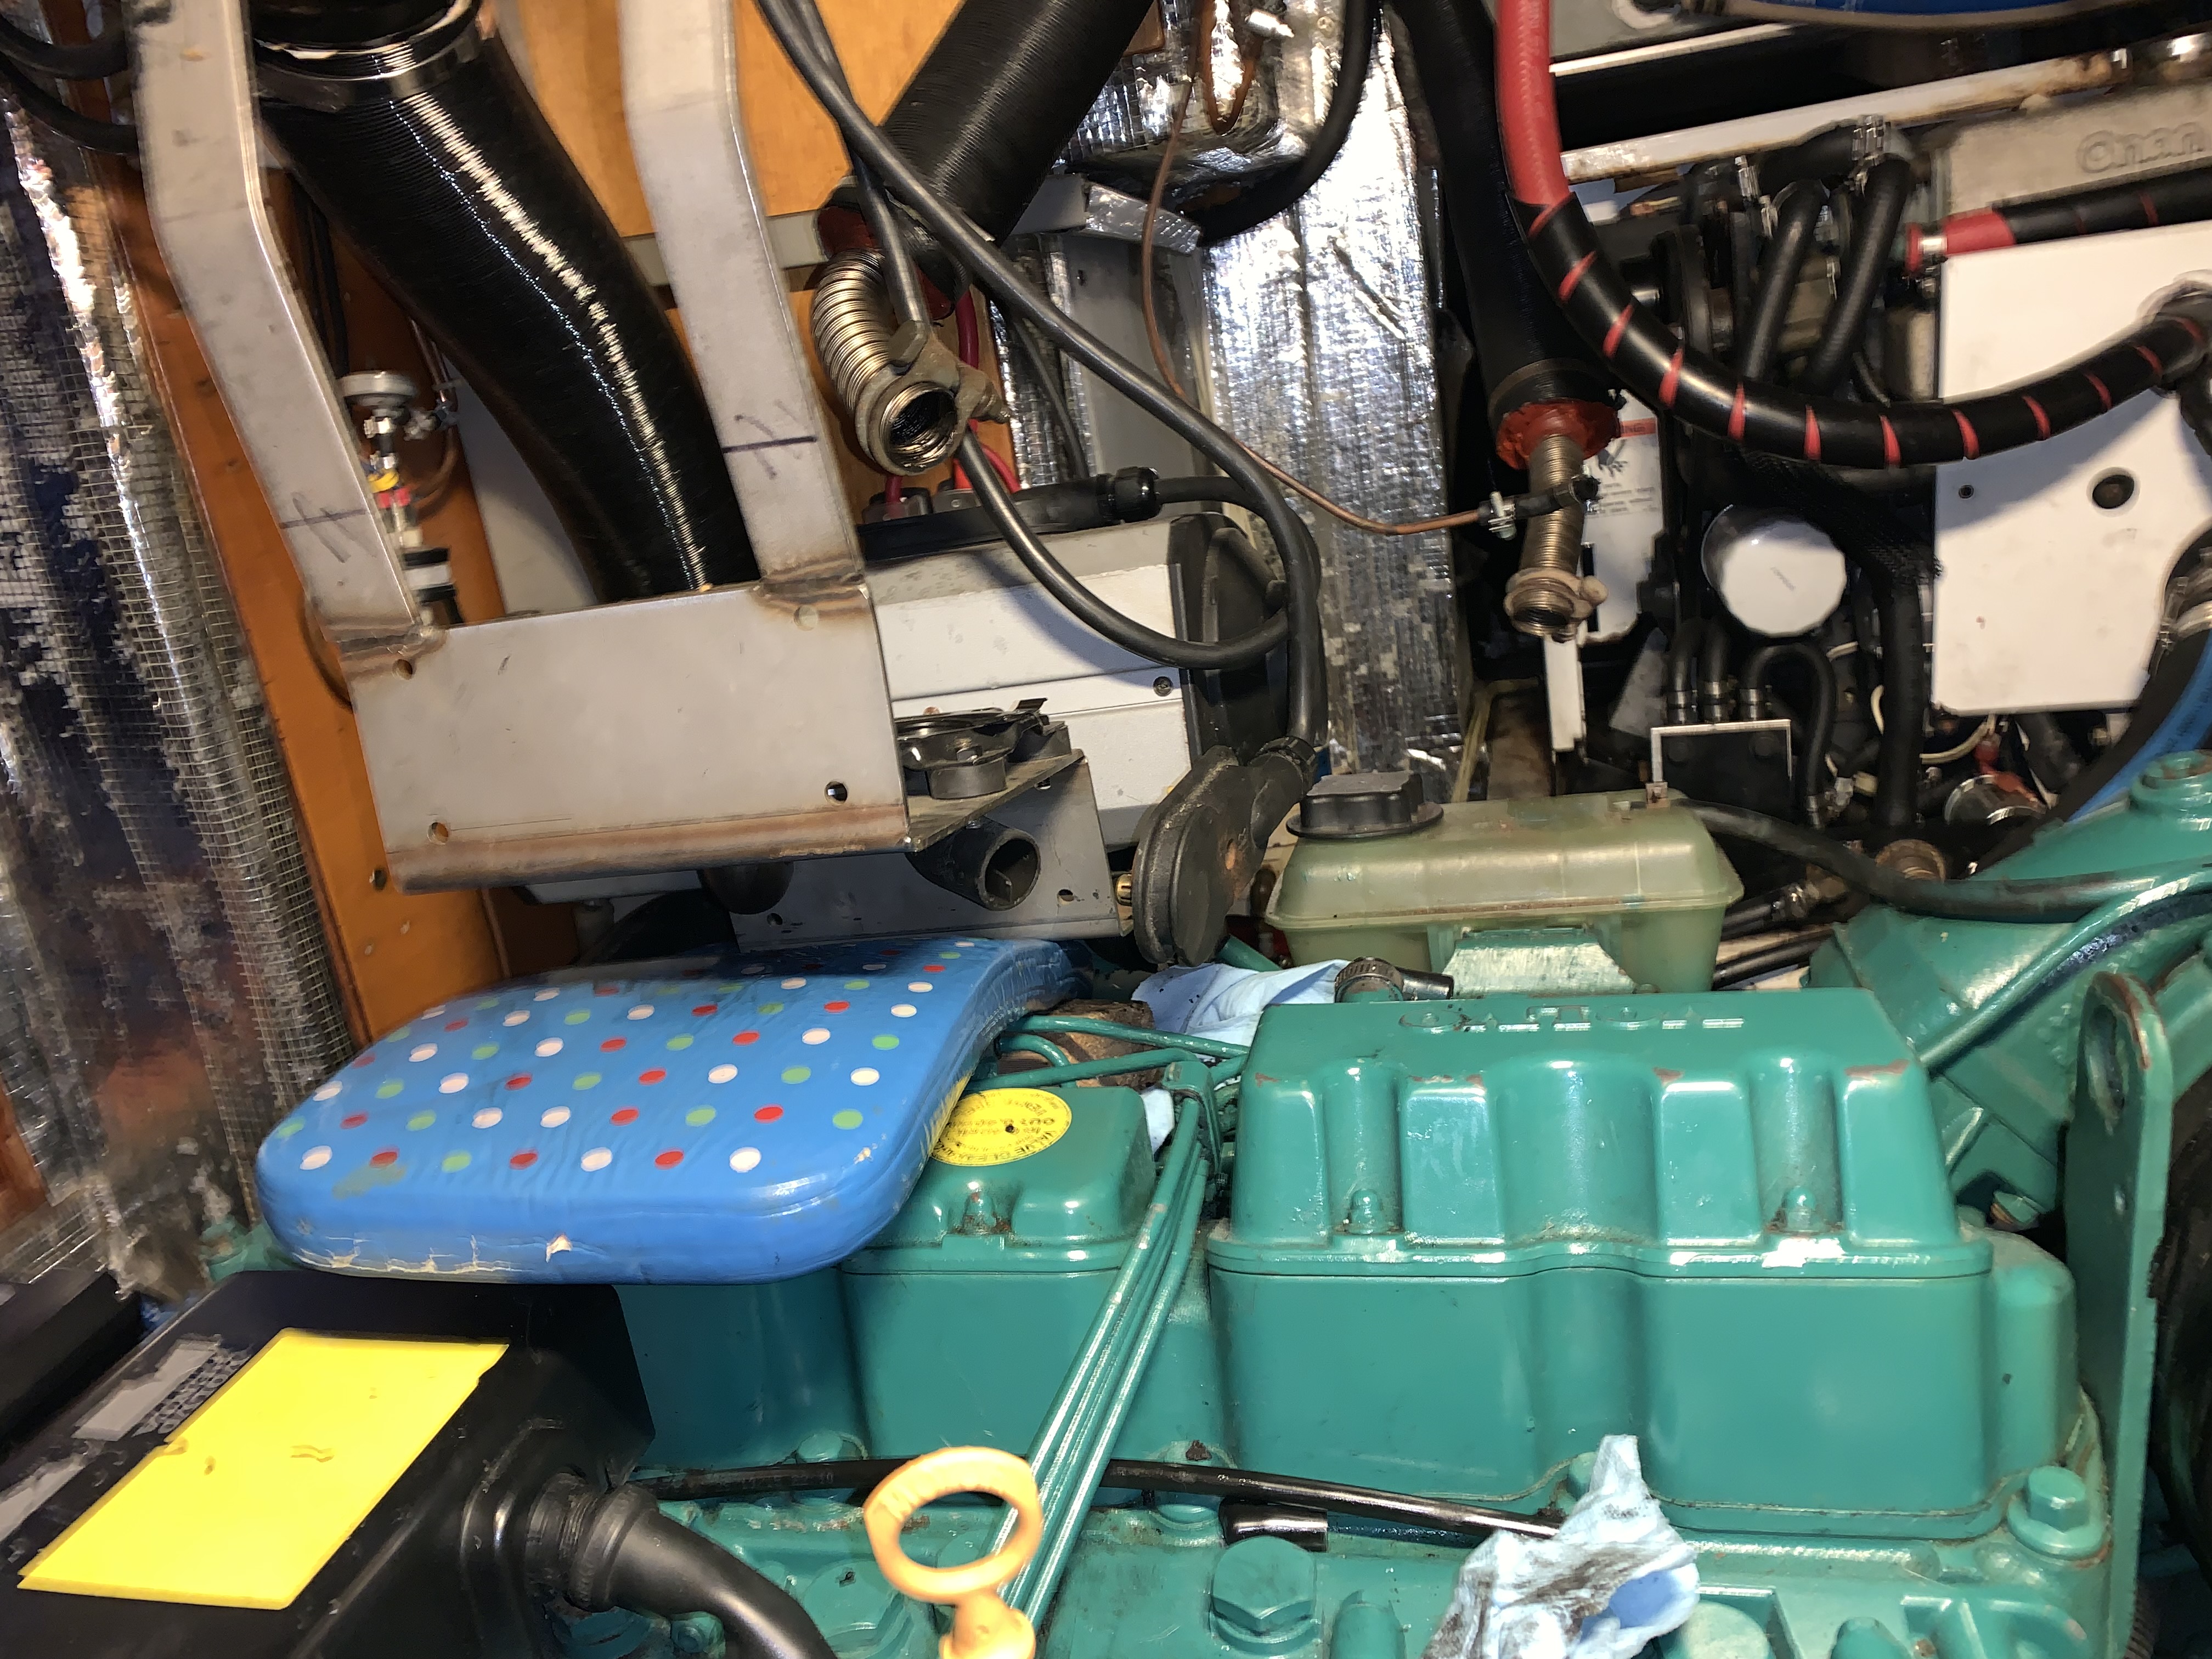
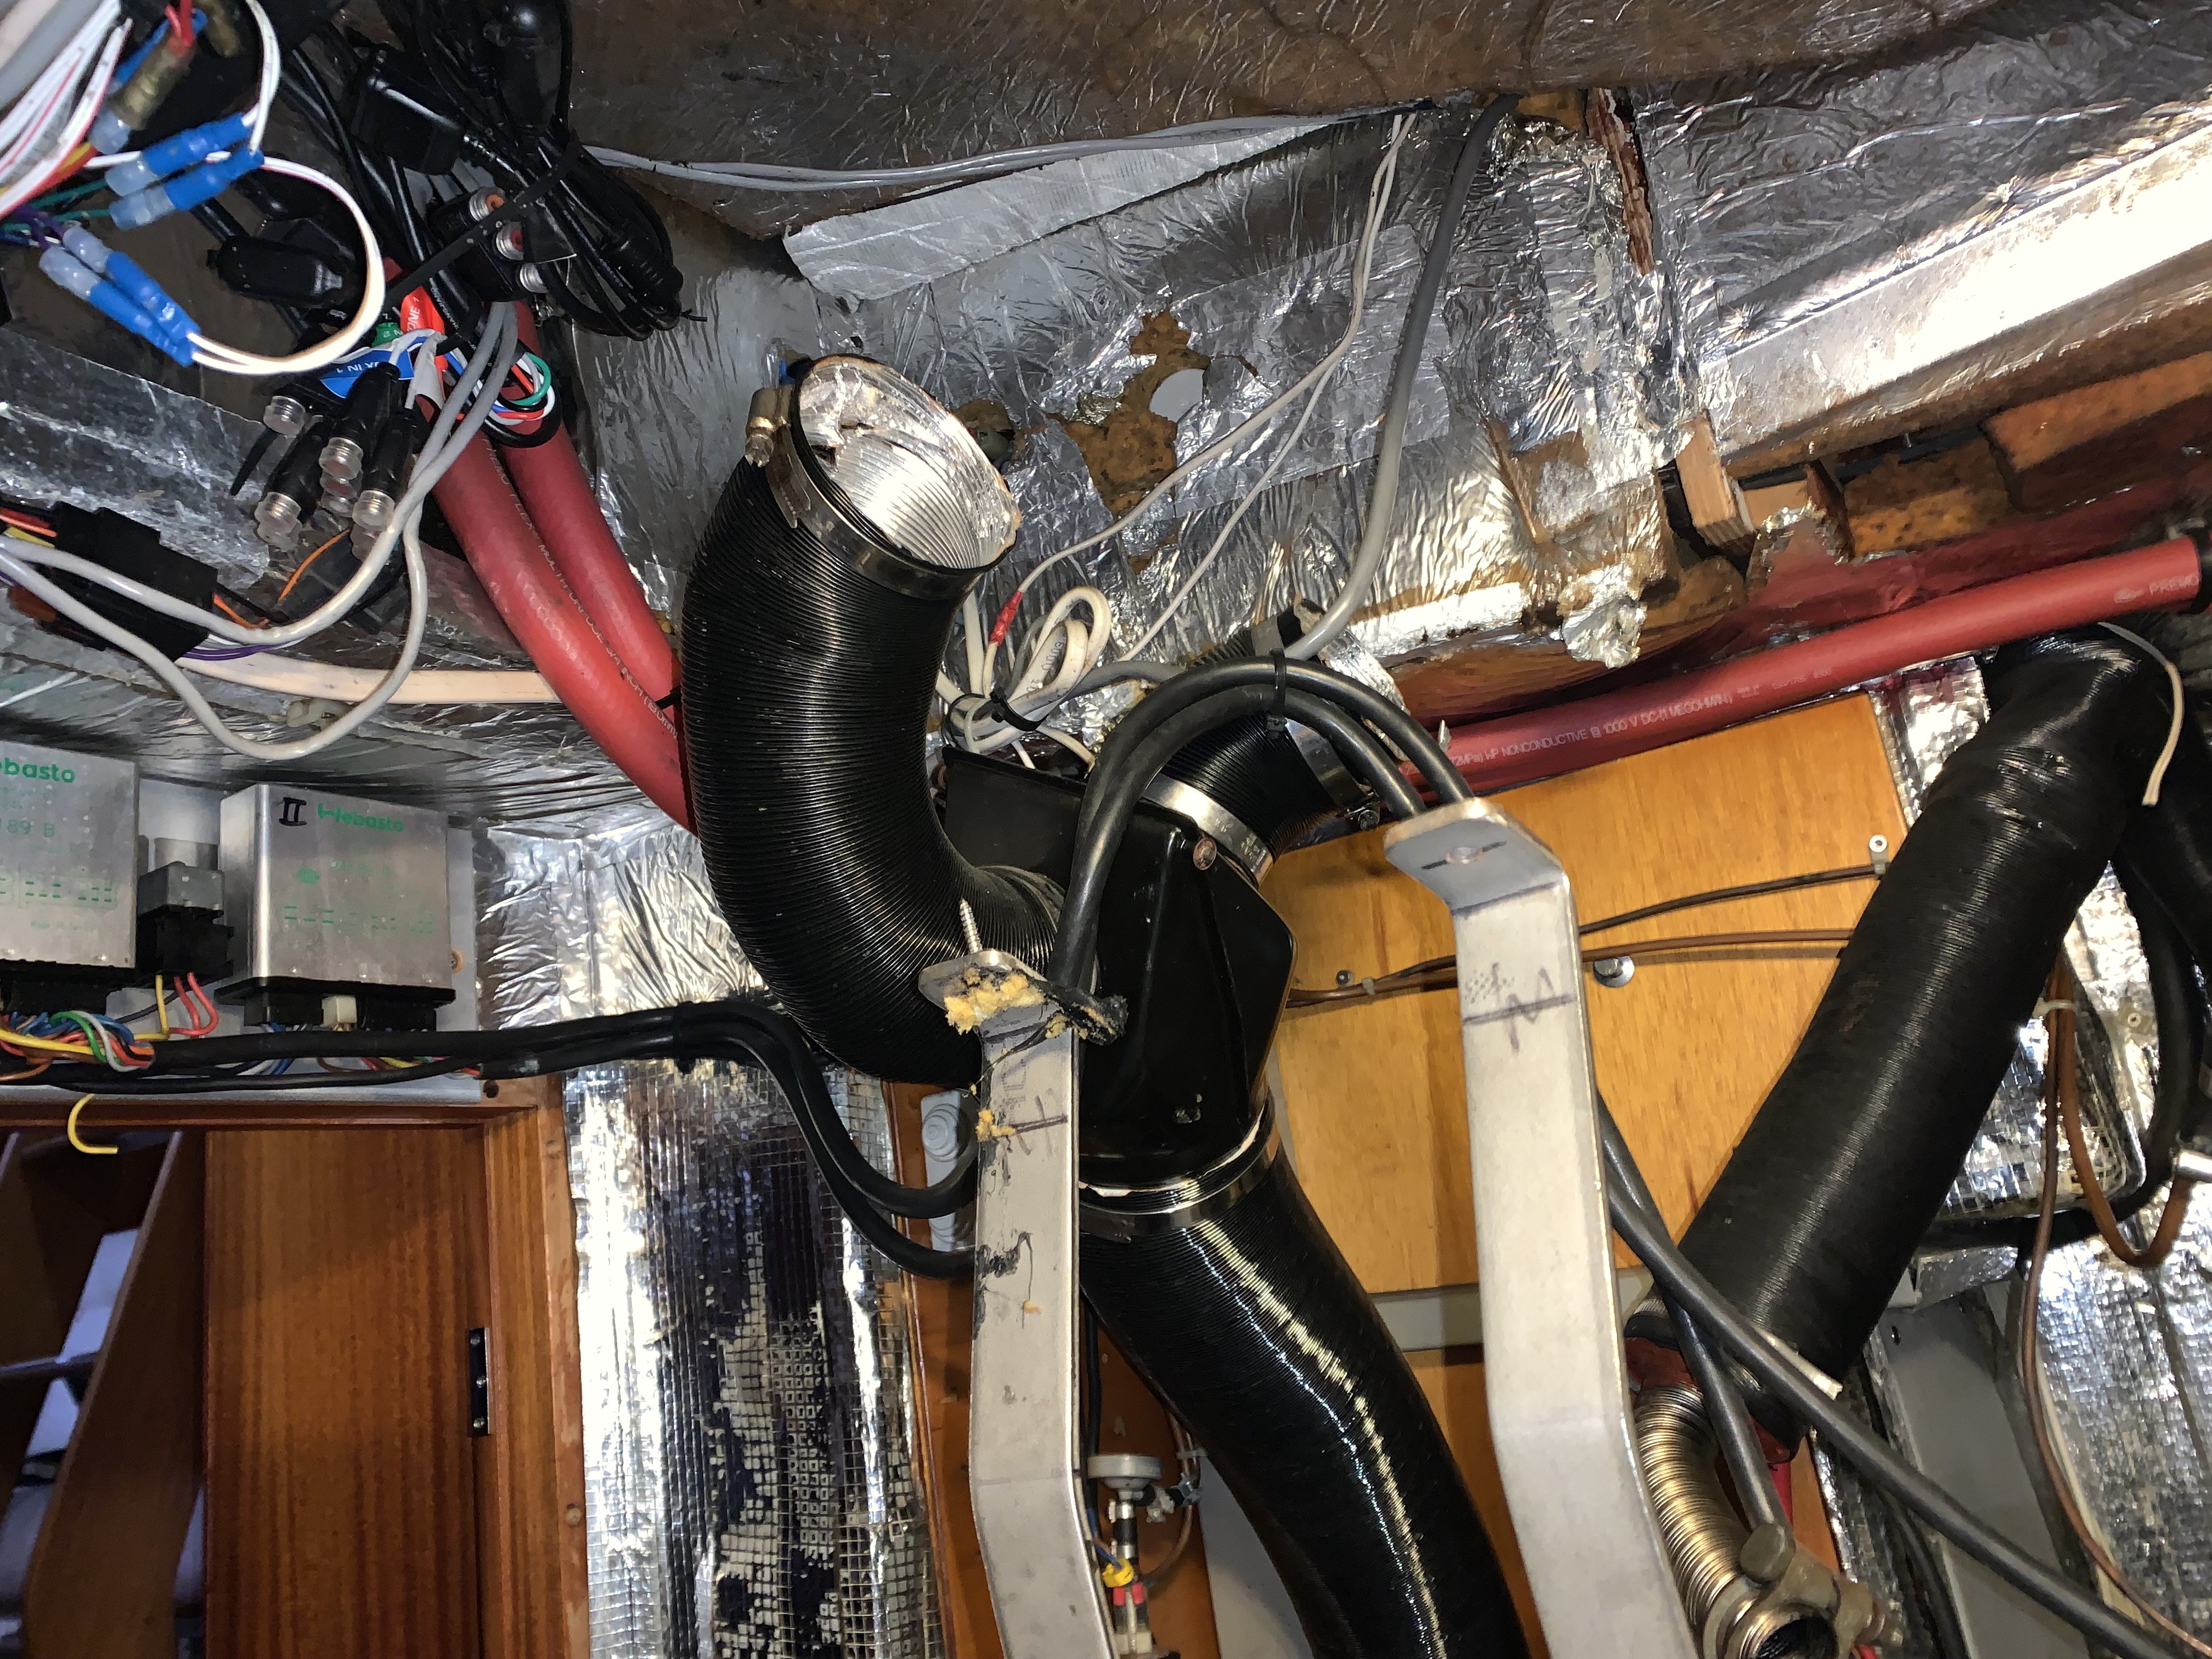
We have two Webasto diesel heaters onboard; they are Air Top HL 32 D. We are also configured with one zone consisting of the main cabin and the aft cabin. Therefore, we have two heaters feeding one large zone which I calculate to be around 1840 cuft (based on 6’4″ ceiling height). These heaters were installed using a bracket that hangs below the cockpit floor and sit directly above the Volvo engine.

One (actually number II) seems to work fine while the other (number I) doesn’t startup properly and sends white smoke reverse flowing out the combustion air intake. We ran kerosene through the one that is working, and it appears to be clean, but the heat output is far too low. The second heater starts up then shuts down. Our troubleshooting took us down the path of uninstalling and taking it to a bench for a tear down.
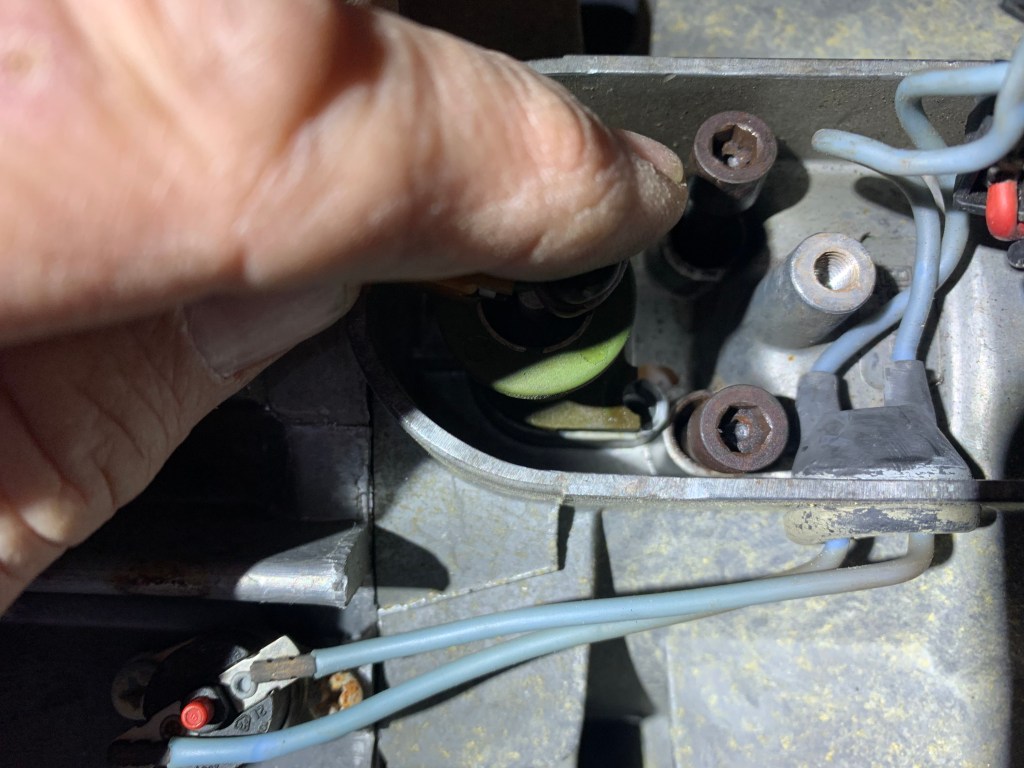
The “uninstalling” part got a little interesting. Sure, I started with one bolt or screw here and another bolt of screw there. Taking our time, taking pictures, making mental notes of the install.

Looking at the manual, Rachel learned that there were a couple of bolts in the top of the unit that held it all together. And, that if I wanted to get these apart, I would need to loosen those. Of course, I had 2.1 inches of clearance to loosen these bolts and get my in there to see all while crouching awkwardly on top of the Volvo with things poking me in the wrong places.
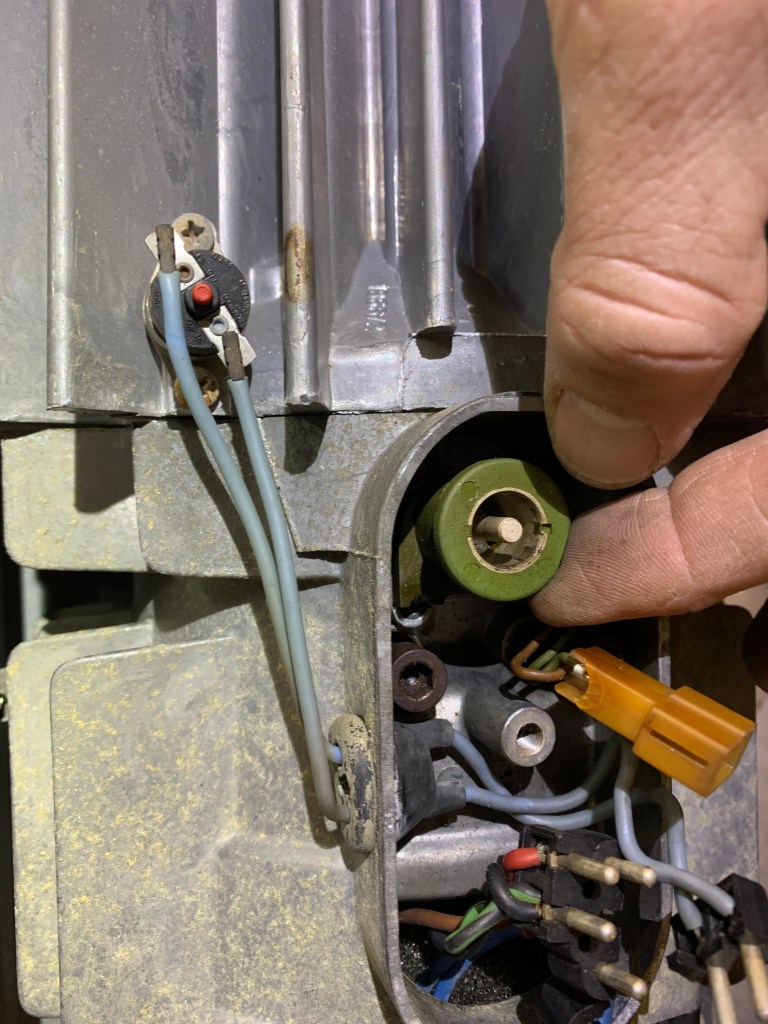
I loosened a few fasteners that connected the the mounting bracket to the boat. That dropped the bracket by a few more inches and voila! the suspect heater was able to be remove. BUT…with all of my yanking and pulling, something came loose and the entire assembly with two heaters fell down on top of me! The problem was that I hadn’t removed all of the ventilation ductwork, so I saw that this put a lot of stress on some very old plastic and heat-aged lines. I wedged my forearm vertically with my elbow on top of the engine and my hand holding up the assembly like a heavy pizza while Rachel did the careful surgery to remove those ducts.
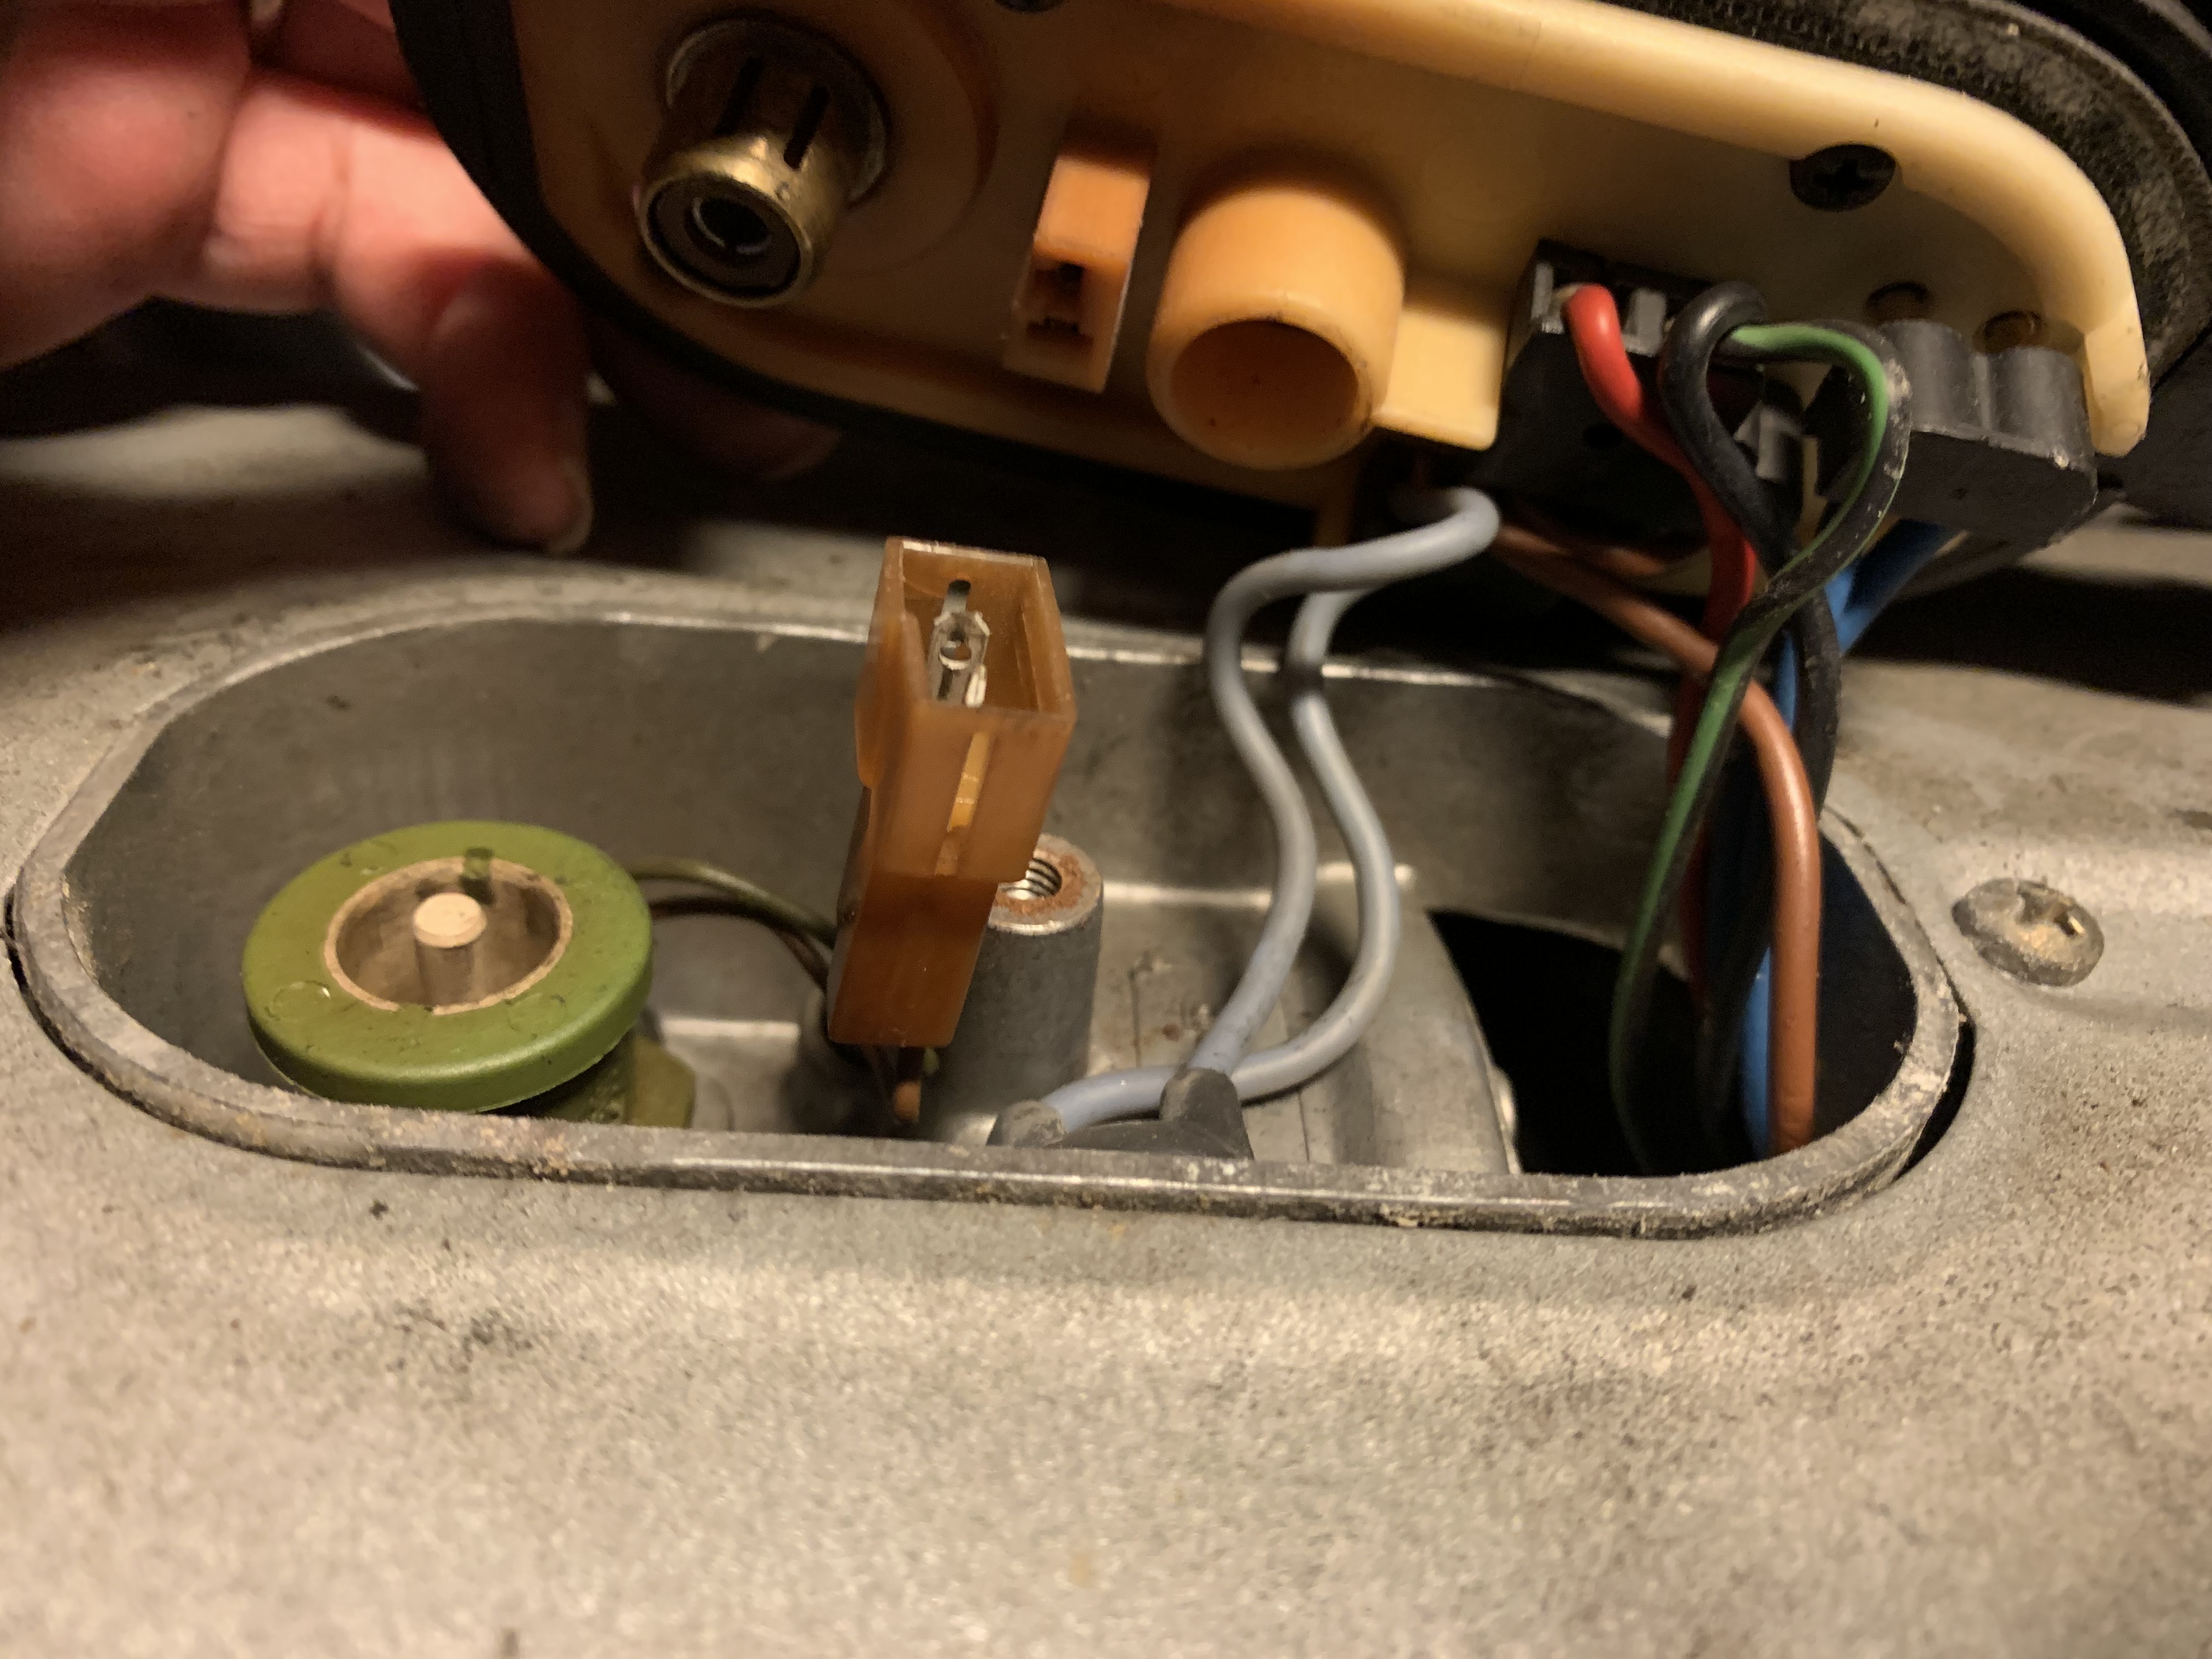
After that near catastrophe, we called a truce. The boat won, and we lost some pride that night. Let’s go do some surgery on the one heater that isn’t working.
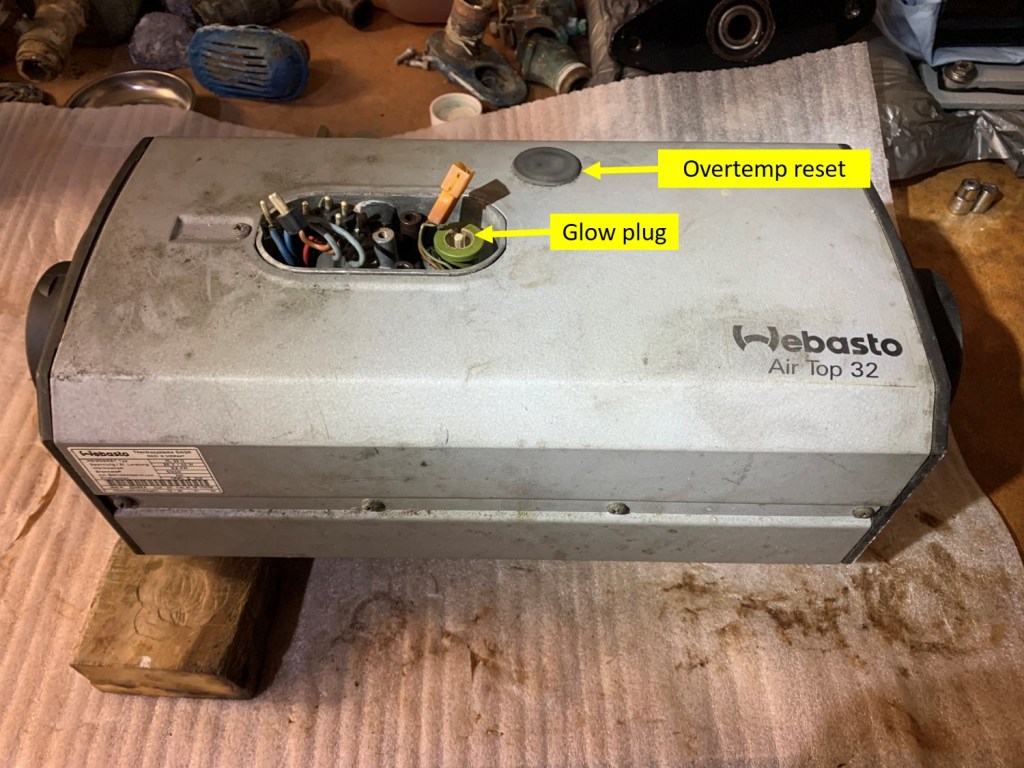
Because of our installation, the top of the heaters is very difficult to get to and see. I started to carefully disassemble the heater one piece at a time.
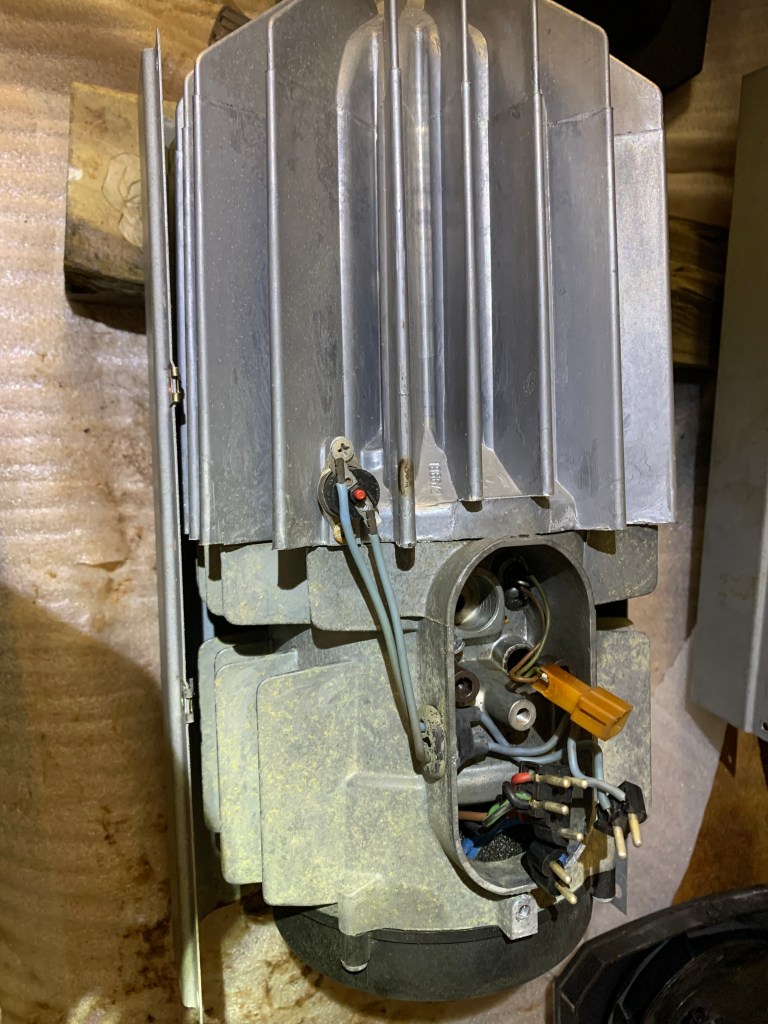
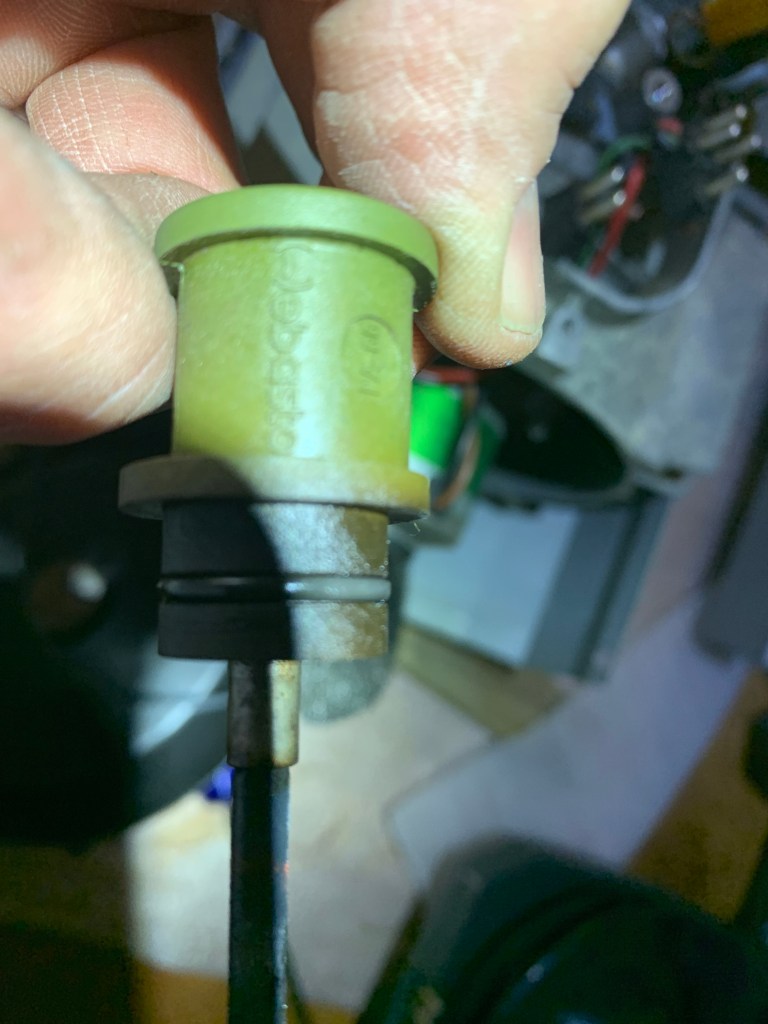
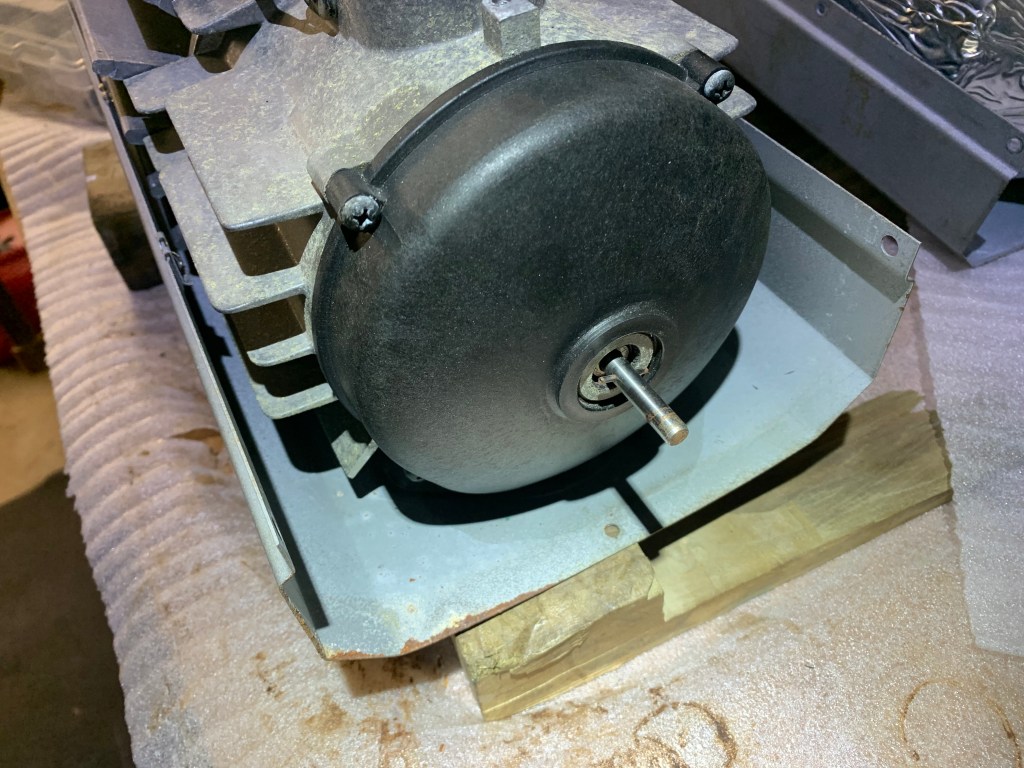
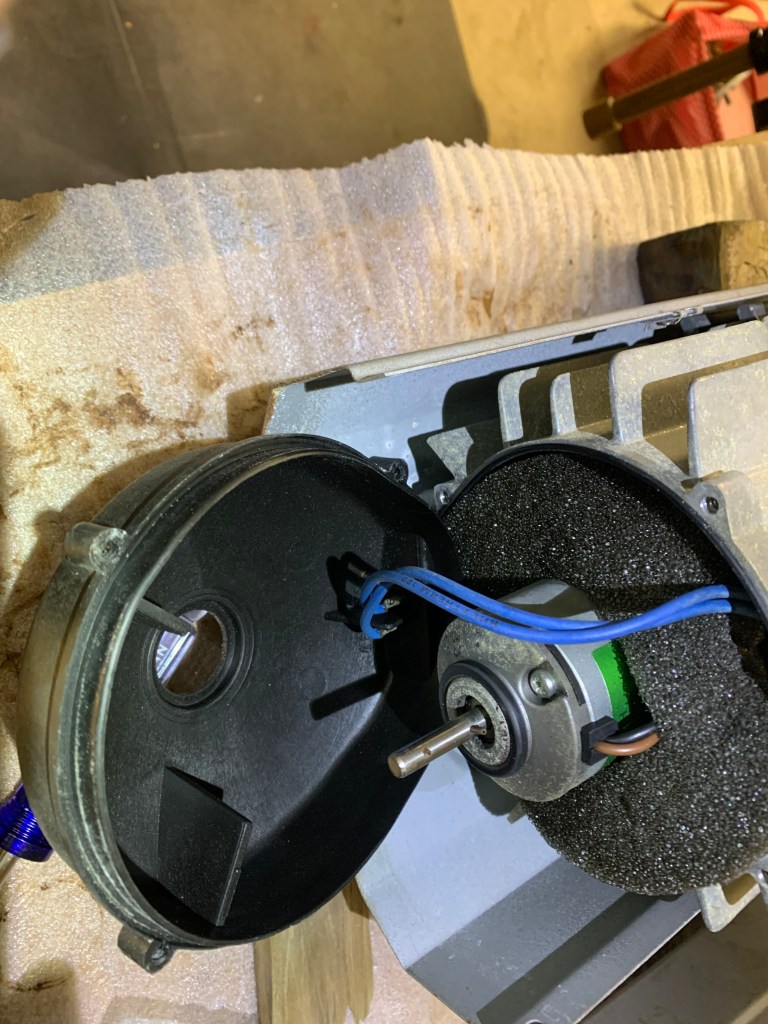
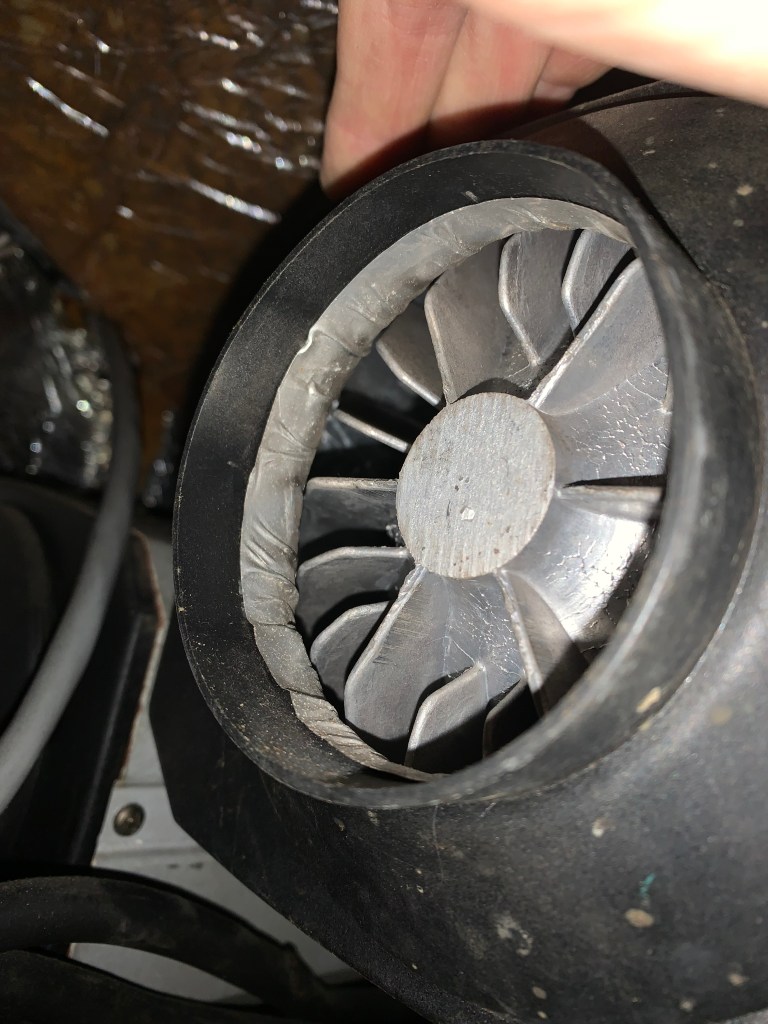
That’s as far as I had disassembled the heater. Our theory is that the fan motor had either stopped working altogether or was “frozen” and needed to be encouraged to spin, which I did that. The next step is the bench test the motor. So we picked up a couple of 12V batteries that we will connect in series and perform a bump test. If that test works, we will try to re-install this unit.
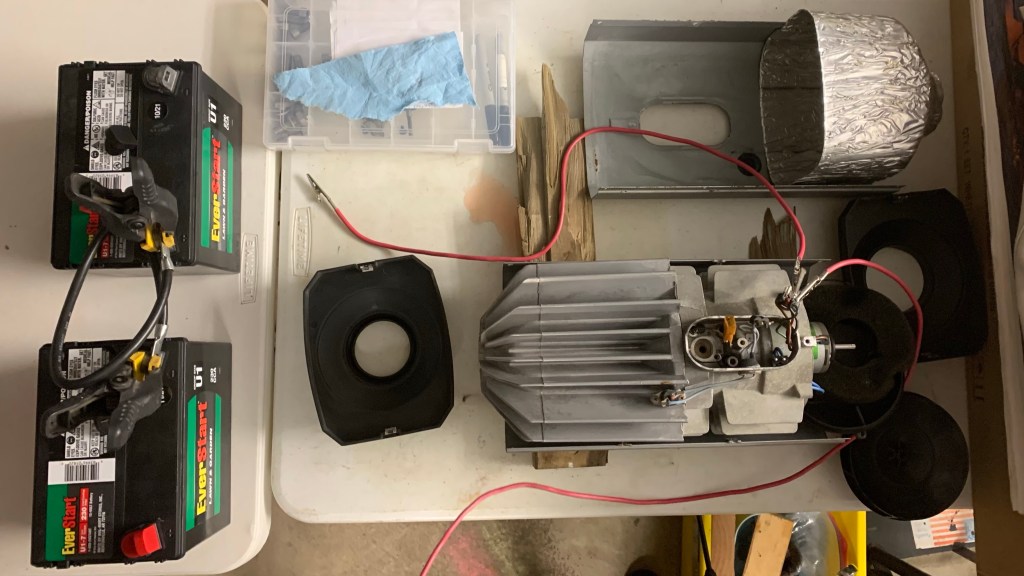
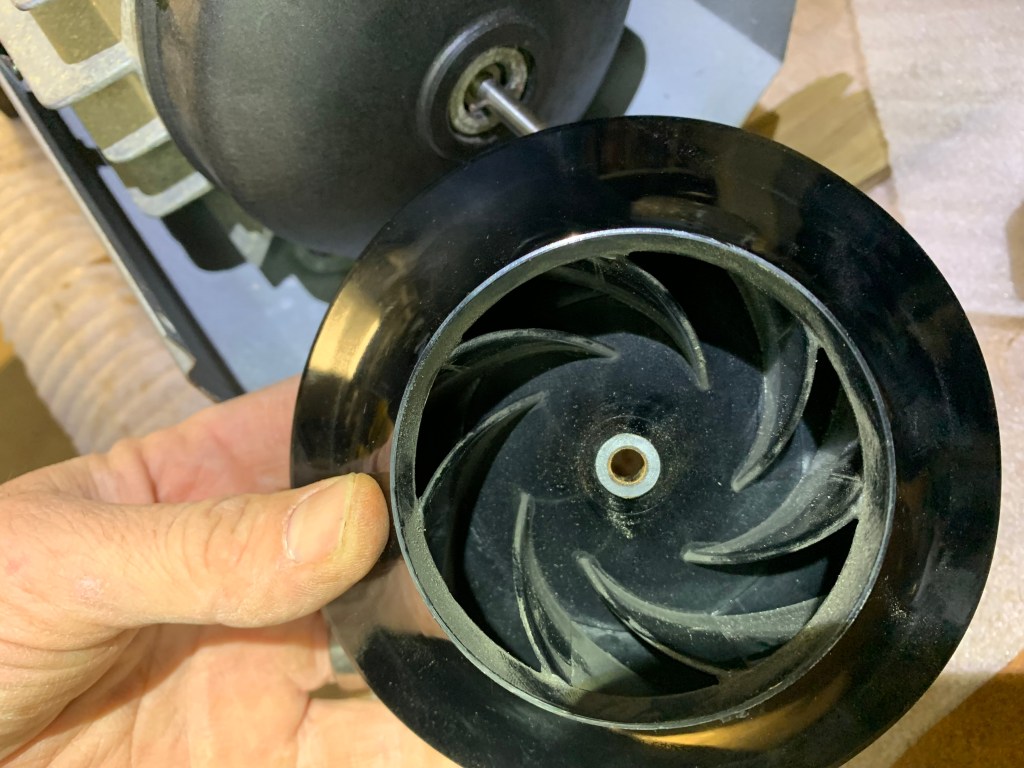
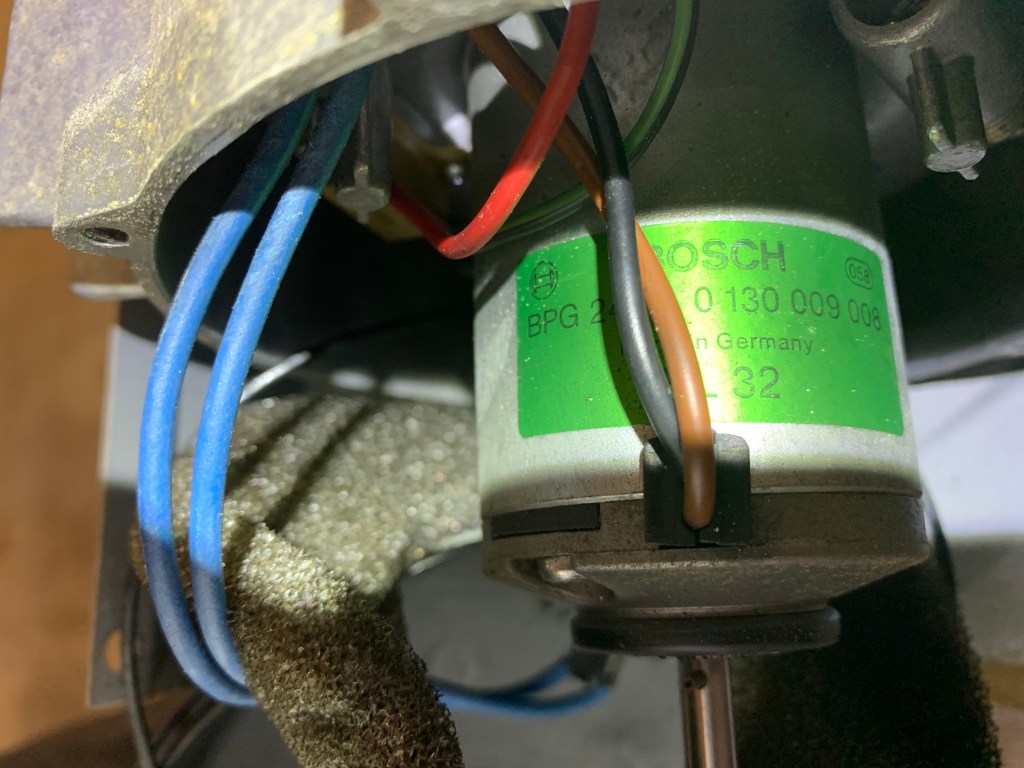
We attempted to power the fan motor but had no luck. After some fiddling and nearly burning down our garage, we decided to disassemble this beast a little further and pull the motor out. The verdict: The fan motor is completely coked up on the inside with carbon dust literally raining out of it when tipped on its end. This motor has seen some better days.
Oh well, so now we are in the market for new EVO 40s to replace these units. This should be fun!
