
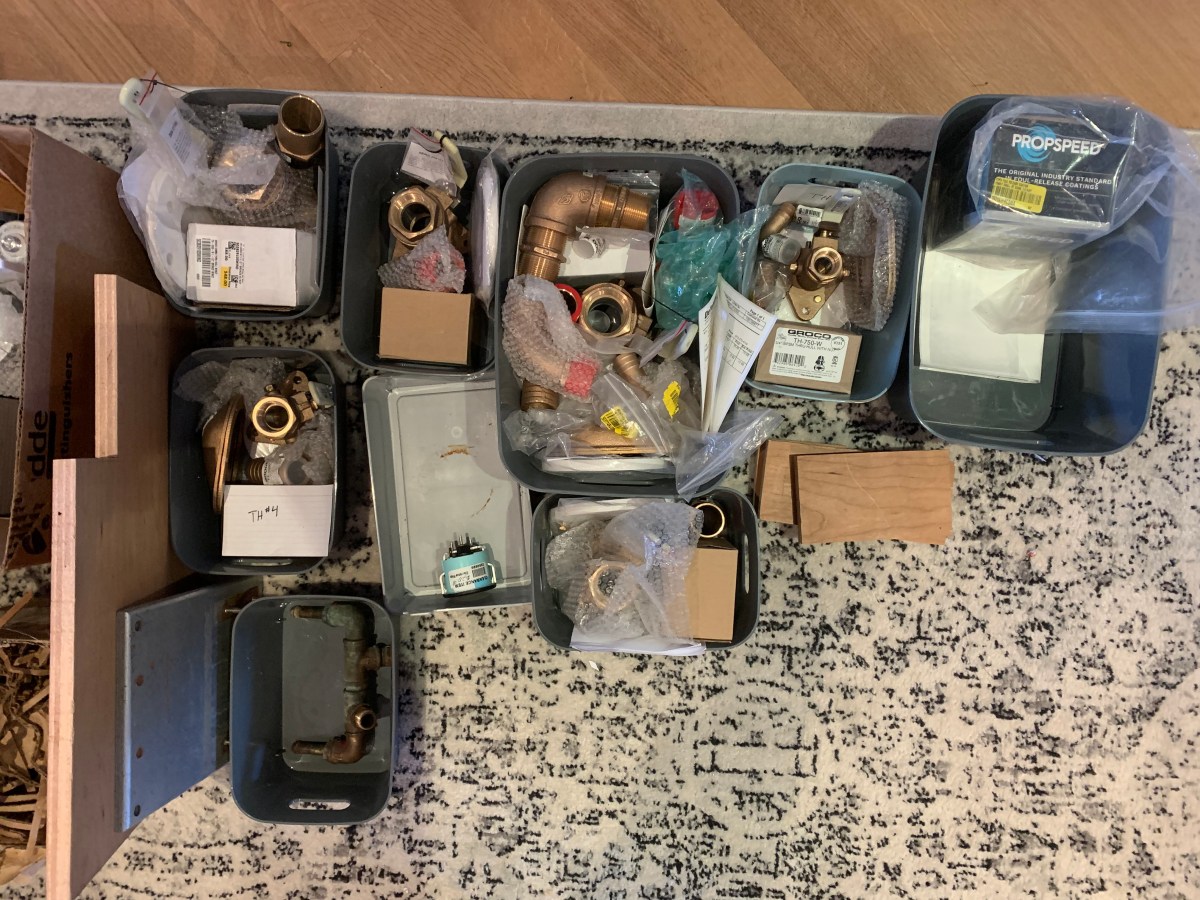
Raw Water Strainers Mock Install
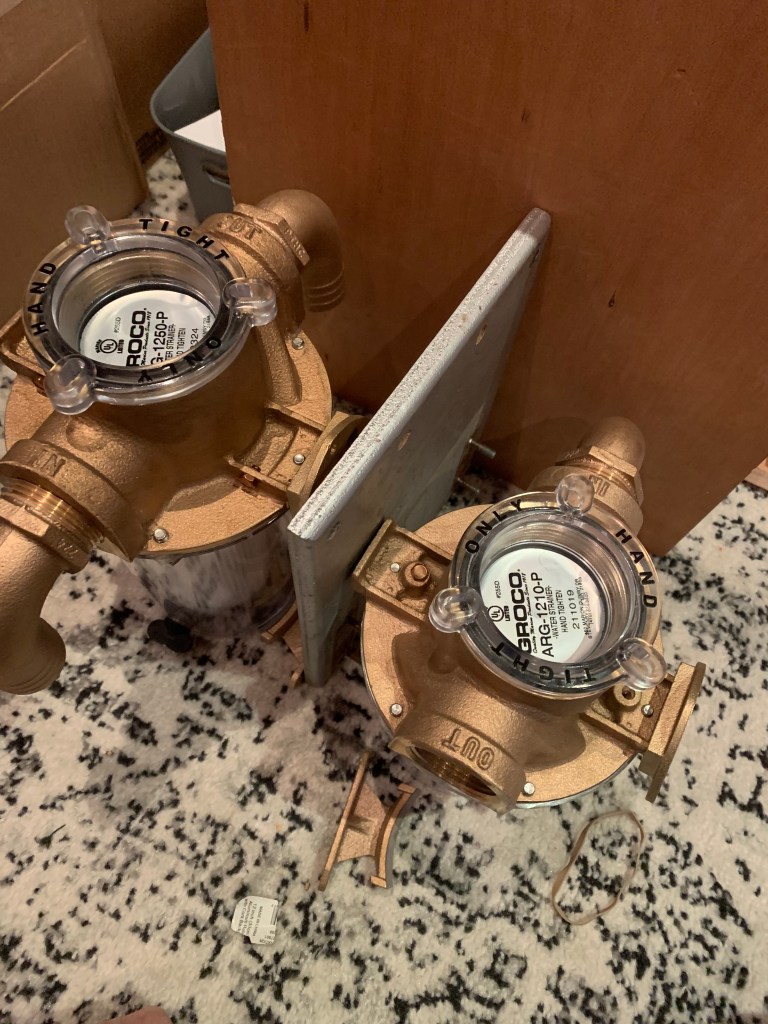
I am replacing the very large diameter Volvo engine raw water strainer and also rearranging where the raw water strainers are and what they feed. Now that I have them in my hands, I took them to the boat and mocked up their install in the new location on the starboard engine room bulkhead.
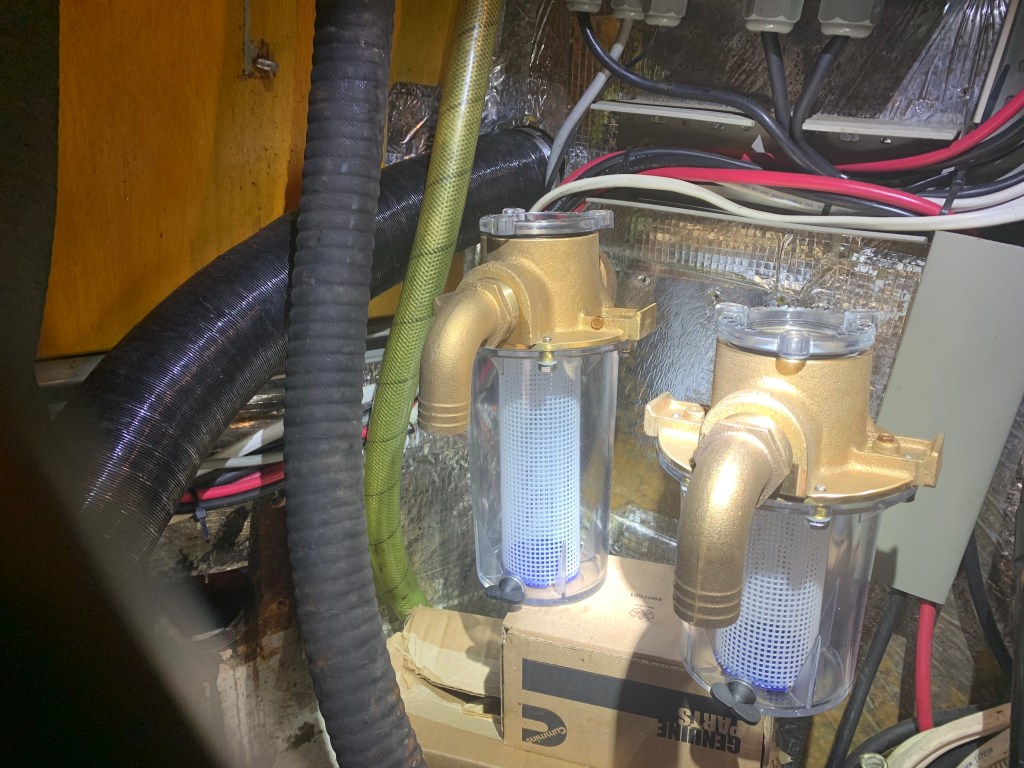

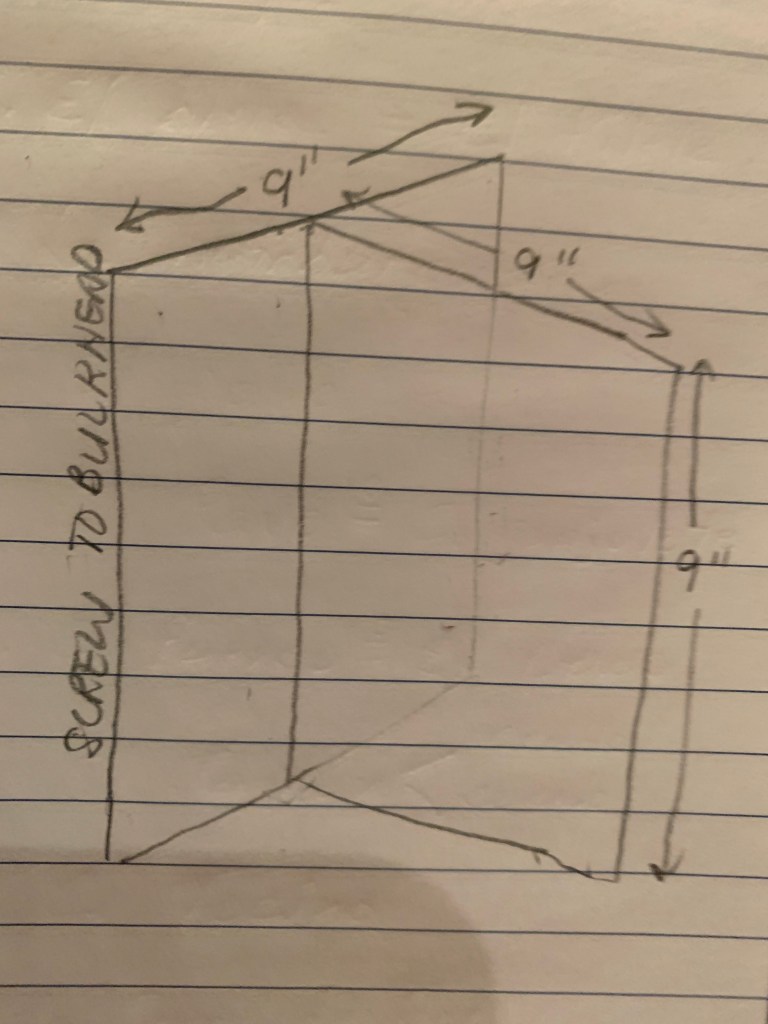
The new strainers fit very well, but they need a rugged and overengineered stand to suppor them off the bulkhead wall. After a simple mock-up and design, I send Ray a text. Without a lot of conversation, he is already in the shop fabricating this beast. I can’t wait to get it on the boat.


Install will be at a later date when we have the thruhulls in and the painting done. But this project is almost ready for launch.
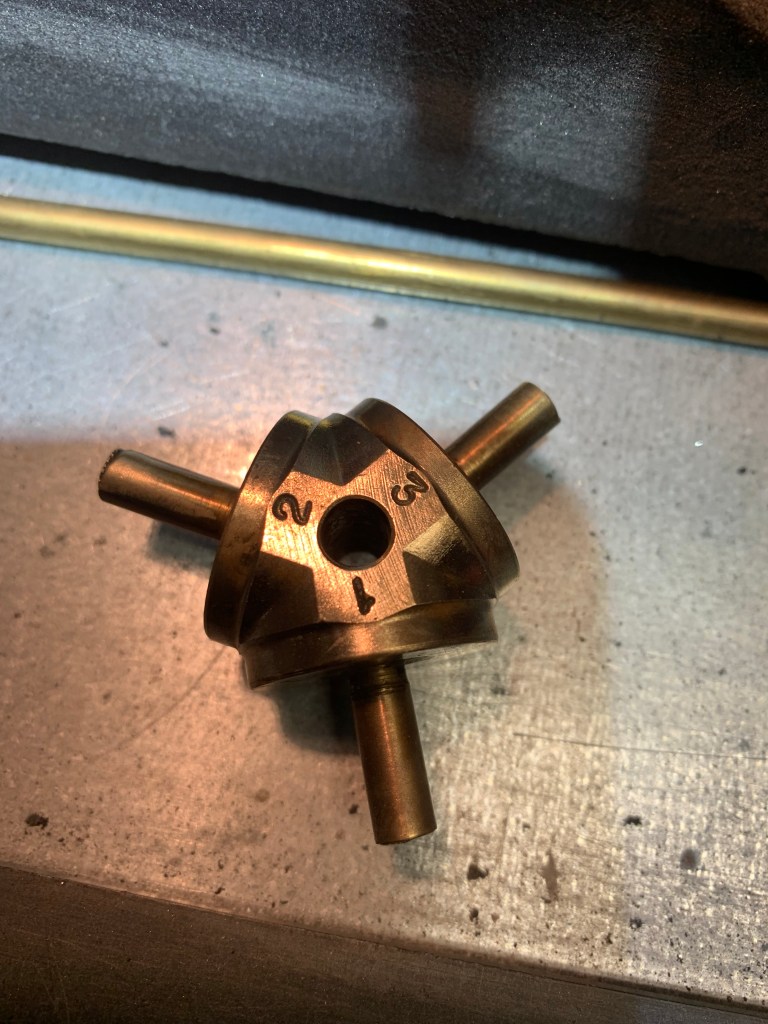
Bevelhead Final Plan: I Have TWO!
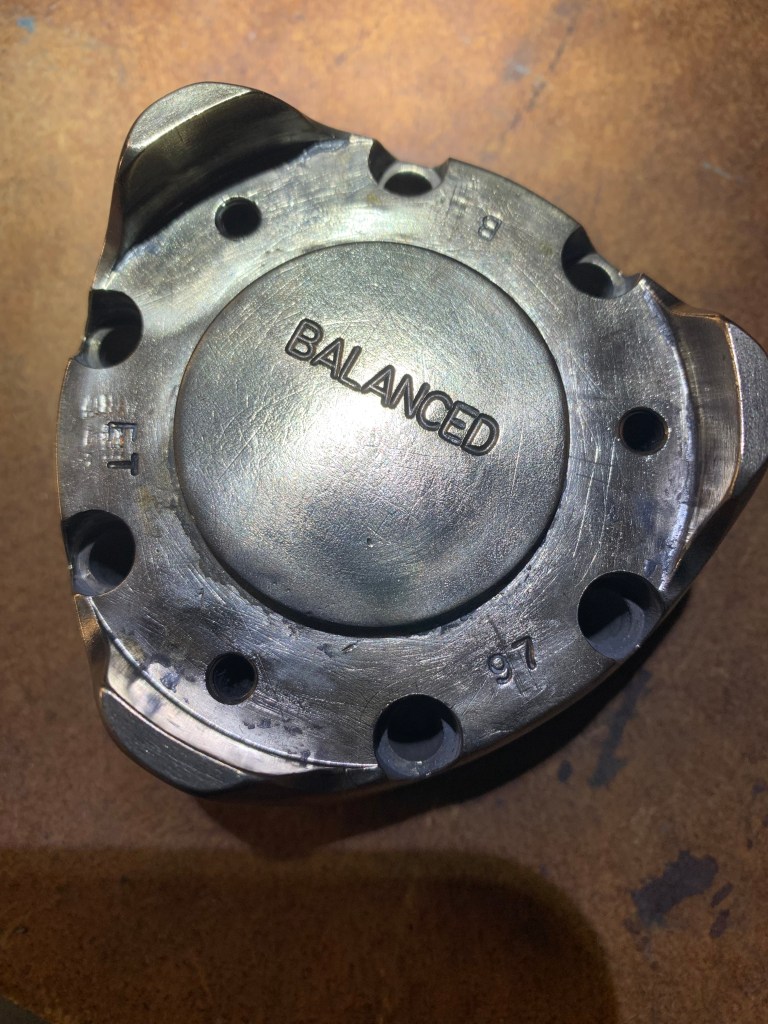
I was able to fully rebuild and set up the original bevelhead. I was a little aggressive during disassembly, and I mushroomed the top of the input shaft. It wouldn’t accept the u-joint, because the spline gears were slightly damaged and the upper 1/8″ of the shaft was no longer circular. I used micro files to clean up the splines. Then I used by bench grinder to remove the top 1/8″ of the input shaft and machine a nice and deep chamfer.
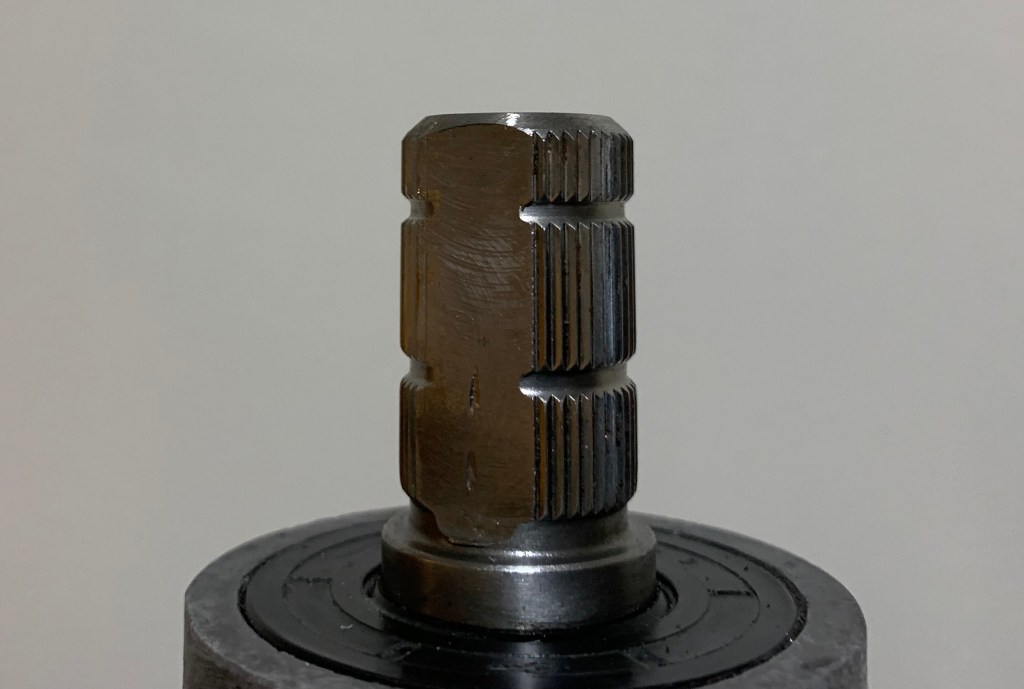
I sprayed CorrosionX on top of the upper bearing, put a dab of white lithium grease on top of the upper bearing, then installed the top dust/oil/grease seal. After a final spray paint job, the assembly looks great. Best of all, the upper u-joint now slides on perfectly. I am so glad this rebuild is now finished.

I purchased the new bevelhead from HR Parts. I will keep the original one as a spare on the boat or to make available to another HR46 owner. I really enjoyed this project to learn about how the system works and how to disassemble and reassemble to return the original capability.
MaxProp Removal, Inpsection and Cleaning
Up until the last post, the MaxProp was still installed. I need to remove the propeller so that I can push the propeller shaft forwards towards the engine so that I can see if there is clearance to remove the cutlass bearing. My goal is to change the cutlass bearing and not have to worry about it for several years.
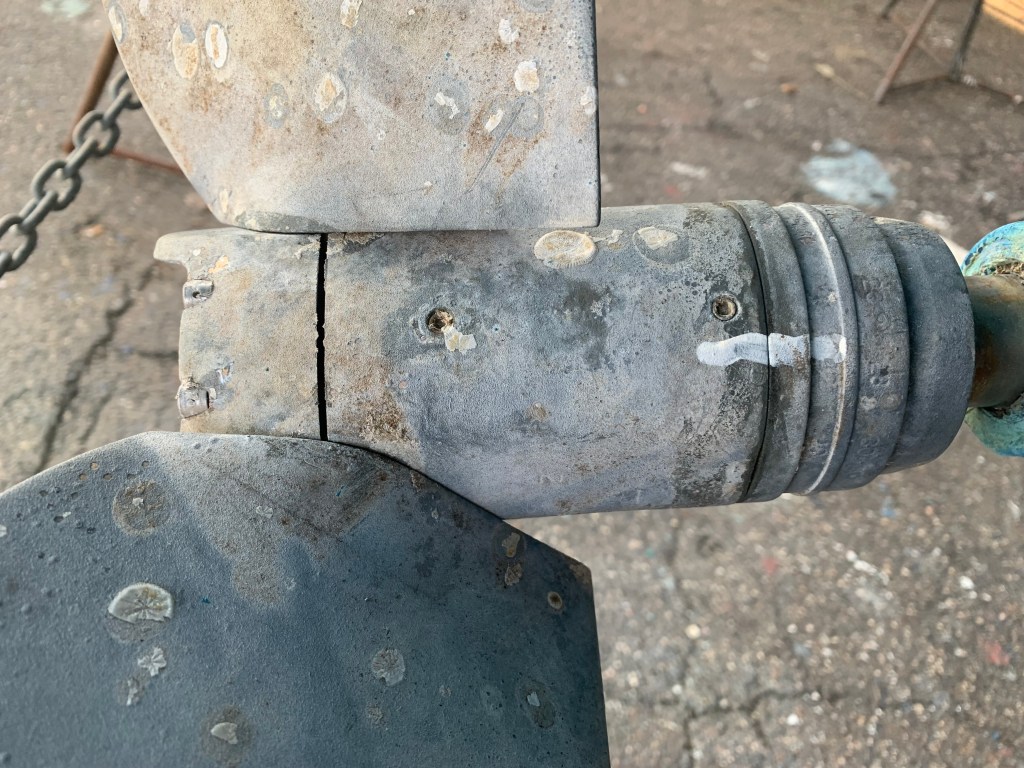
I marked the body and base to make sure that I could align them when I re-install them. That was actually done incorrectly. The propeller blades are supposed to be facing perfectly forward when making this mark. I am confident we will re-align and install the MaxProp correctly.
I popped off the propeller zinc and the shaft zinc and began to carefully disassemble the unit taking lots of pictures and noting particular details like our (likely) right hand rotating design.
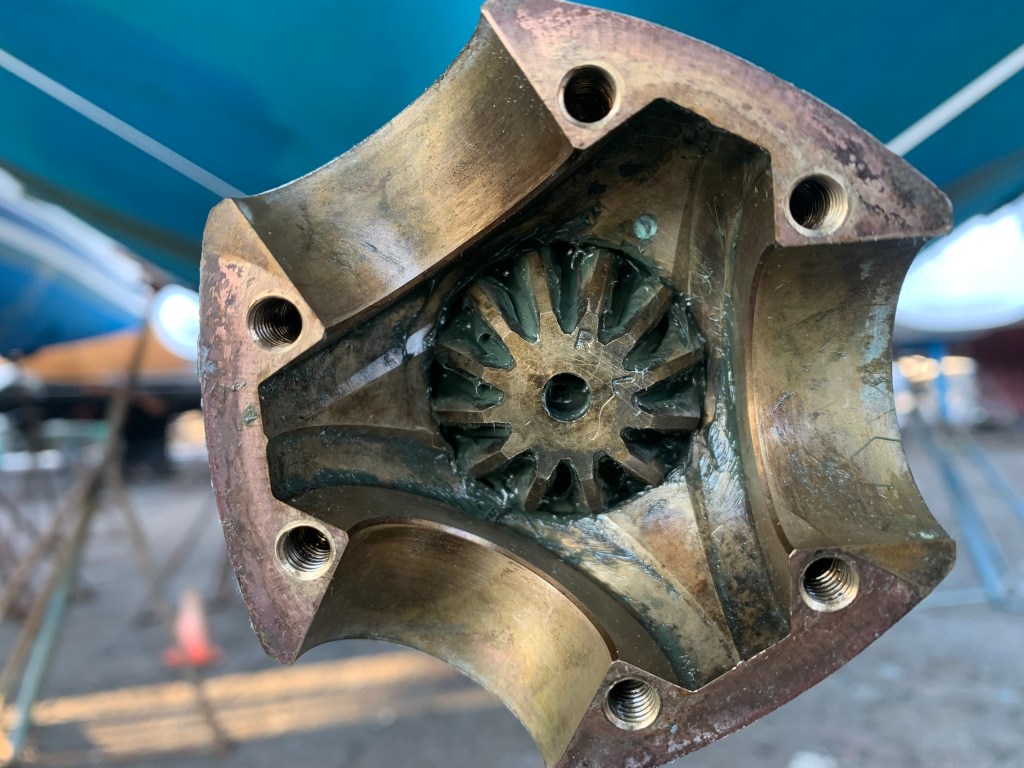
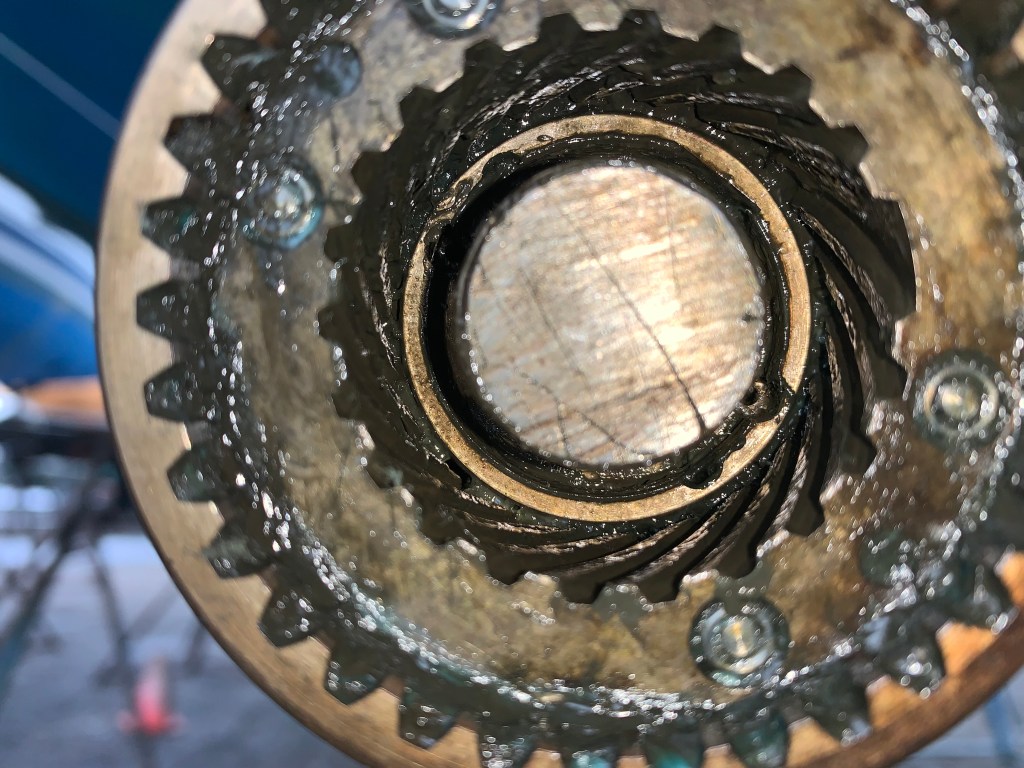
This MaxProp didn’t seem to match the “Classic” design exactly, because the center gear had spiral gears not flat gears. I later learned from PYI that I have a MaxProp VP propeller that hasn’t been produced in over a decade. I keep trucking along taking this apart piece by piece.
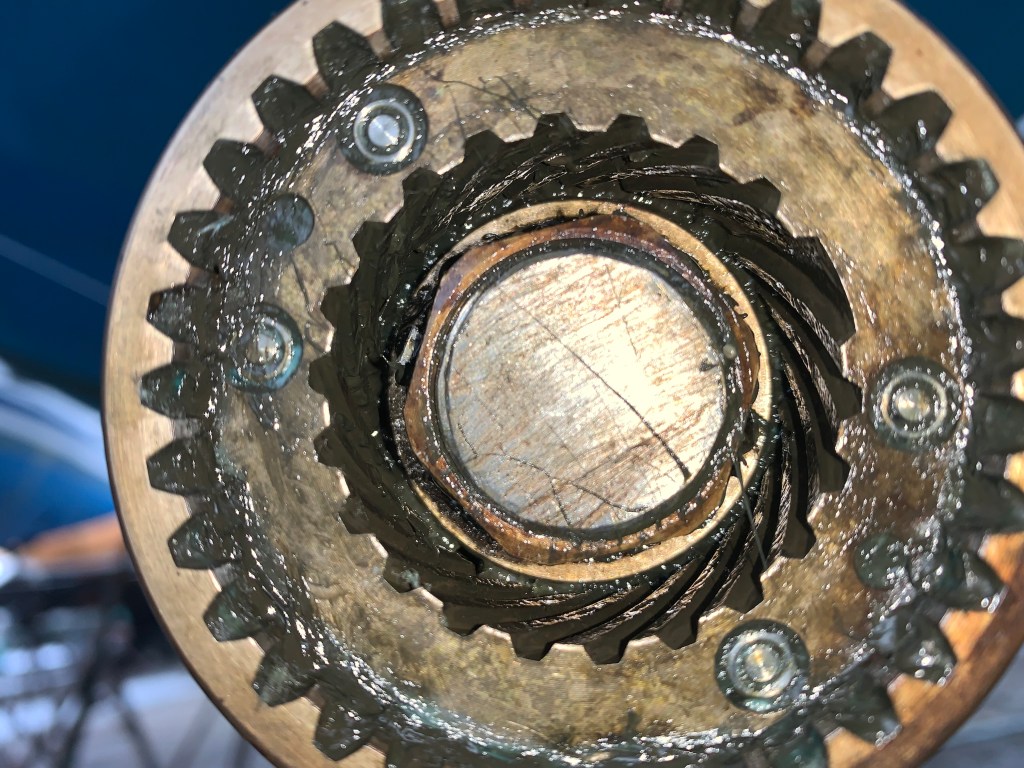
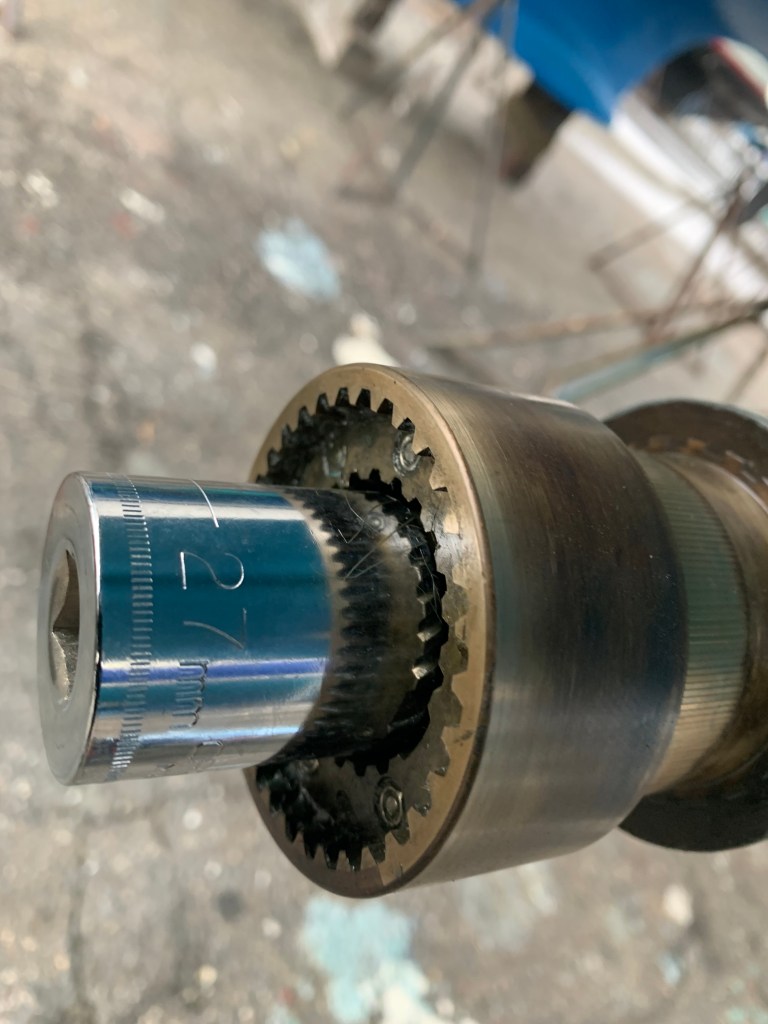
With the shaft nut off, the entire propeller hub is slid off the shaft. I pushed the shaft all the way forward, and it worked brilliantly. I have more than enough clearance to remove the cutlass bearing without having to pull the entire propeller shaft out of the boat. This was a blessing, because the propeller shaft cannot easily come out of the boat without removing the rudder and skeg. At least that is what I think.
I’m using a wire wheel on my bench grinder to remove the Rust-O-Leum antifoul paint. I am also using mineral spirits to clean up greast from the gears and parts. The process is going smoothly.
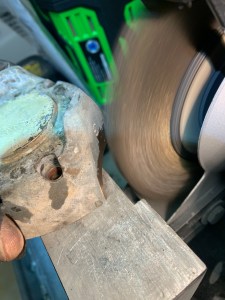
The rest of the propeller will get the same treatment. I will assemble this onto the shaft as soon as I get the cutlass bearing installed. Will also bolt on new zincs and finish with PropSpeed.
Cutlass Bearing Removal Part 1
With the shaft out of the way, the cutlass bearing is revealed and it is in rough shape. It is very clear that this was due to be replaced.
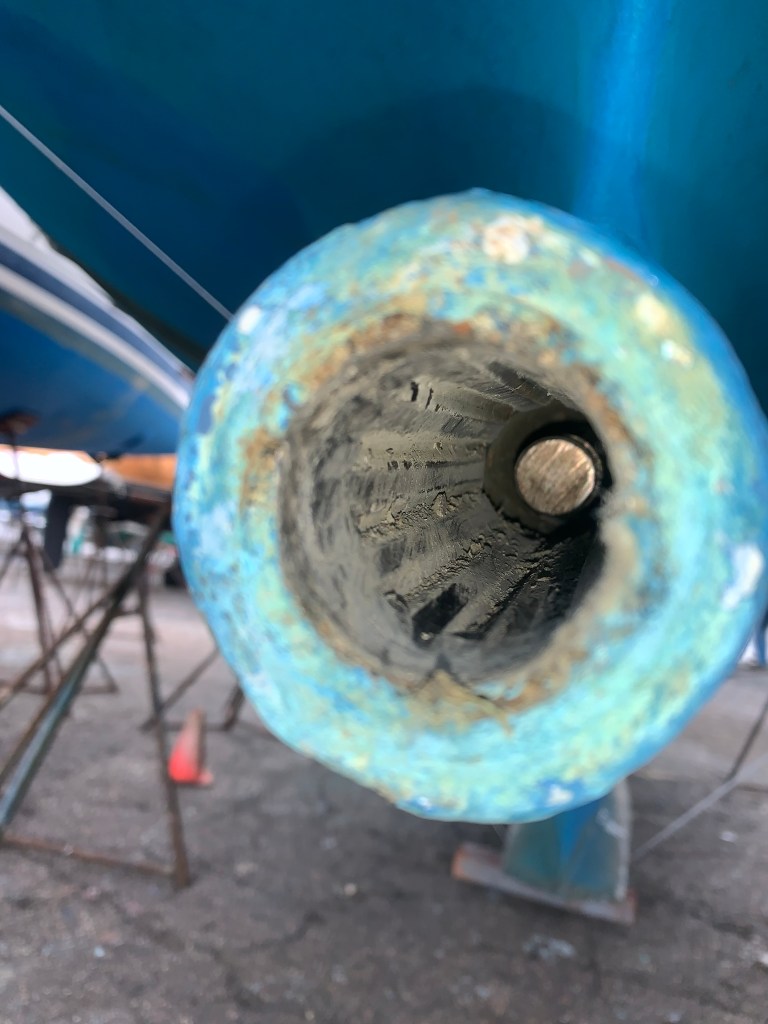
Fortunately, HR Parts had the right sized cutlass bearing in stock. Within a few days…well actually weeks due to some strange issues shipped from HR Parts to my home…I have the brand new cutlass bearing in my hand. It is BEEFY! Taking some advice from friends, I begin cutting the bearing out.
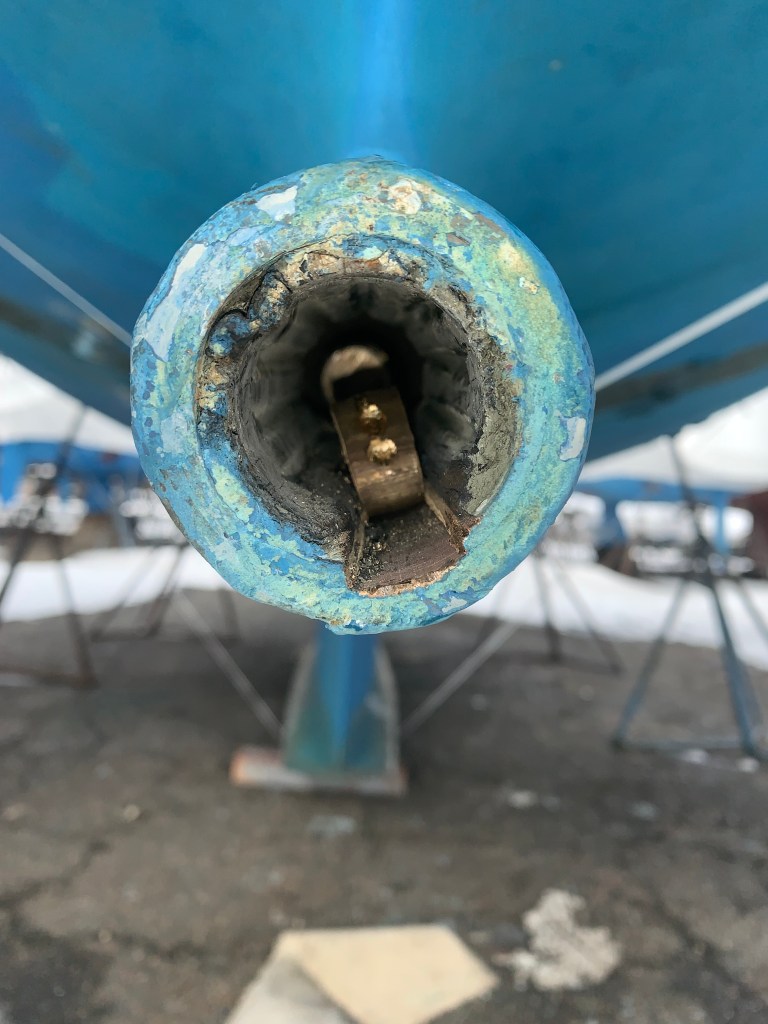
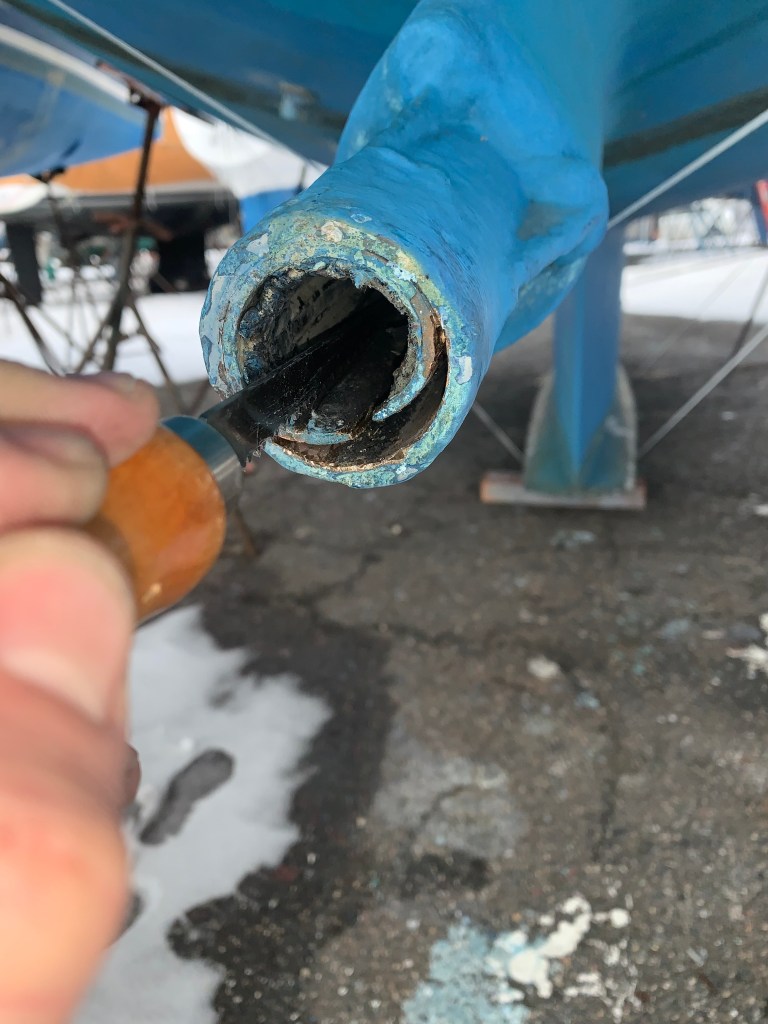
Unfortunatley, I was using the wrong tools and the first attempt did not go as planned. I was able to carve out a 3″ long x 0.5″ wide slice, then I tried to pry up the loose ends to see if I could muscle this thing out. The cutlass bearing laughed like a giant adult after taking kicks from a toddler. I will be back to get this done with heavier duty machinery
The Webastos Have Arrived
We decided to replace our Webasto diesel heaters, because one of them is not working and these units are original and are no longer manufactured or supported. These original heaters were HL32D. The heater than was not working appeared to have a blower motor issue. My online research suggested I could purchase a new motor for < $1000 US, but then I would have to risk that expense if that did not fix the problem. As they say: “BOAT” stands for break out another thosand.

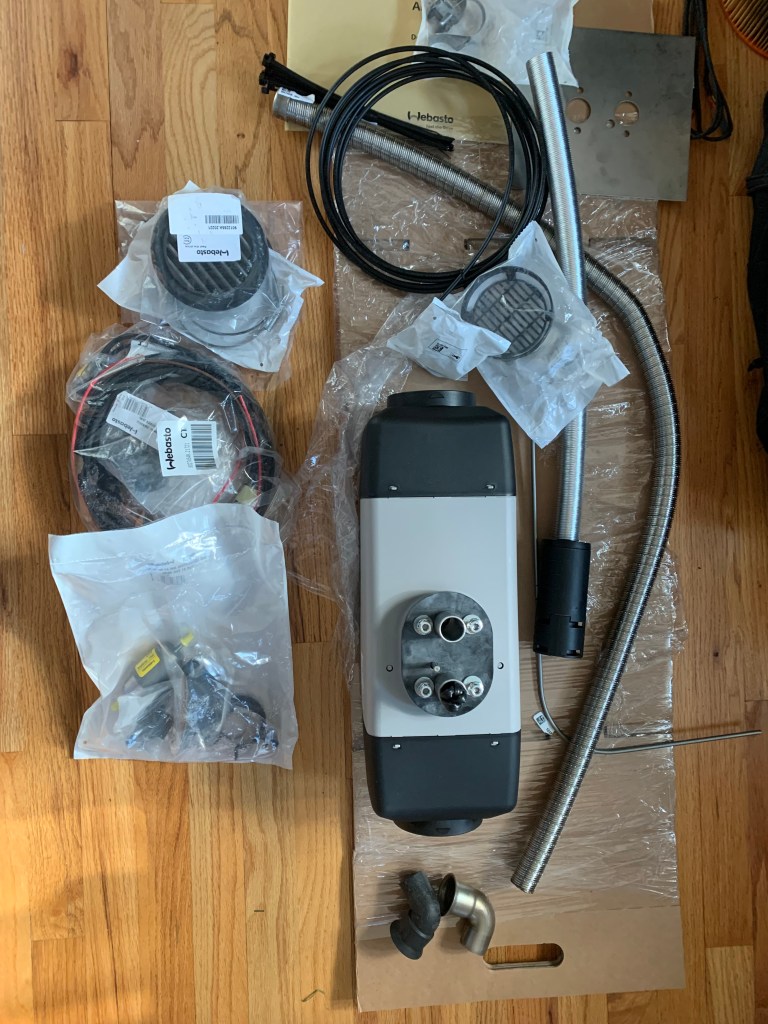
We purchased the standard Webasto Air Top Evo 40 units from Heatso online. We opted for the simple rheostat controller instead of the SmartTemp or other fancier controllers. We don’t see the value in making this system more complex than it needs to be.
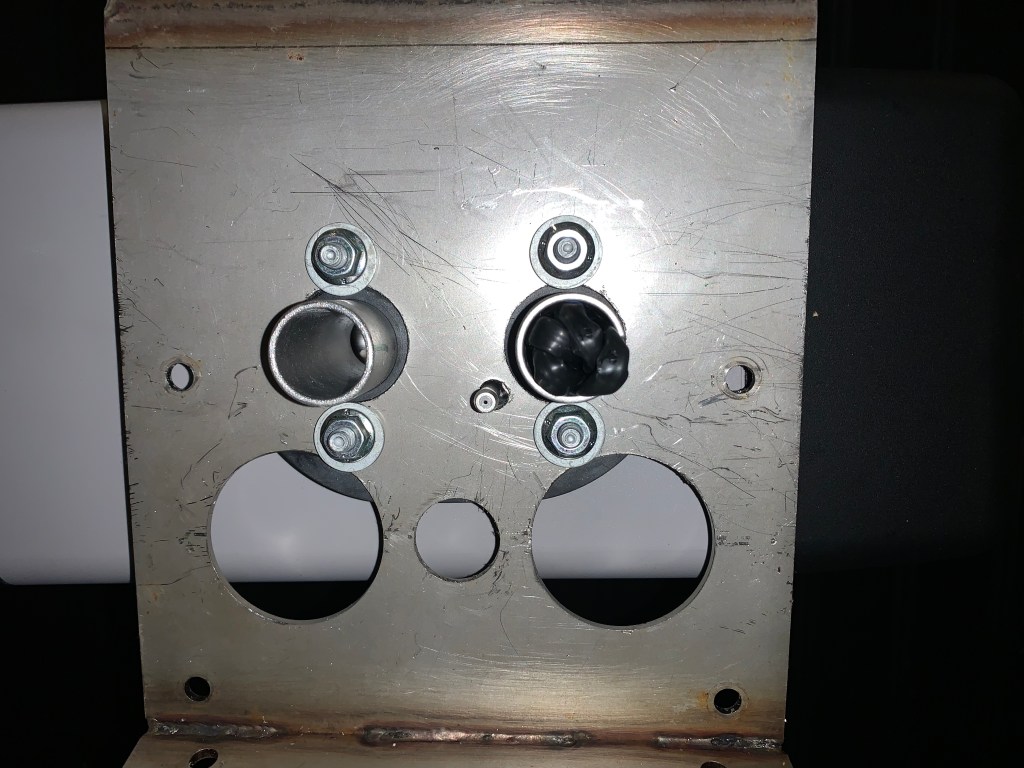
Speaking of complex, now I have to sort out how to mount these new units, because they have different inlet and outlet sizes and also different placement of the mounting studs. Our hanger is made of 1/8″ stainless steel, and I decided to attempt to modify it myself. Not so hard to do with the right drill and bits.
Installing these now allows us to work in a warmer environment for the next 2 months, but then we have to disassemble them in order to remove the cockpit hatch which is leaking. Waiting until after we remove the cockpit hatch and then reinstall it reduces our workload now, but still leaves us shivering inside the cabin for the next 2 months. Tough choices!
Fresh Water System
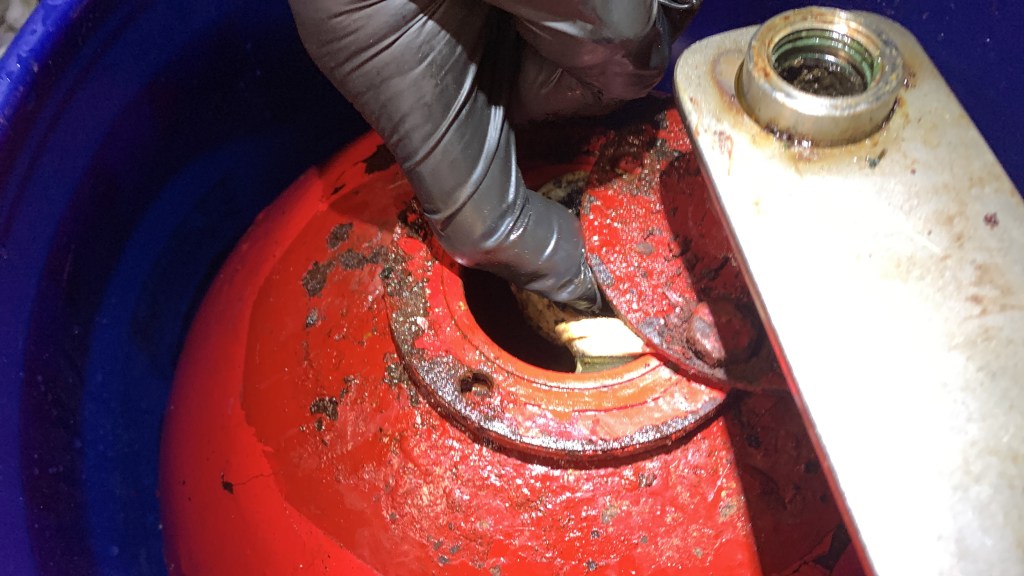
We believe that we have the original fresh water piping still on the boat. The spherical pressure tank is visibly corroded both top and bottom halves. The rest of the system appears to be acceptable. But we know that the pressure tank is a risk, and we do not know if it is holding pressure. We get our answer very quickly.
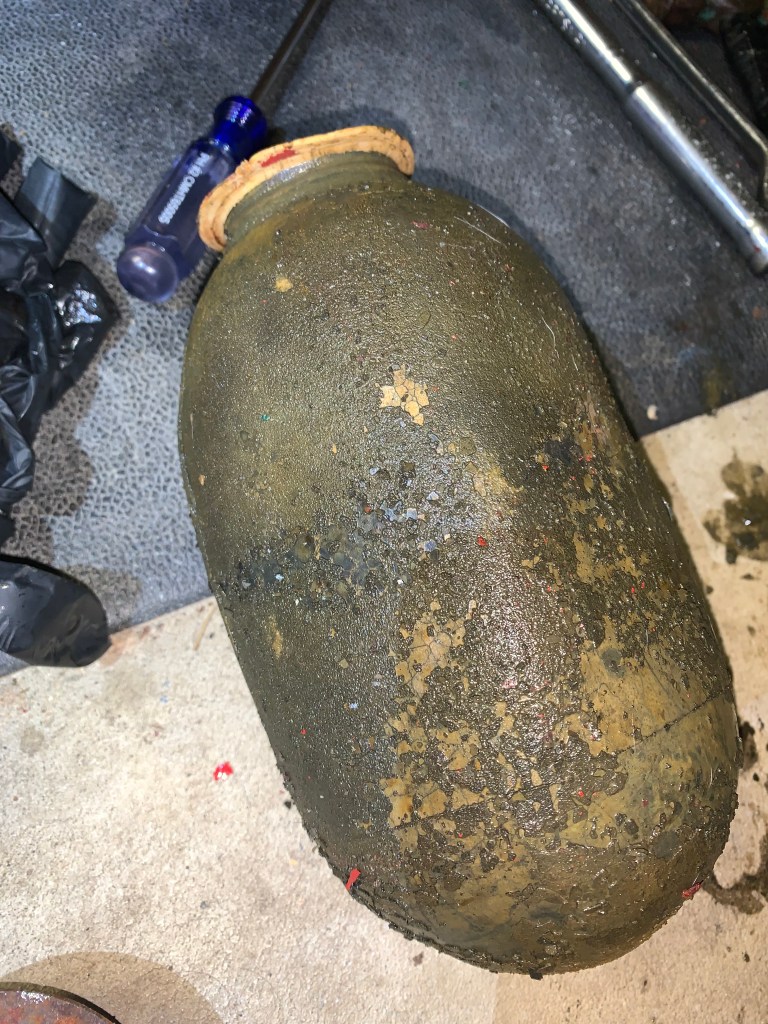
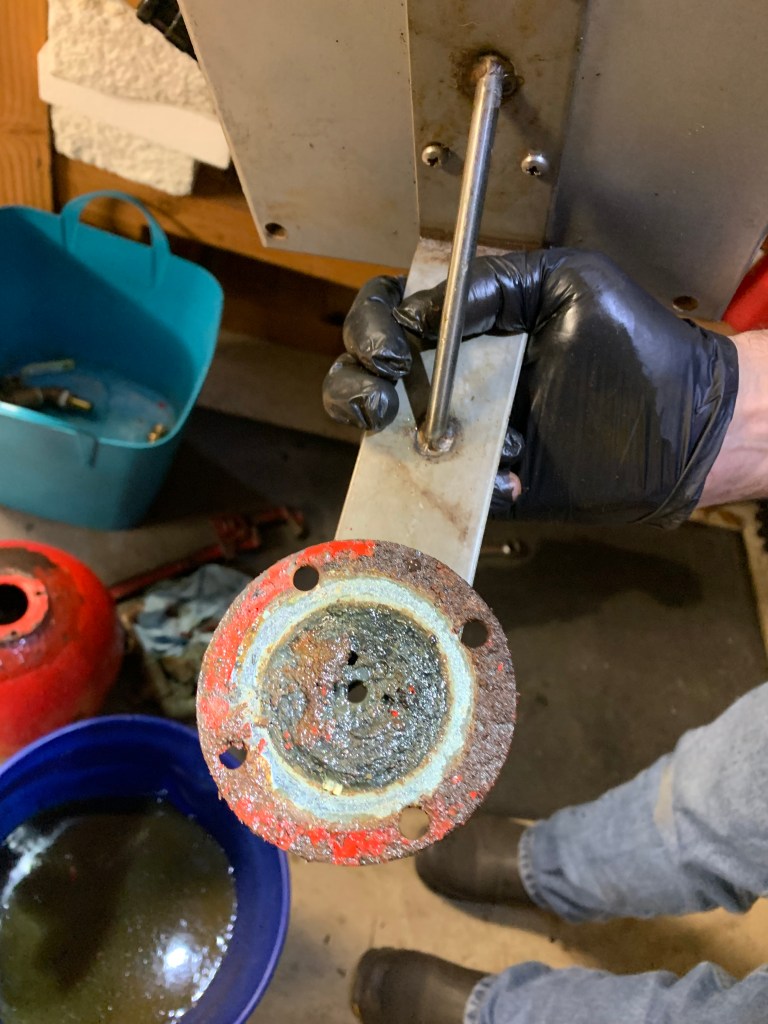
Once I removed the bottom flange from the tank, the bladder was revealed to be in terrible shape. We were quite surprised to see this in such bad shape.
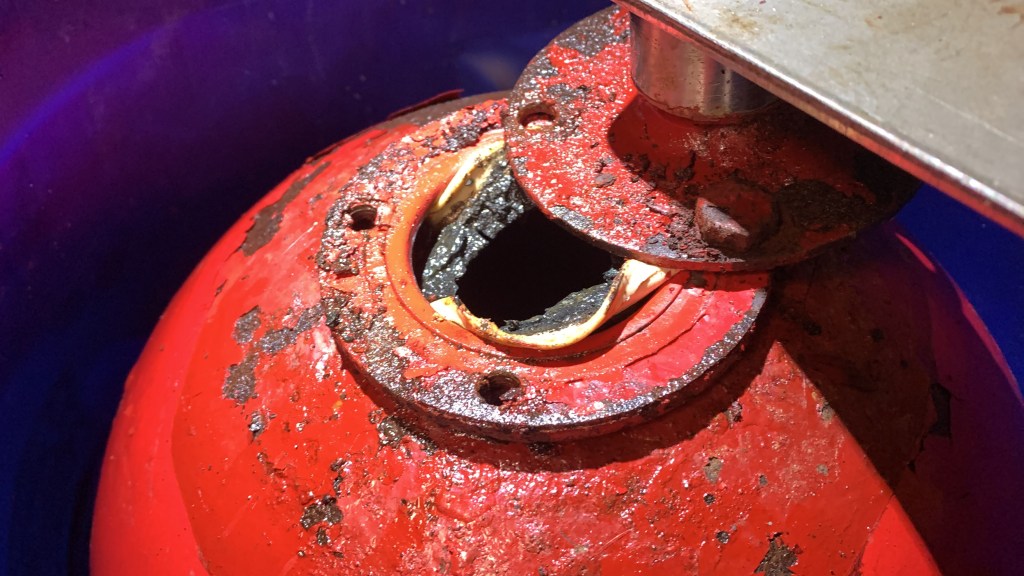
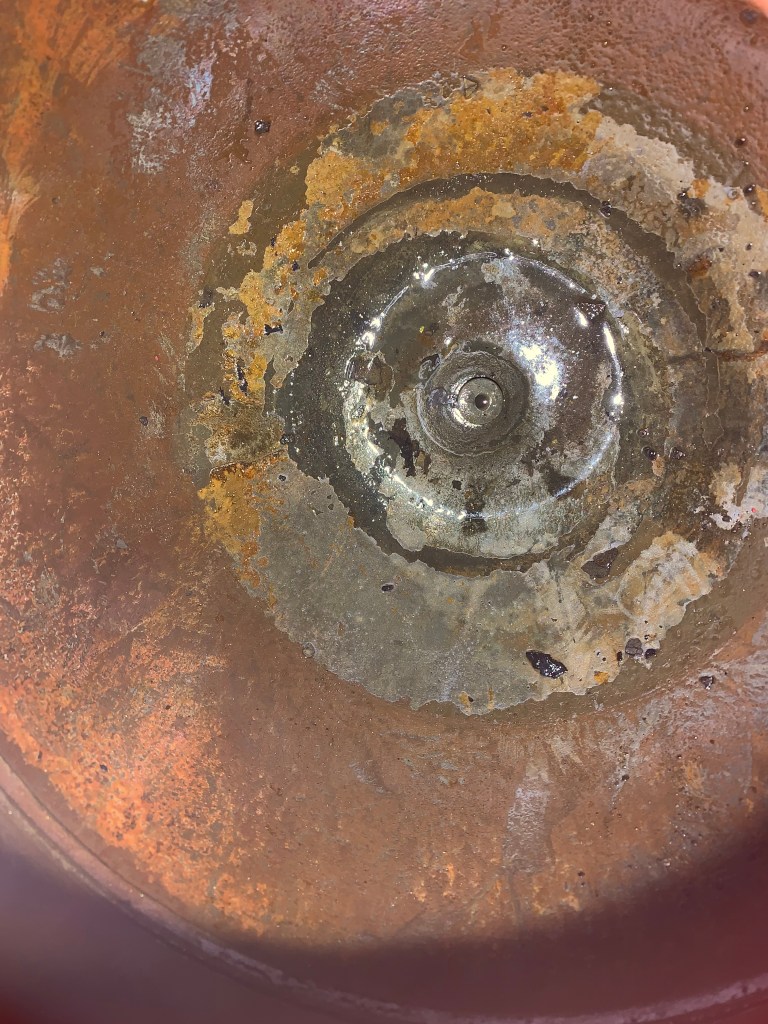
Further inspection showed that the bladder layers were completely degraded and leaking water. The inside of the tank was also showing some signs of corrosion. We were glad we took the time to remove this from the boat and reduce our risks.

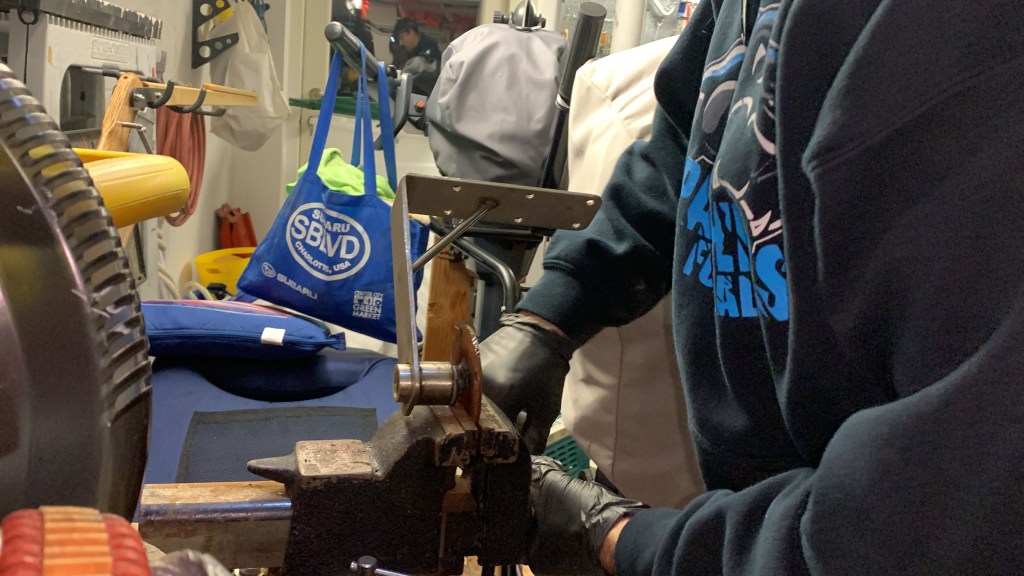
I had to figure out how to separate the bottom flange from the wall hanger and pipe adapter so that I could rebuild this system. A little PB Blaster and brute force on our table-mounted vise did the trisk after several blows with a 3-lb hammer.

The new 8L tank from HR Parts is cylindrical and is about 1.5-2″ taller than the original spherical tank. I made some adjustments to the hanger assembly, and here is the final product ready for re-installation.

Scuba Dive Tanks: No Bueno
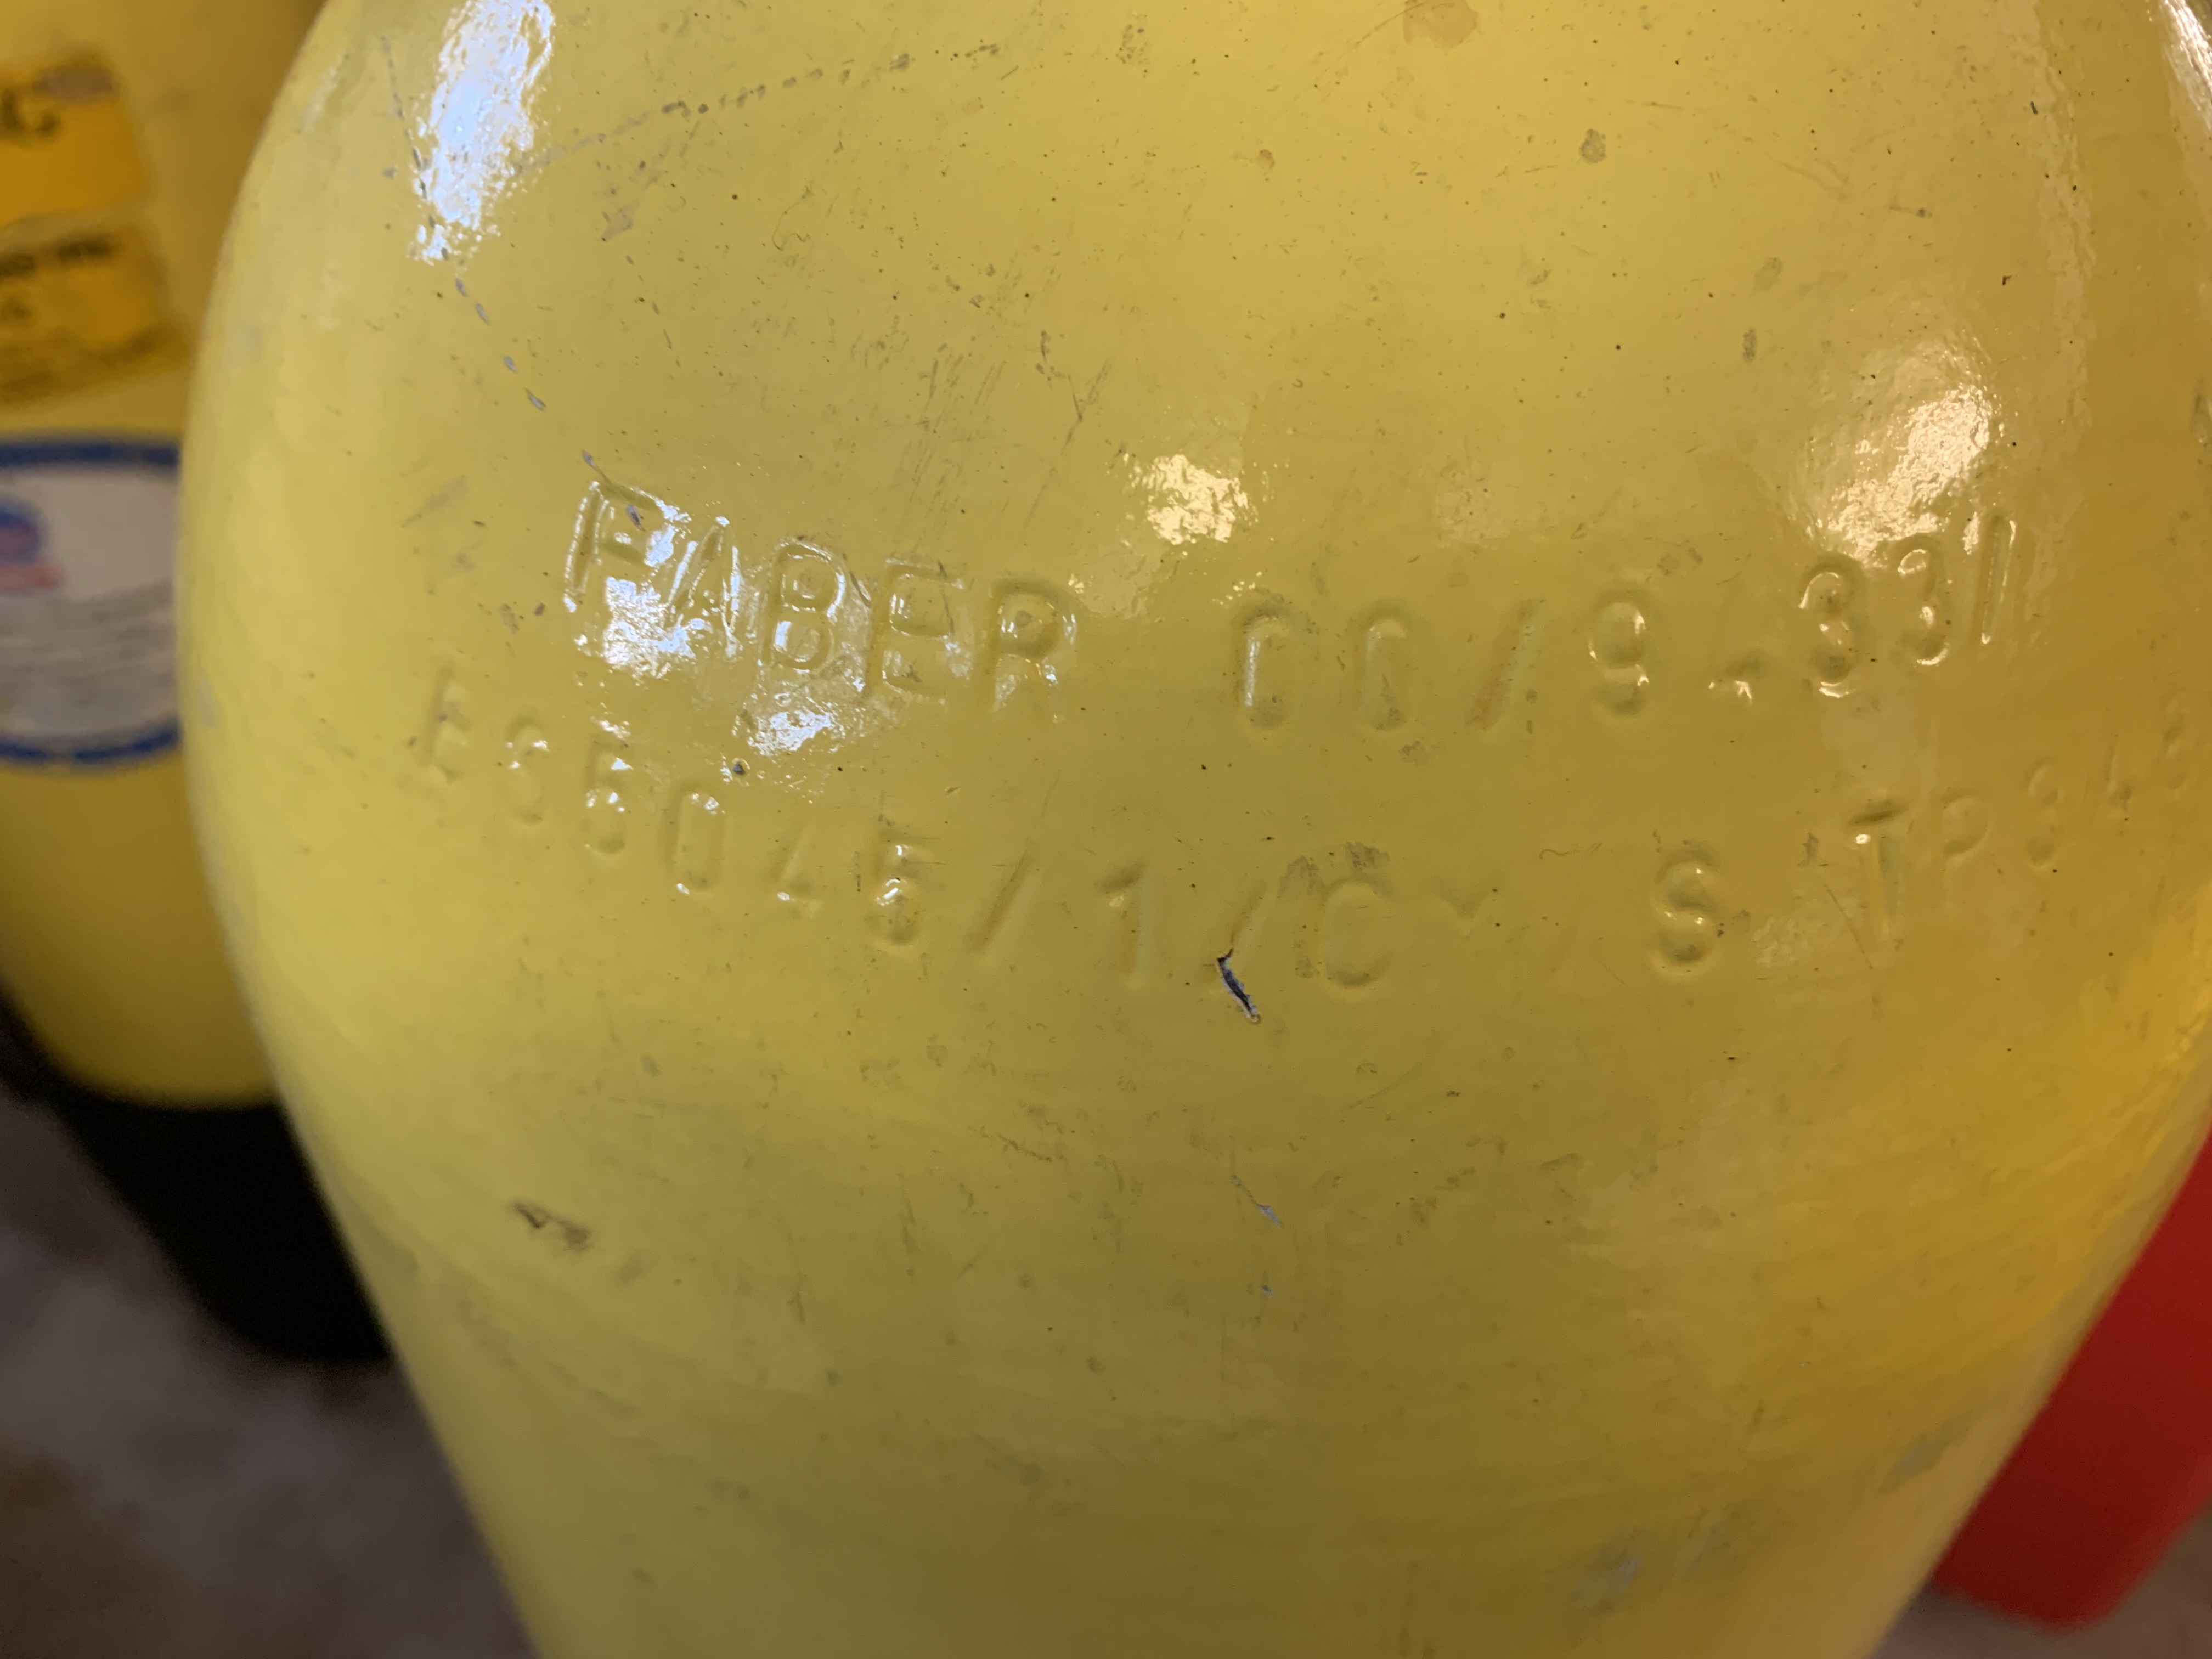
We inherited two 15L Faber dive tanks. They are very nice, but the nozzle/valve has some visible corrosion, and the last time they were inspected was 2003. They have been held under pressure since that time. These tanks are not DOT stamped.
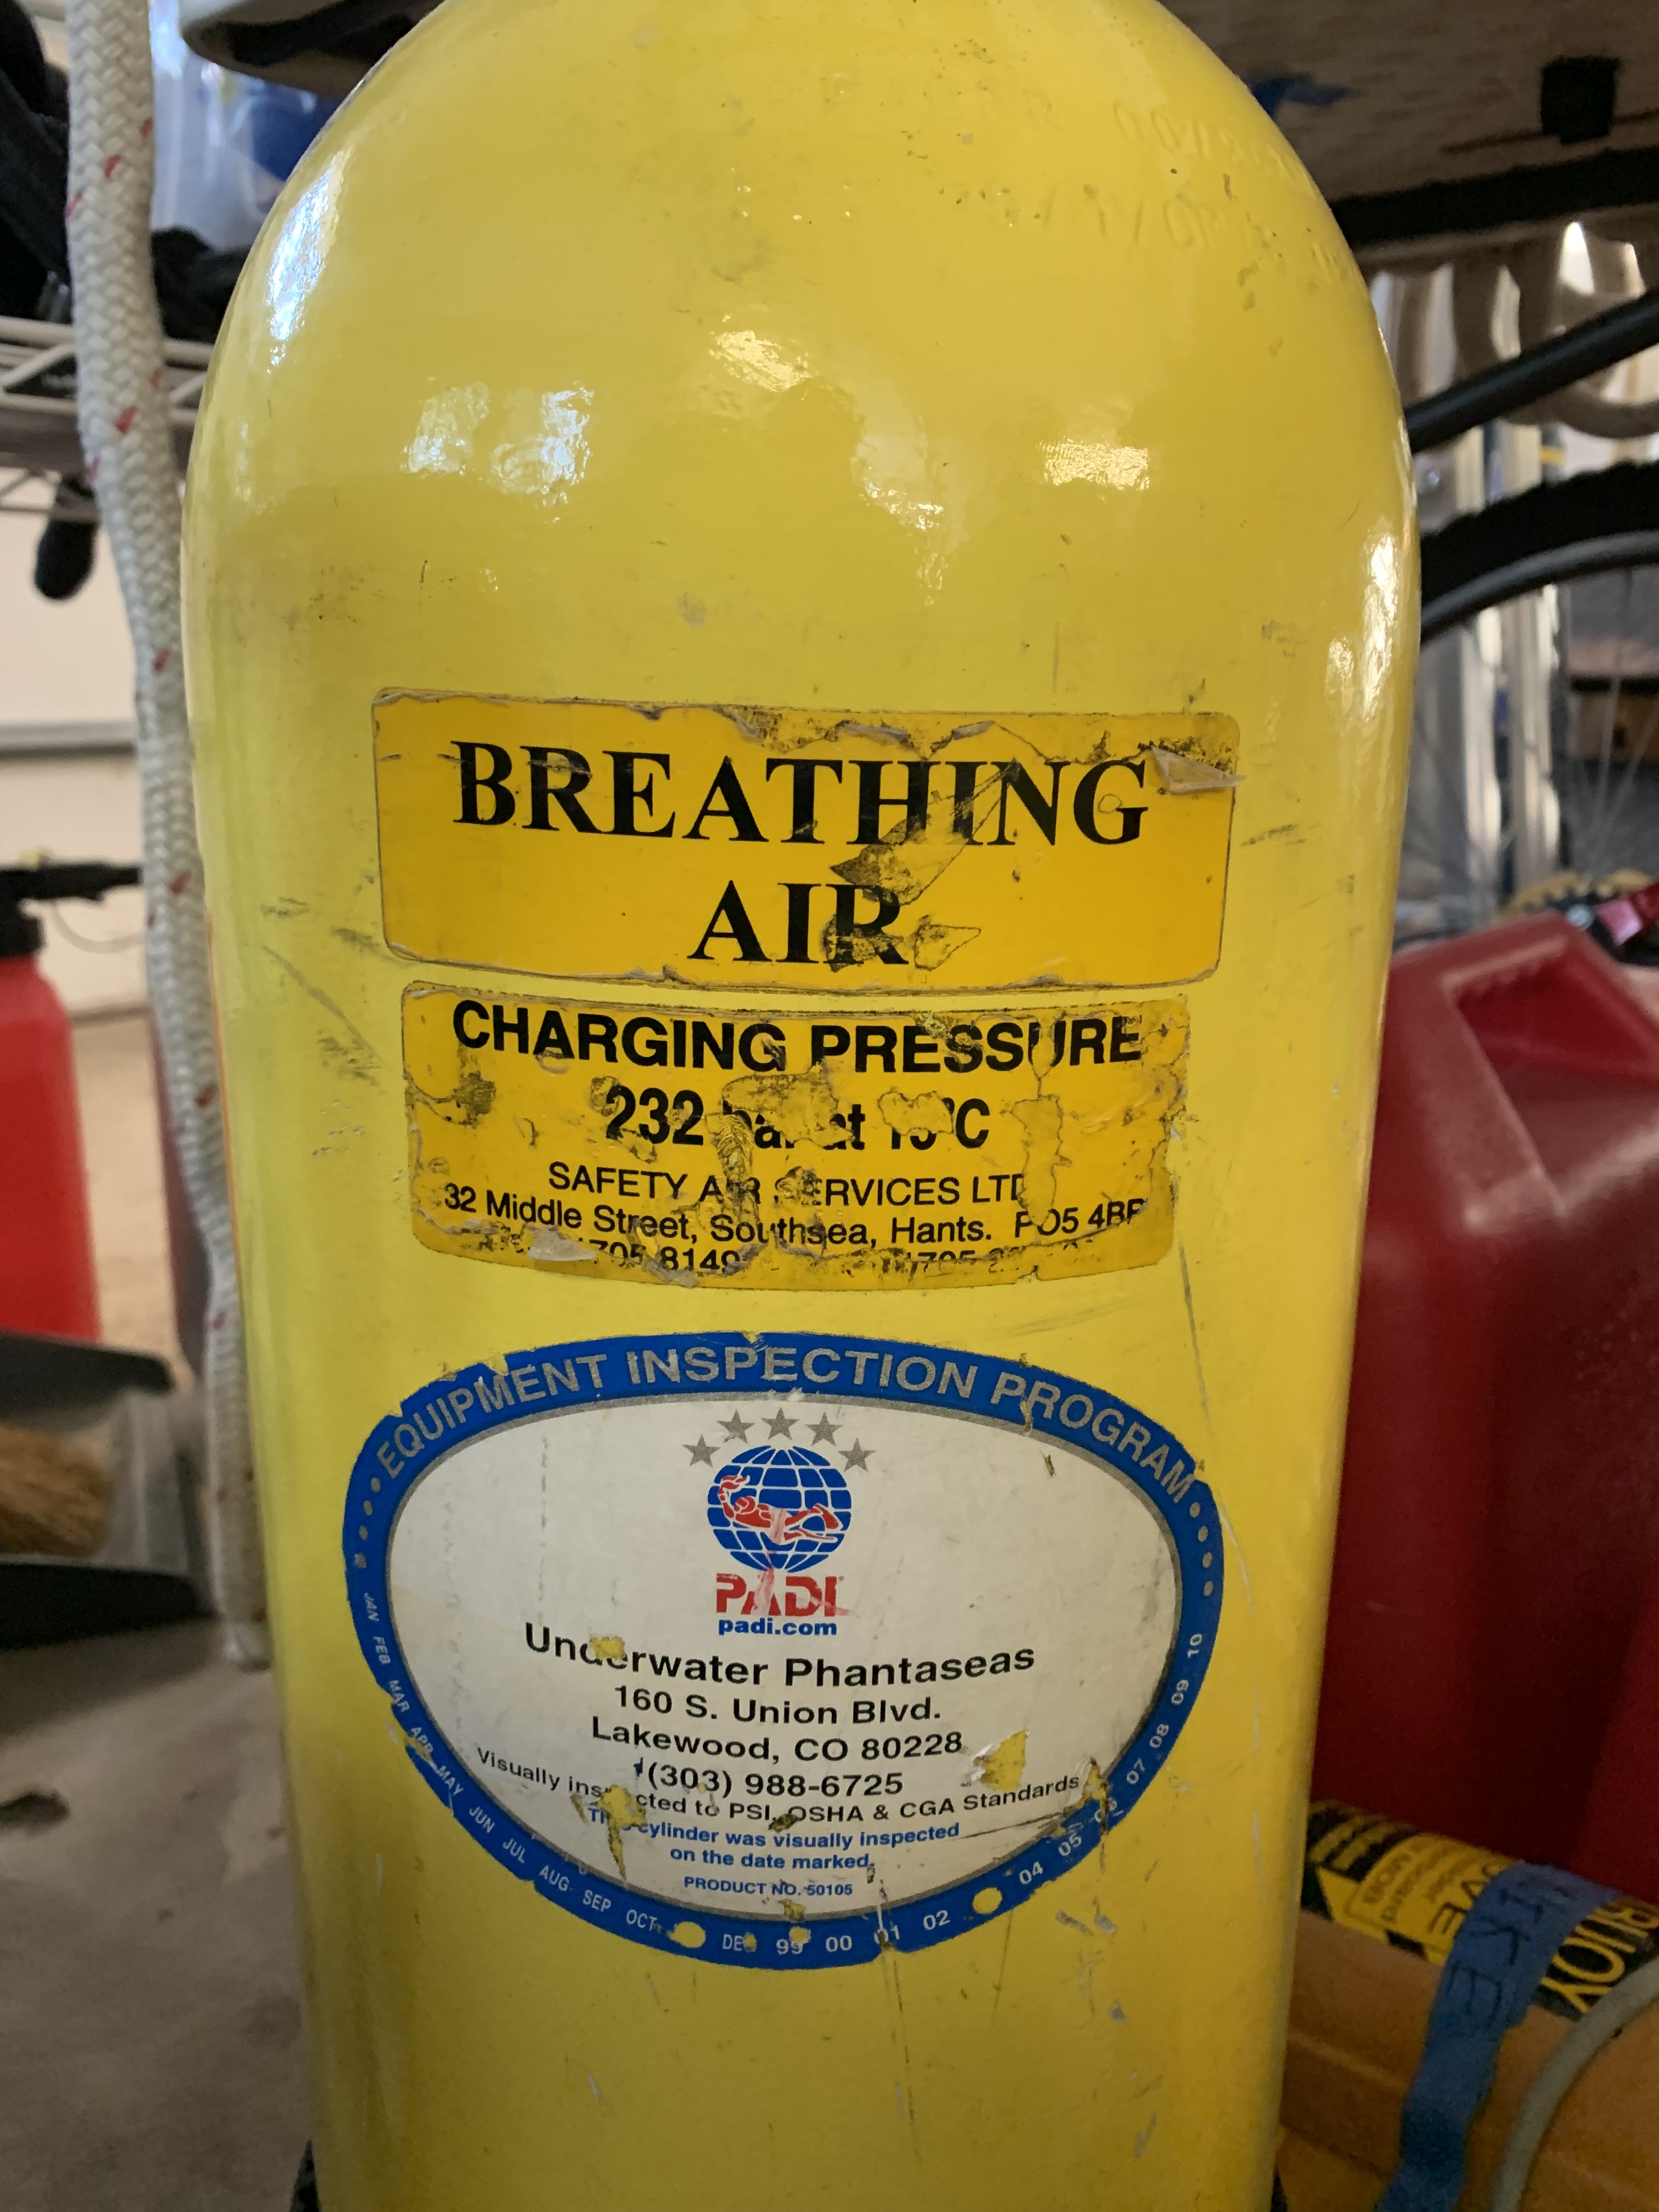
I have spoken with 3-4 different dive shops and all of them have said that they cannot legally inspect, hydro of certify these tanks. I still do not understand why these dive centers cannot even look at the tanks -just as a courtesy take a look at them. They claim they would lose their license, but I supposed I have to deep dive (no pun intended!) and read the regulations to make that determination myself. I don’t need them DOT certified, I just want a qualified/trained person to take a look at them. People with European boats and similar tanks would have a similar issue if they land in the US and need their tanks inspected or hydro tested.
This is such a shame, because I was hoping to use these tanks during our PADI Open Water dive certification training in March. But it is better to be safe than sorry so one day we will replace these tanks. We will depressurize them and disassemble ourselves just to take a peek.
It seems like every feature on this 24 year old boat -those features that we thought added value and caught our interest- needs to be completely replaced.
