
This post is all about our windlass, a Lofrans Project 1500 1200W 24V unit. After the top-half of the unit was removed from the deck, we brought it back home to the workshop and decided to break it down to inspect and re-build what we could.
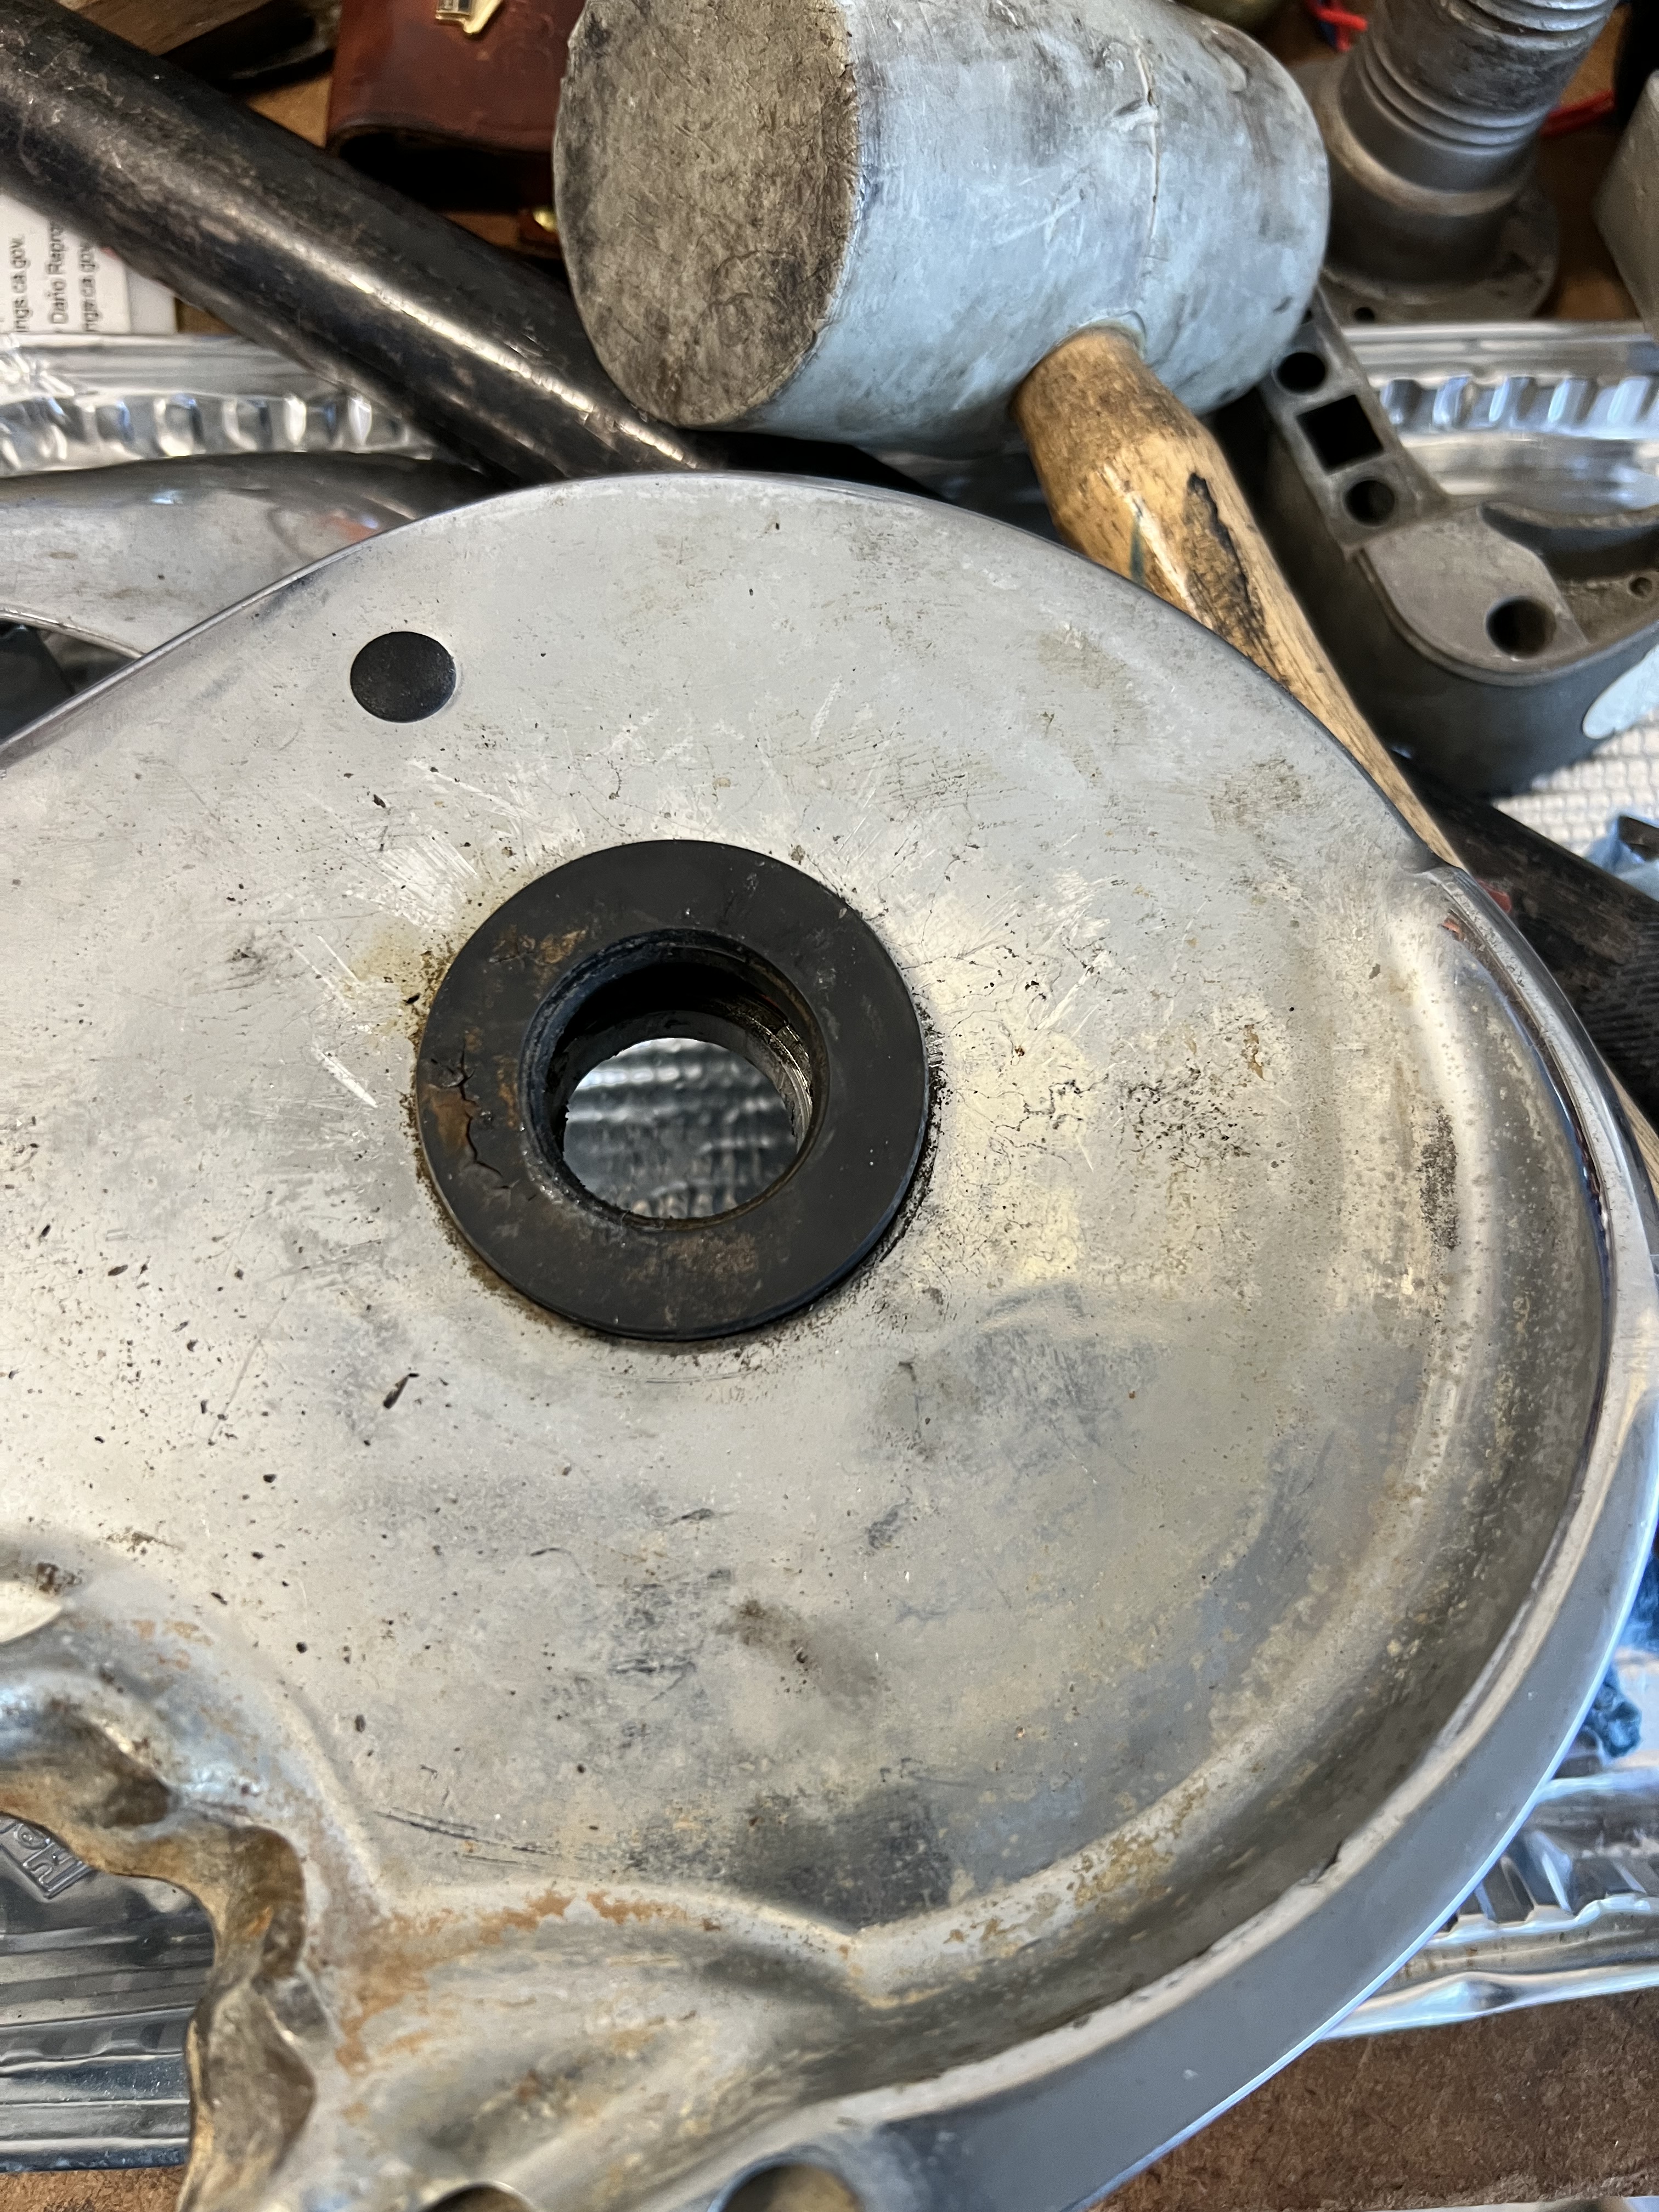
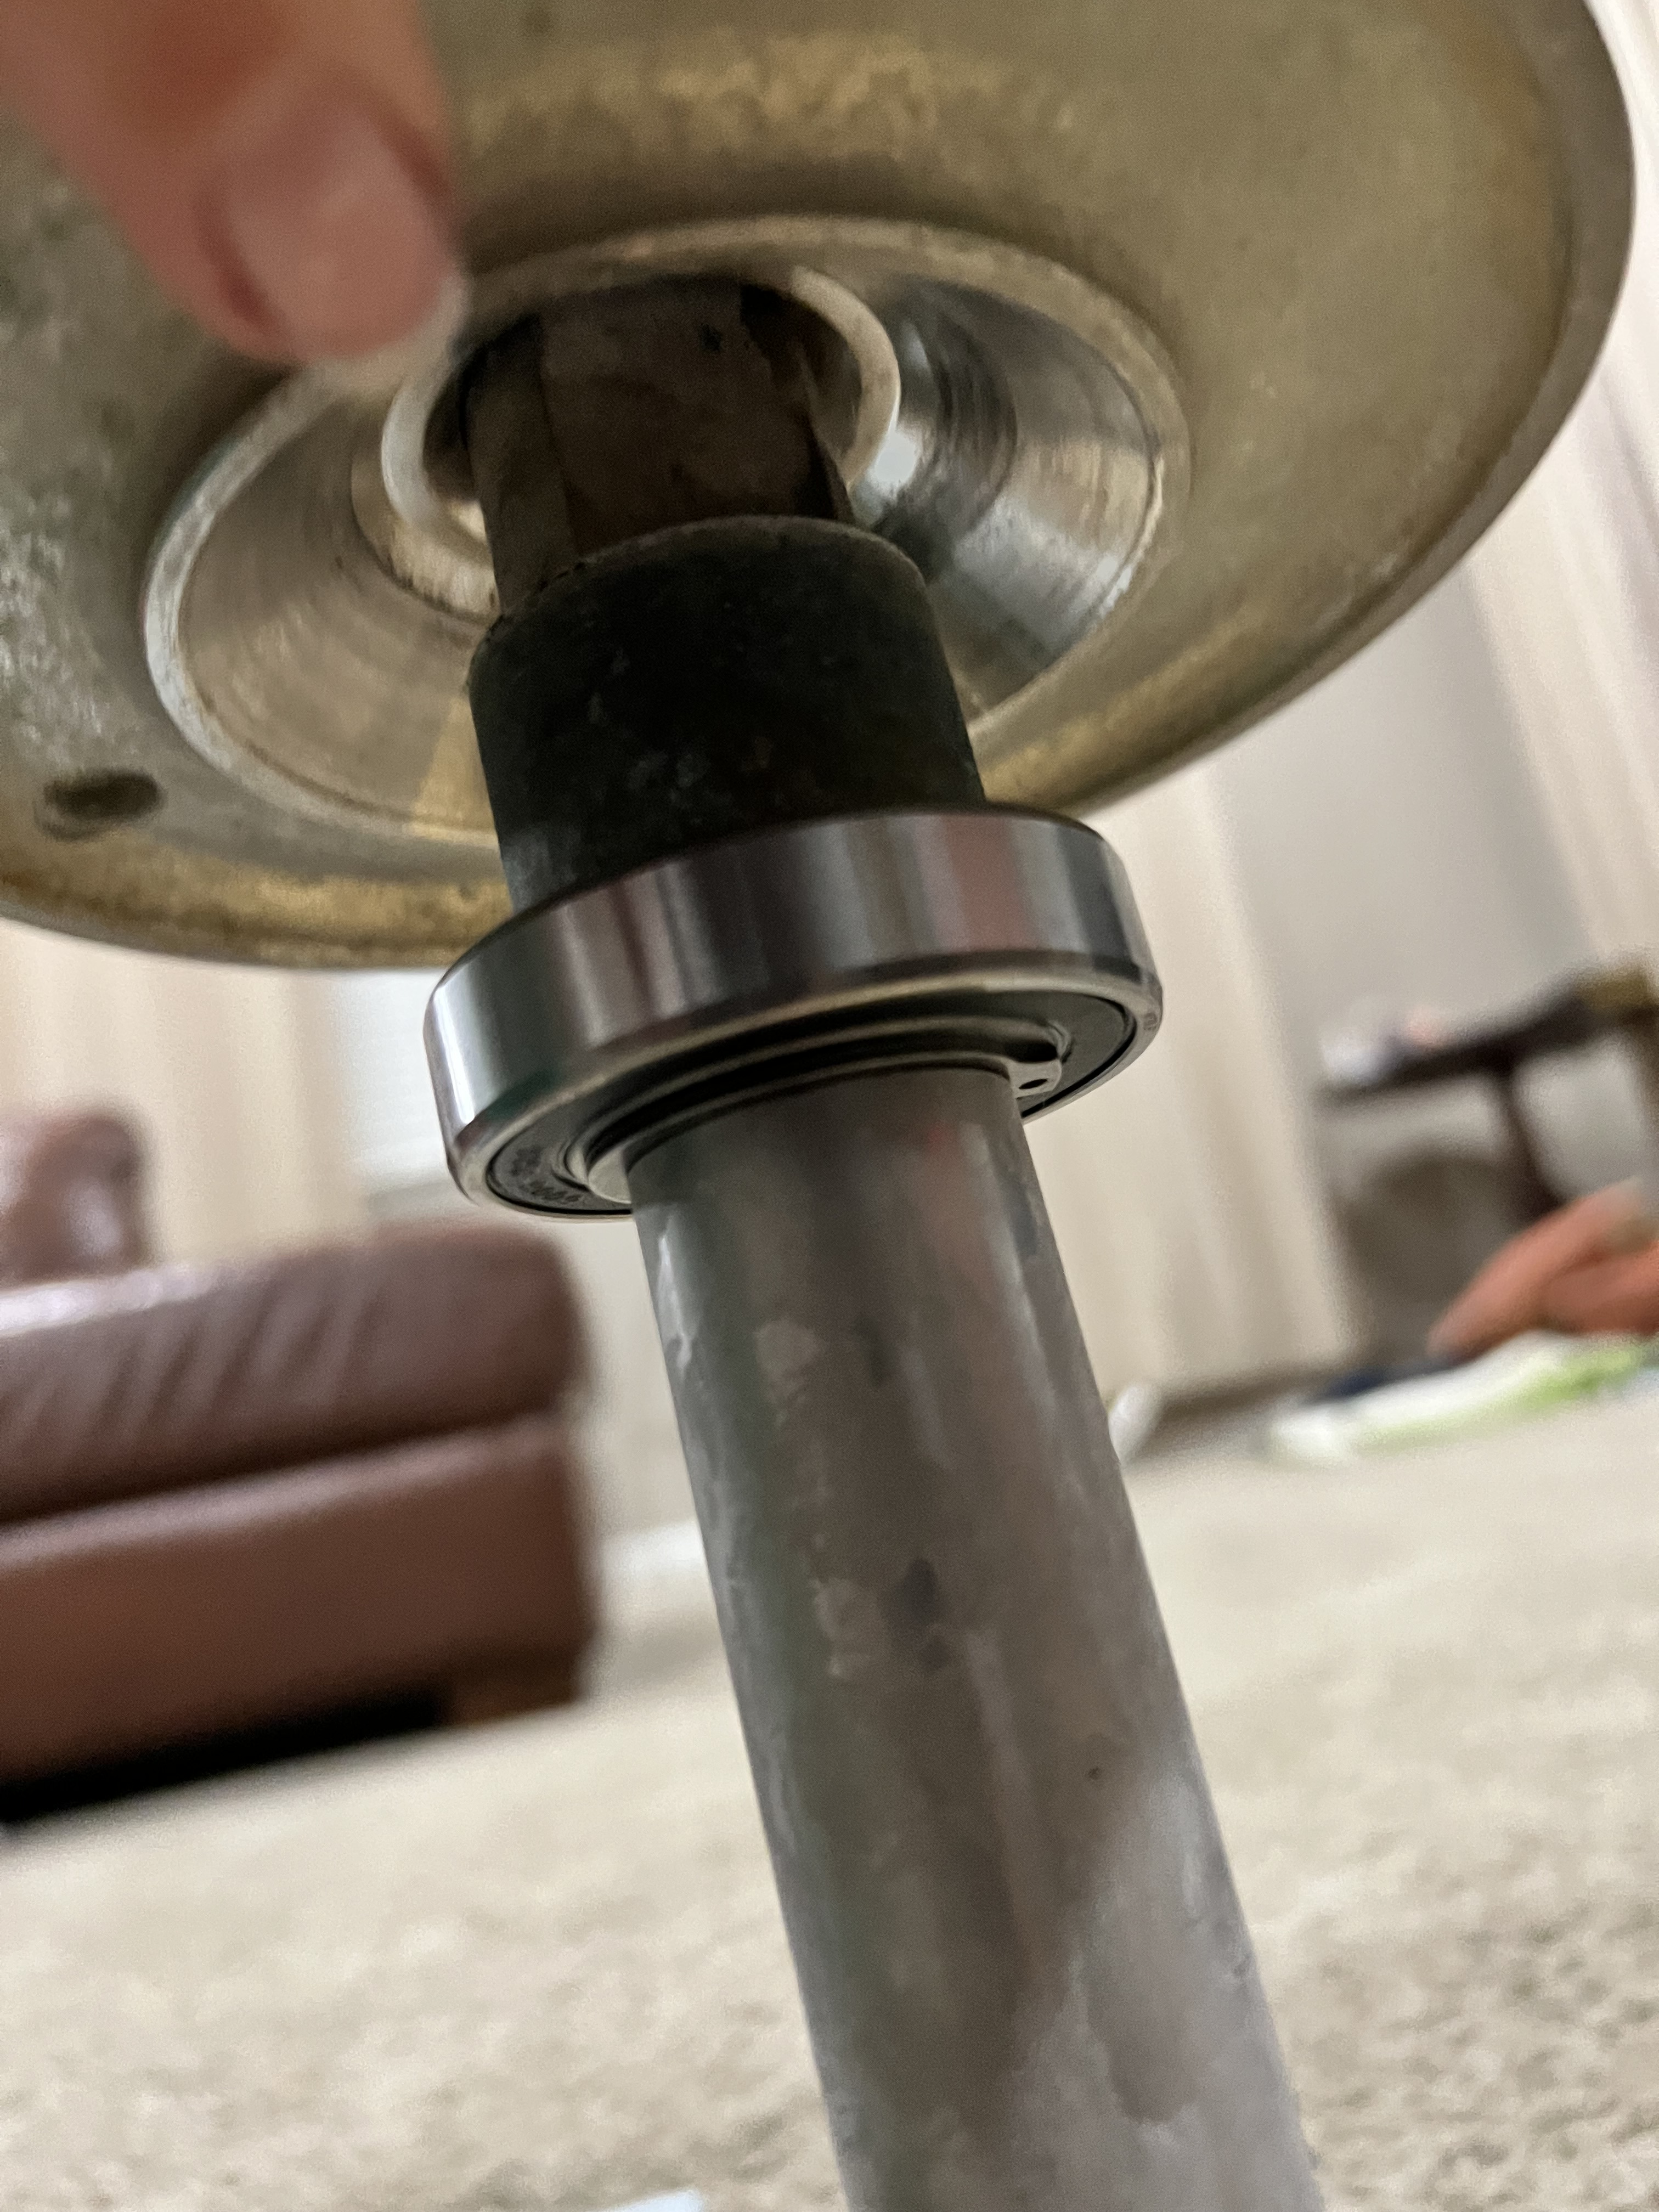
Taking apart something from the boat usually brings some surprises. In this case, I found a broken circlip on the top side of the bearing which is supposed to keep the bearing in place and not allow the shaft to slide upwards.
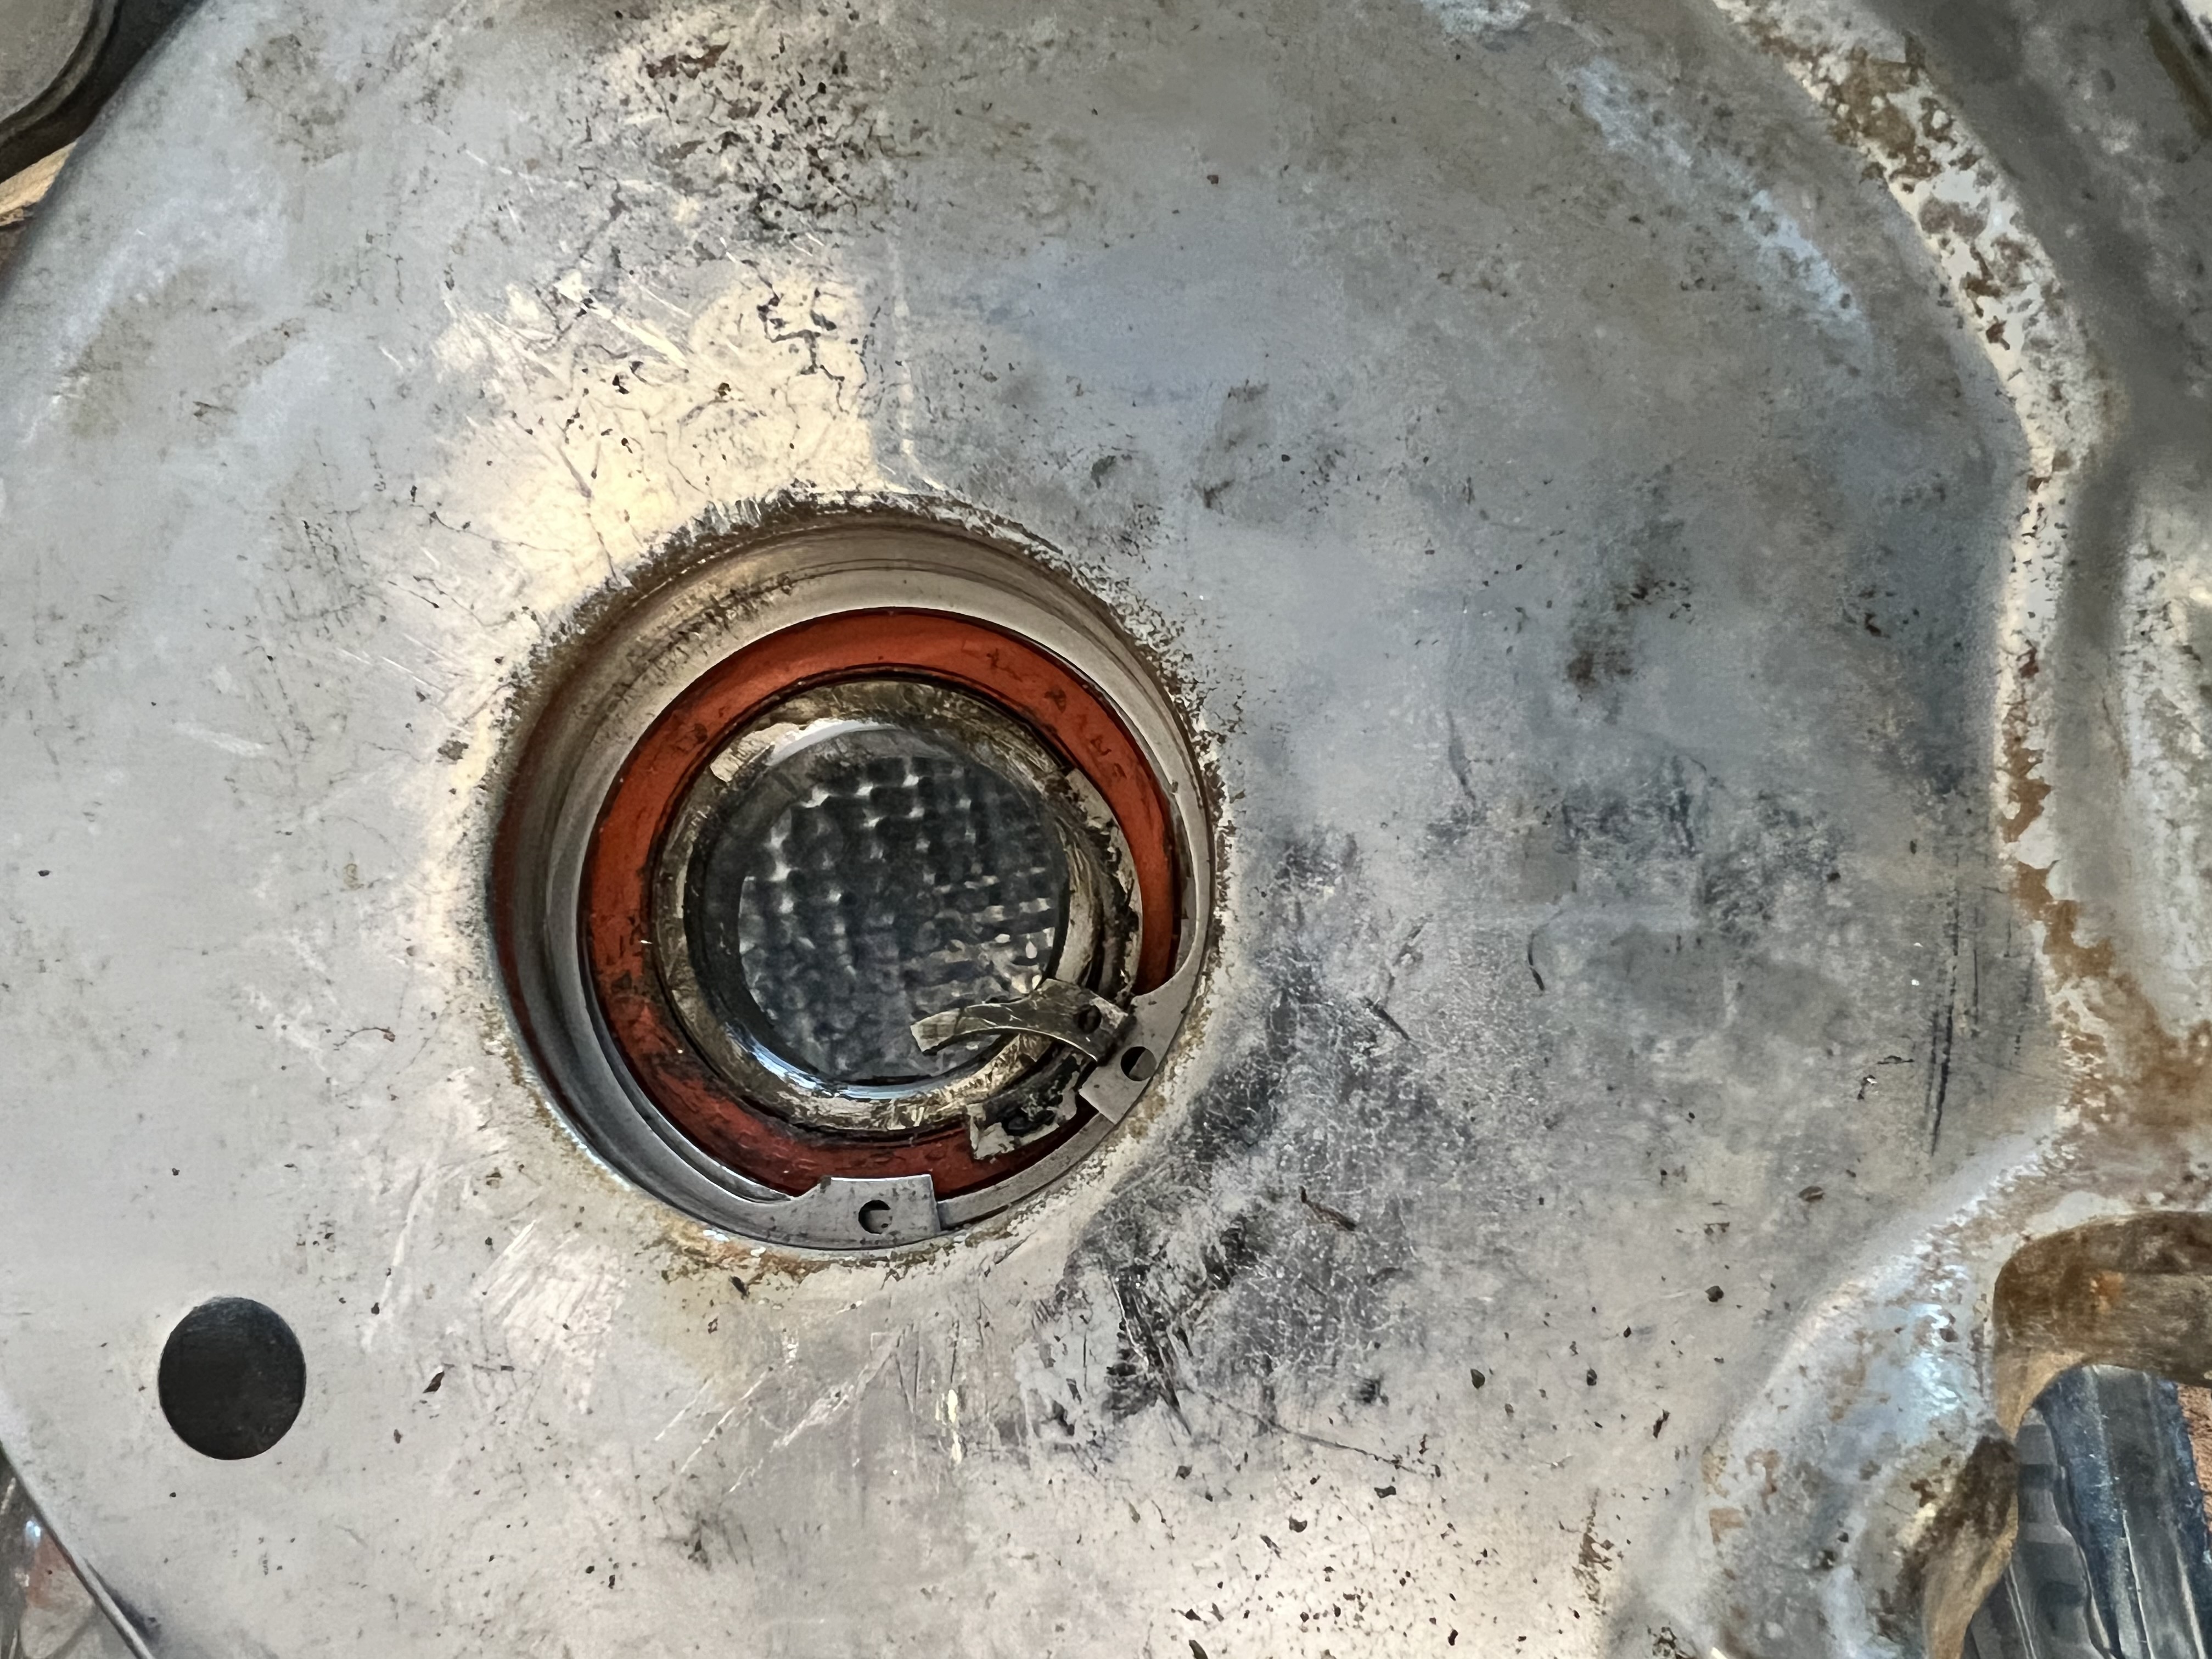
I mounted the windlass in my vice as shown in a previous post. That wasn’t too bad. Then I removed the seal with a screwdriver. I instantly saw that the seal had a crack in it and was beginning to fail. That means that water could make it’s way into the bearing and sit and brew up some nasty corrosion. Let’s see what the next step brings.
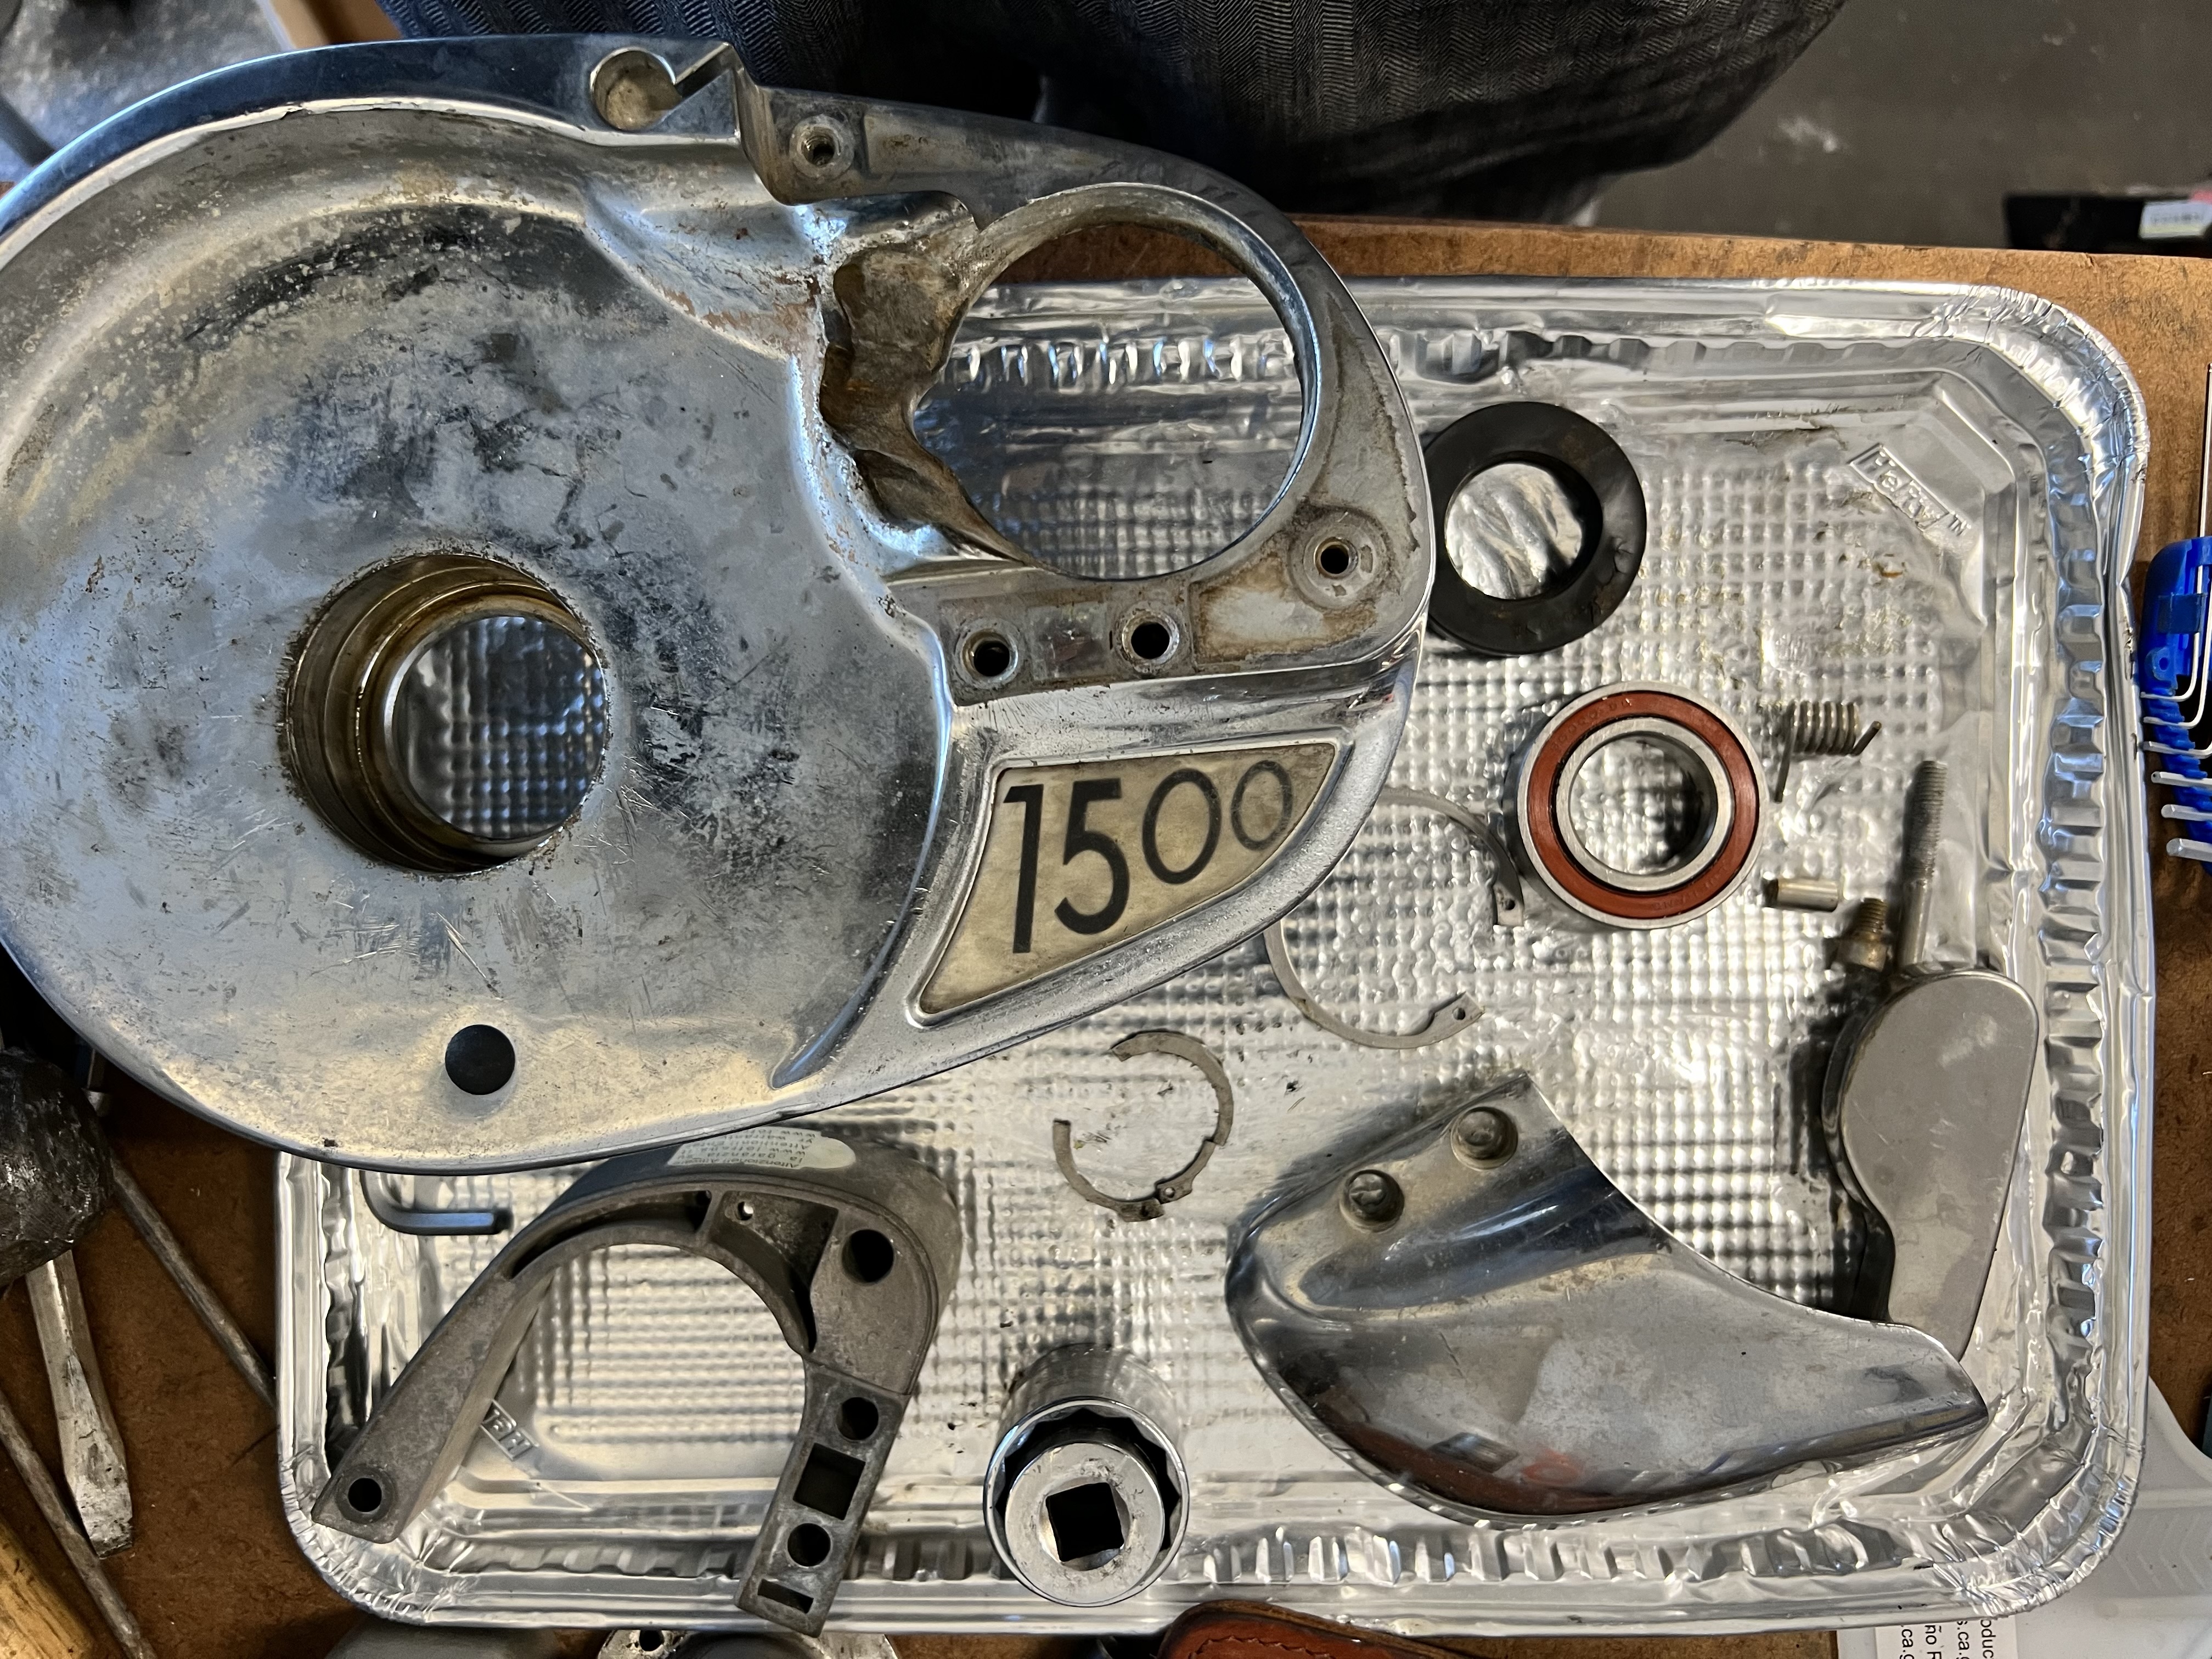
and then I squeezed and removed all three of the circlips holding the shaft and bearing into position. After a few taps with a soft hammer and block of wood from the underside, the shaft came out without too much trouble. Left inside the base is the bearing.
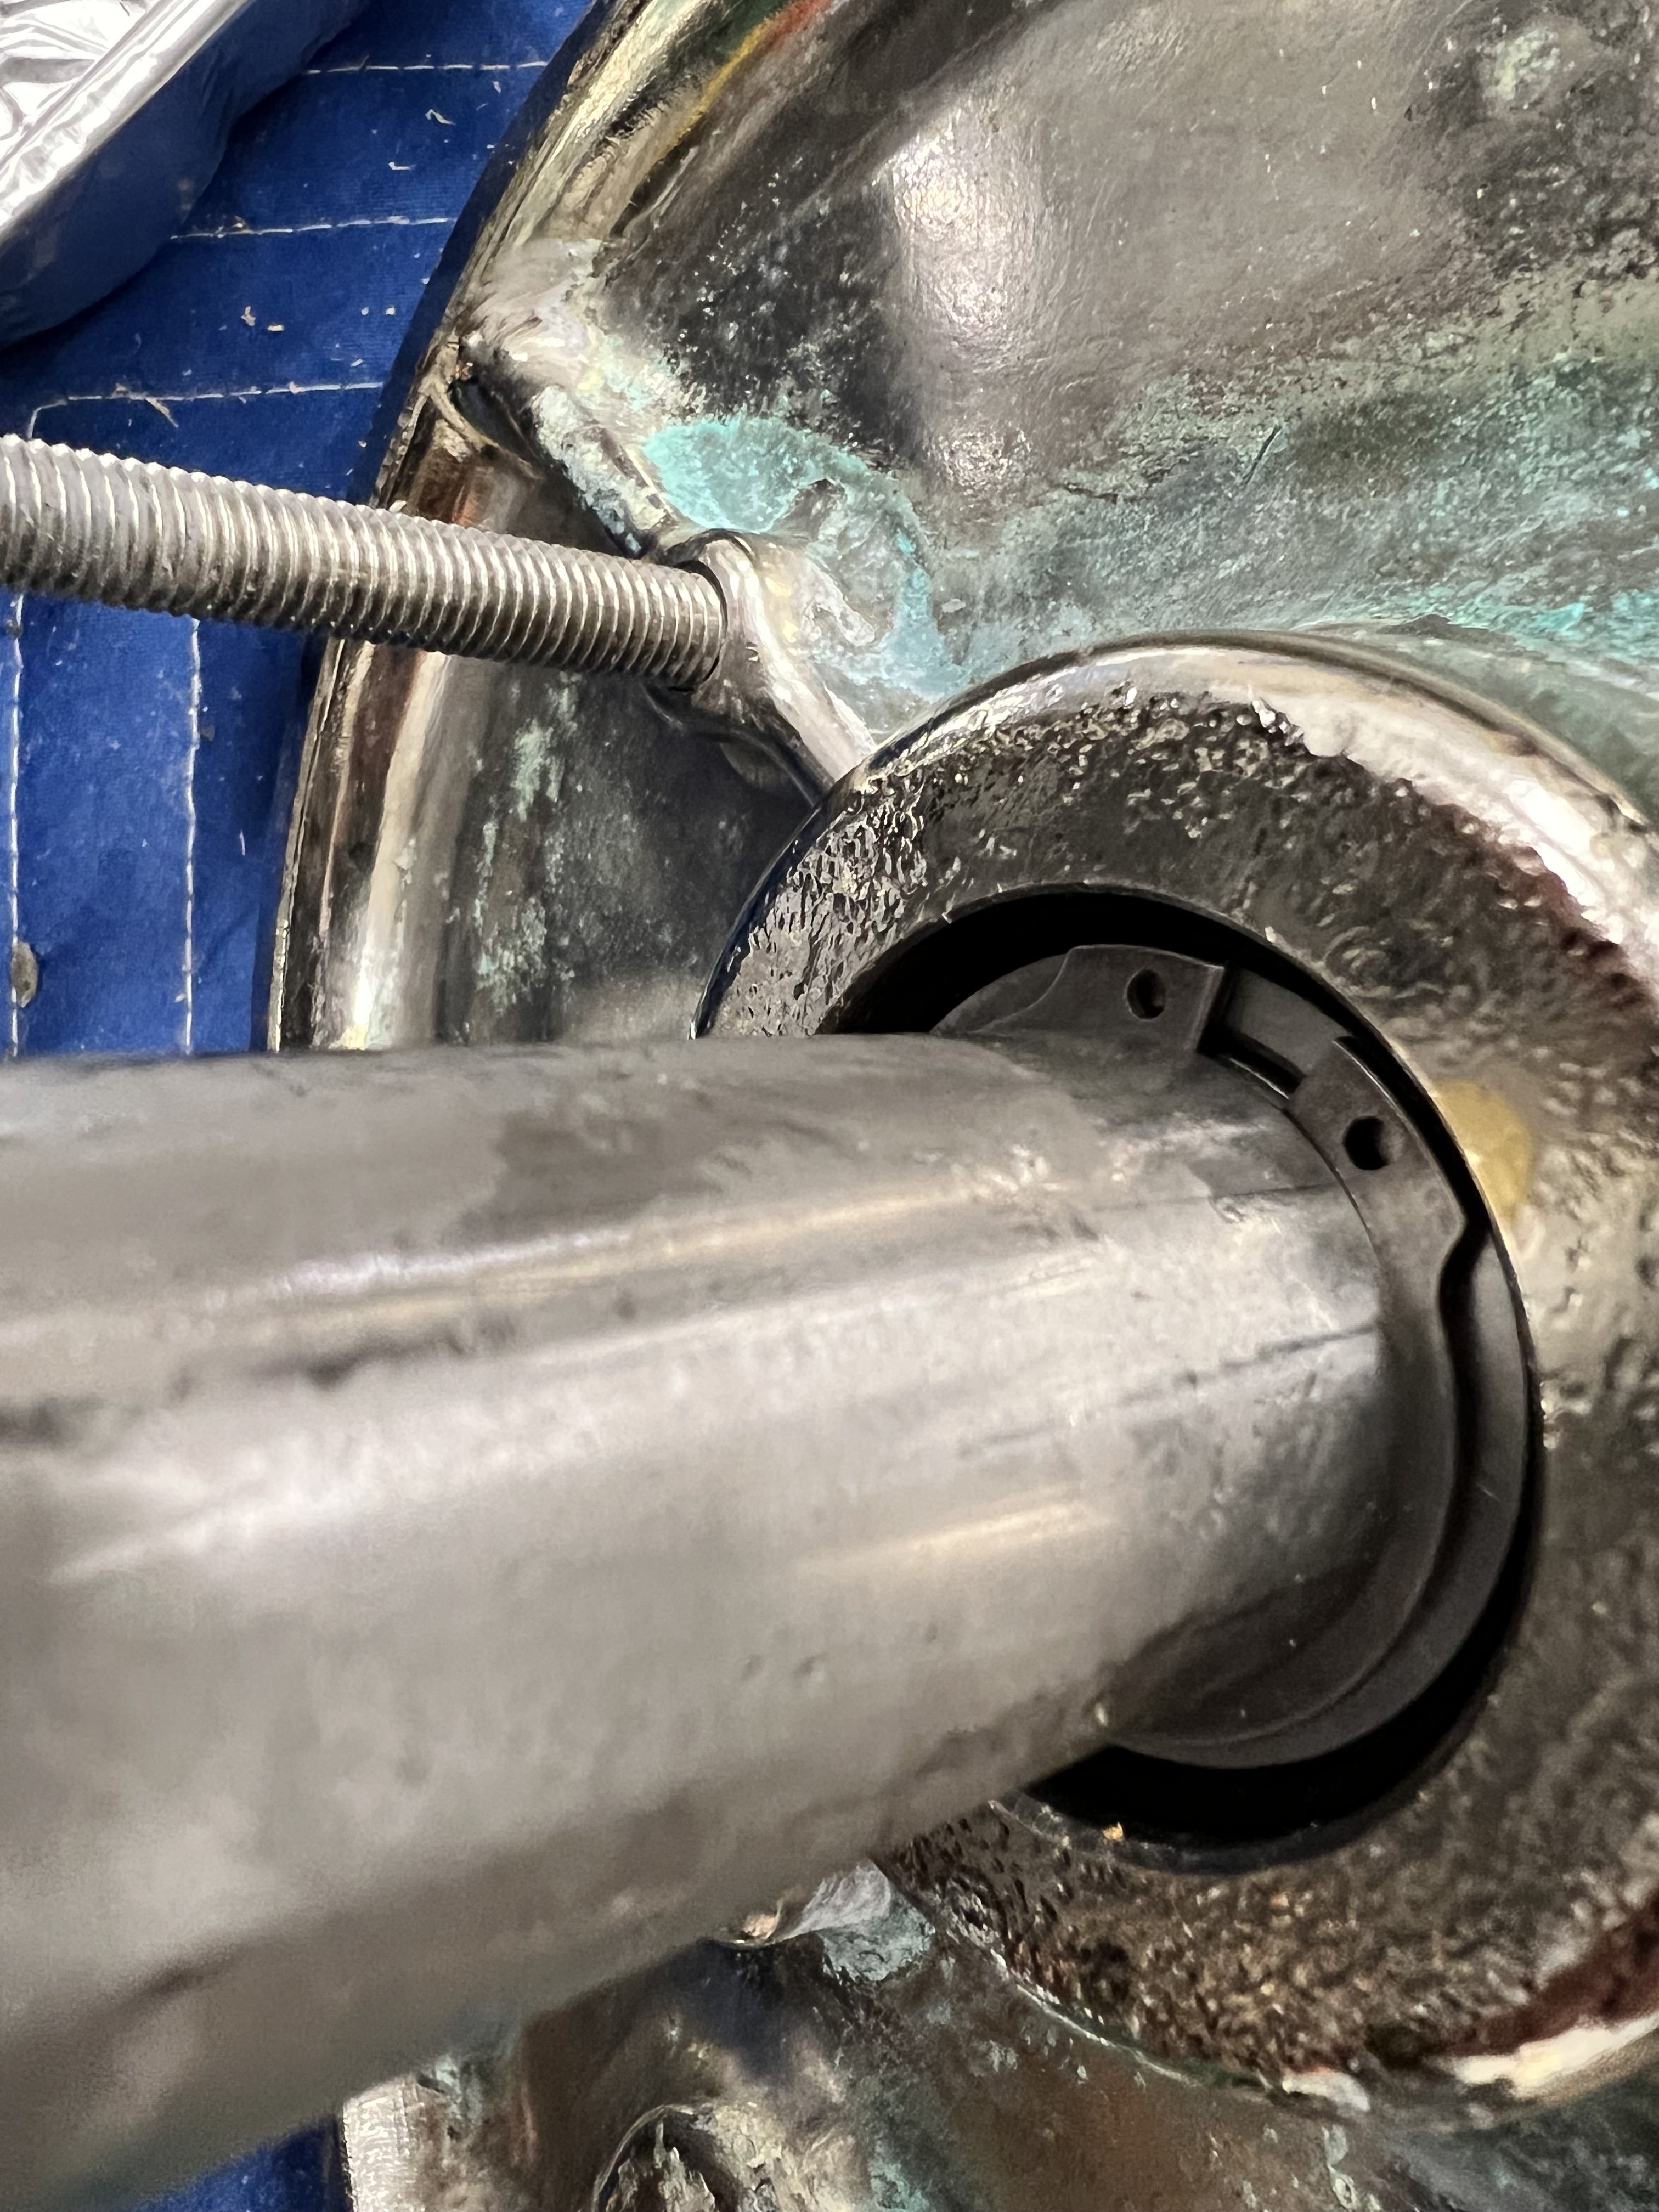
I used a combination of sockets to pound out the bearing from the underside of the base. Again, this was not complicated or tough to do. Once I had the bearing out, then all parts went into the mineral spirits bath for a soak and then cleaning with a metal brush.
While the parts were soaking, I bought my maintenance parts online from P2 Marine, and it appears they are based on Kent Island – not too far away. Here is the link to their parts page for this windlass. I received the parts within 1-2 days. That was what I call fast service. I love living in the Annapolis area for that reason. The only complaint is that I had to pay $275 for the maintenance kit of which I really only needed 3 circlips, the bearing and the seal – all of which probably cost $20 at the most. Now I have a kit with a wide assortment of o-rings, clips and seals for parts of the motor which will probably never be used.
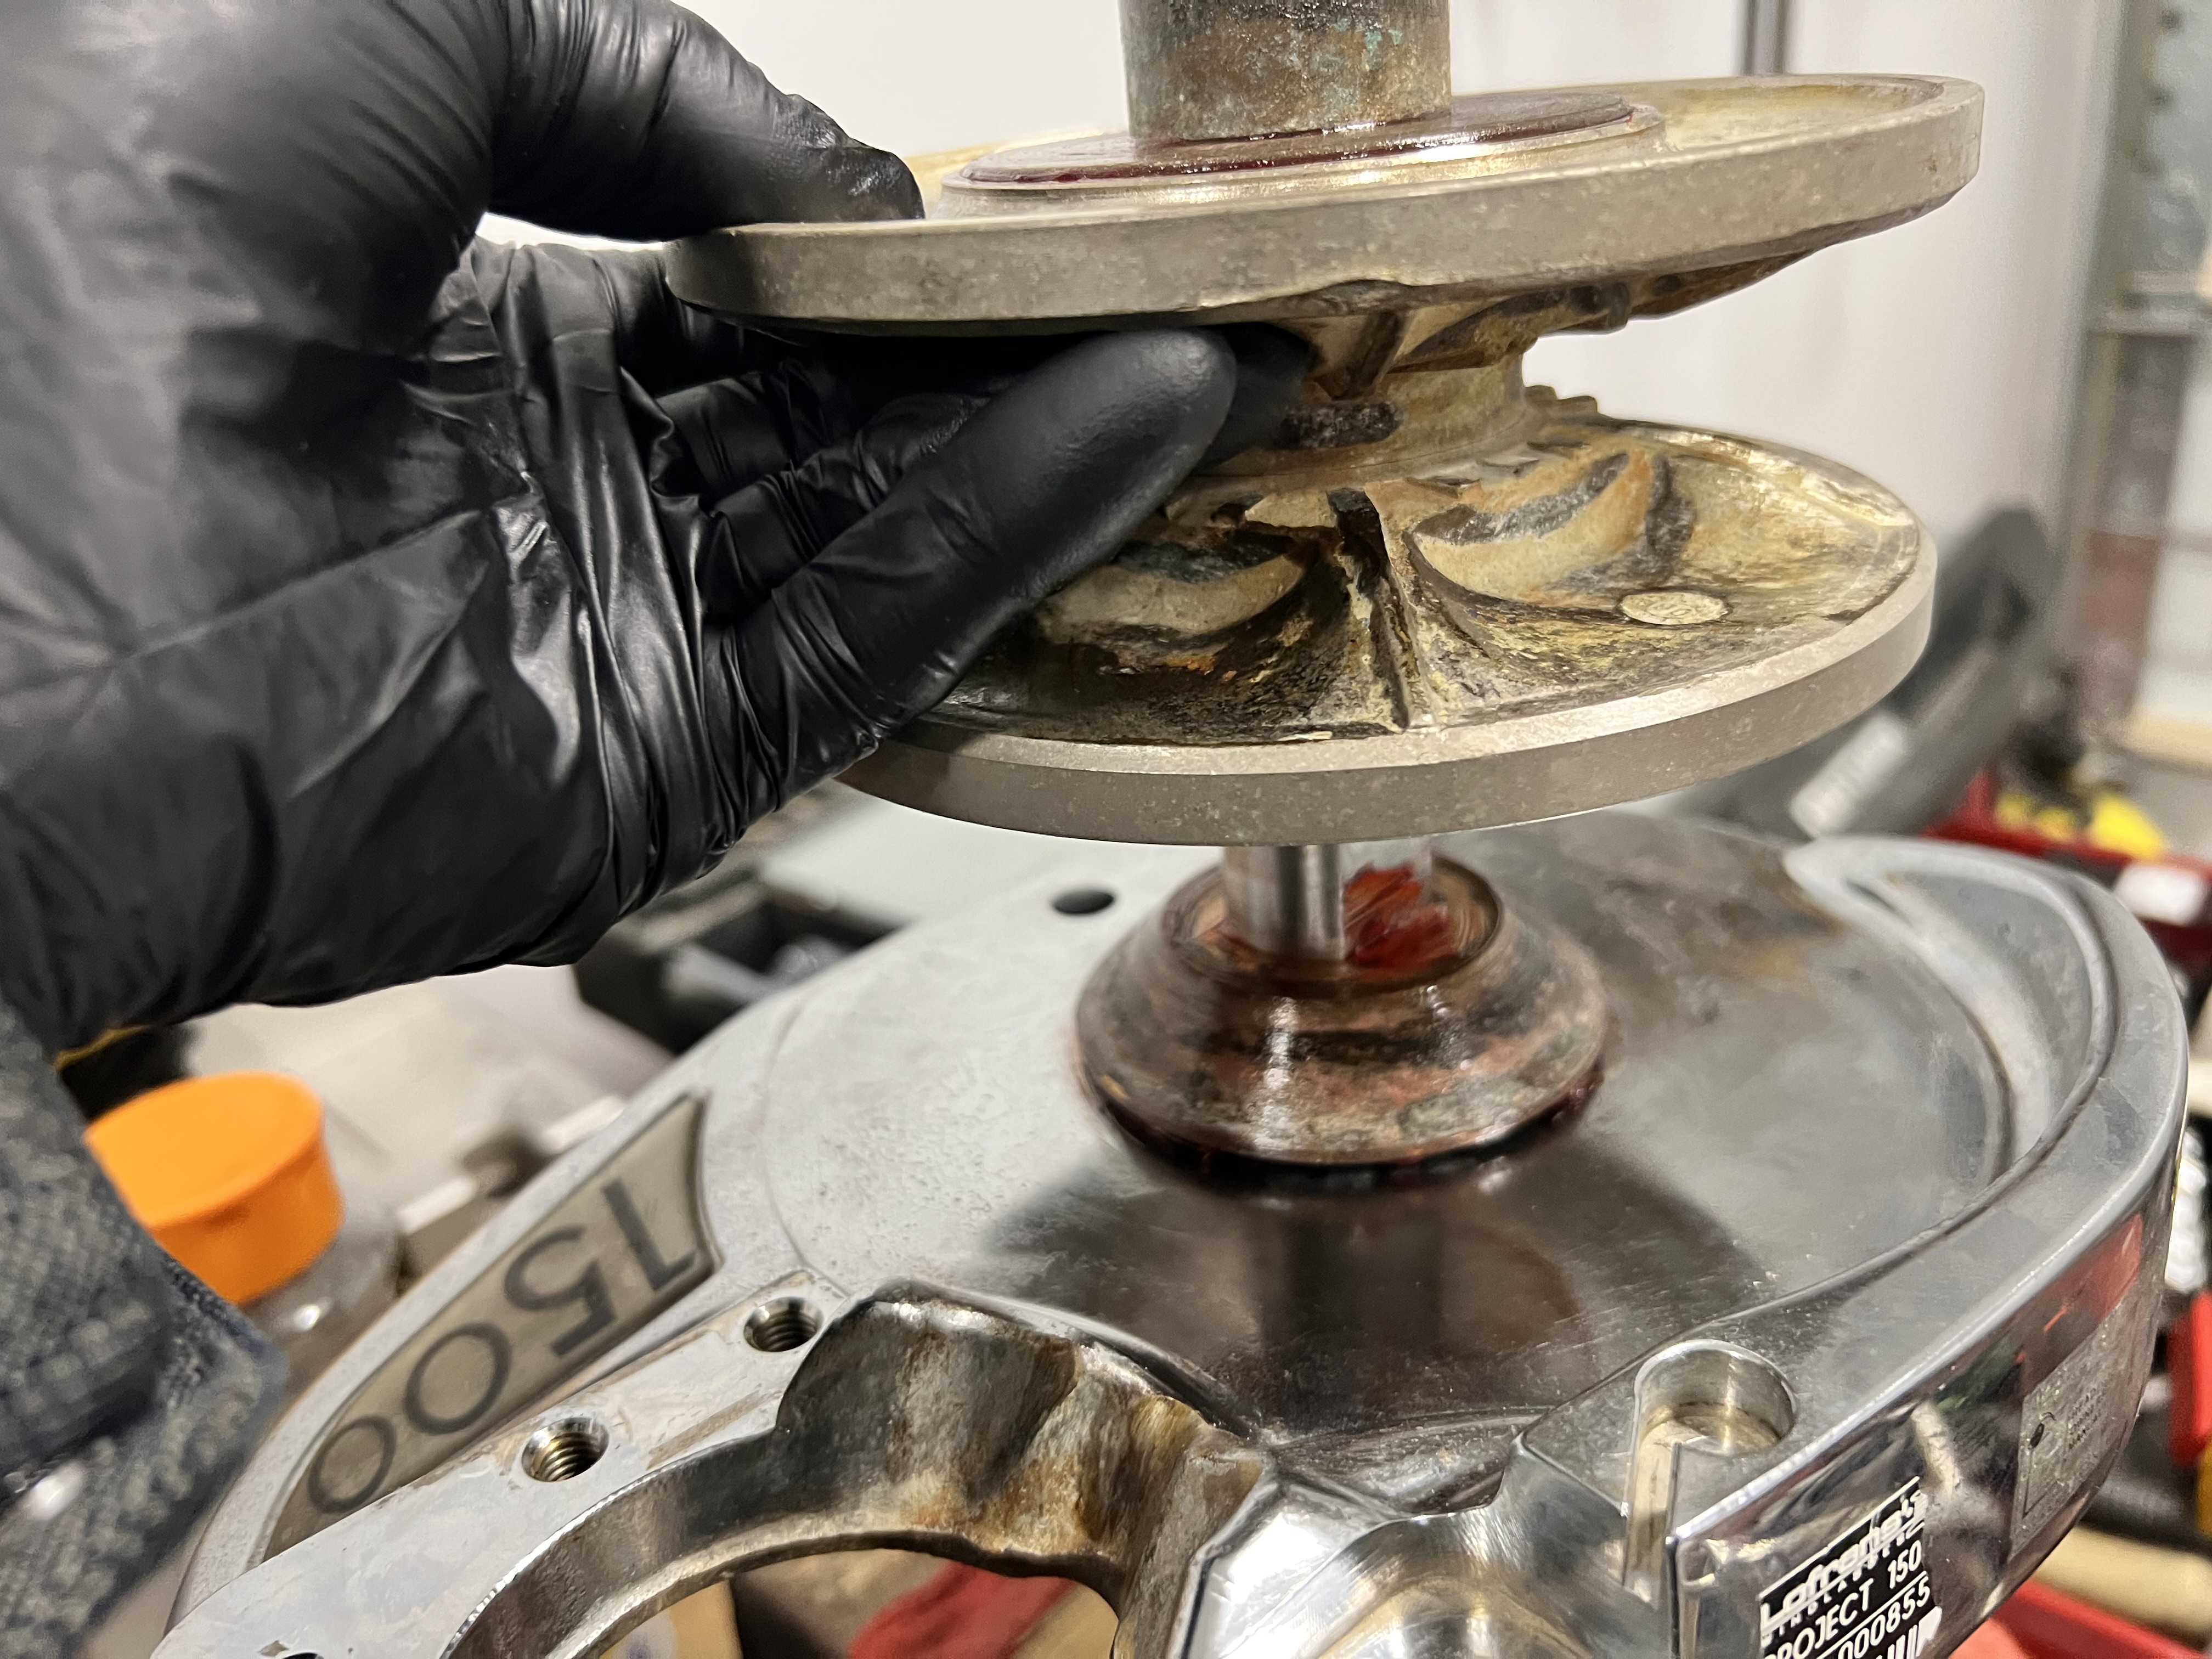
I installed the new bottom circlip on the shaft, the put the shaft inside the freezer at home. Rachel asked “what are you doing?”, and then I had a crude response. She let me go this time! Then I wrapped the bearing inside of a hot pad that you use on your back when you pull a muscle. After about 15 minutes both the shaft and the bearing were put together, and the bearing slid down the shaft with ease. Just a few light poundings from the gypsy (perfect diameter) did the final touch.
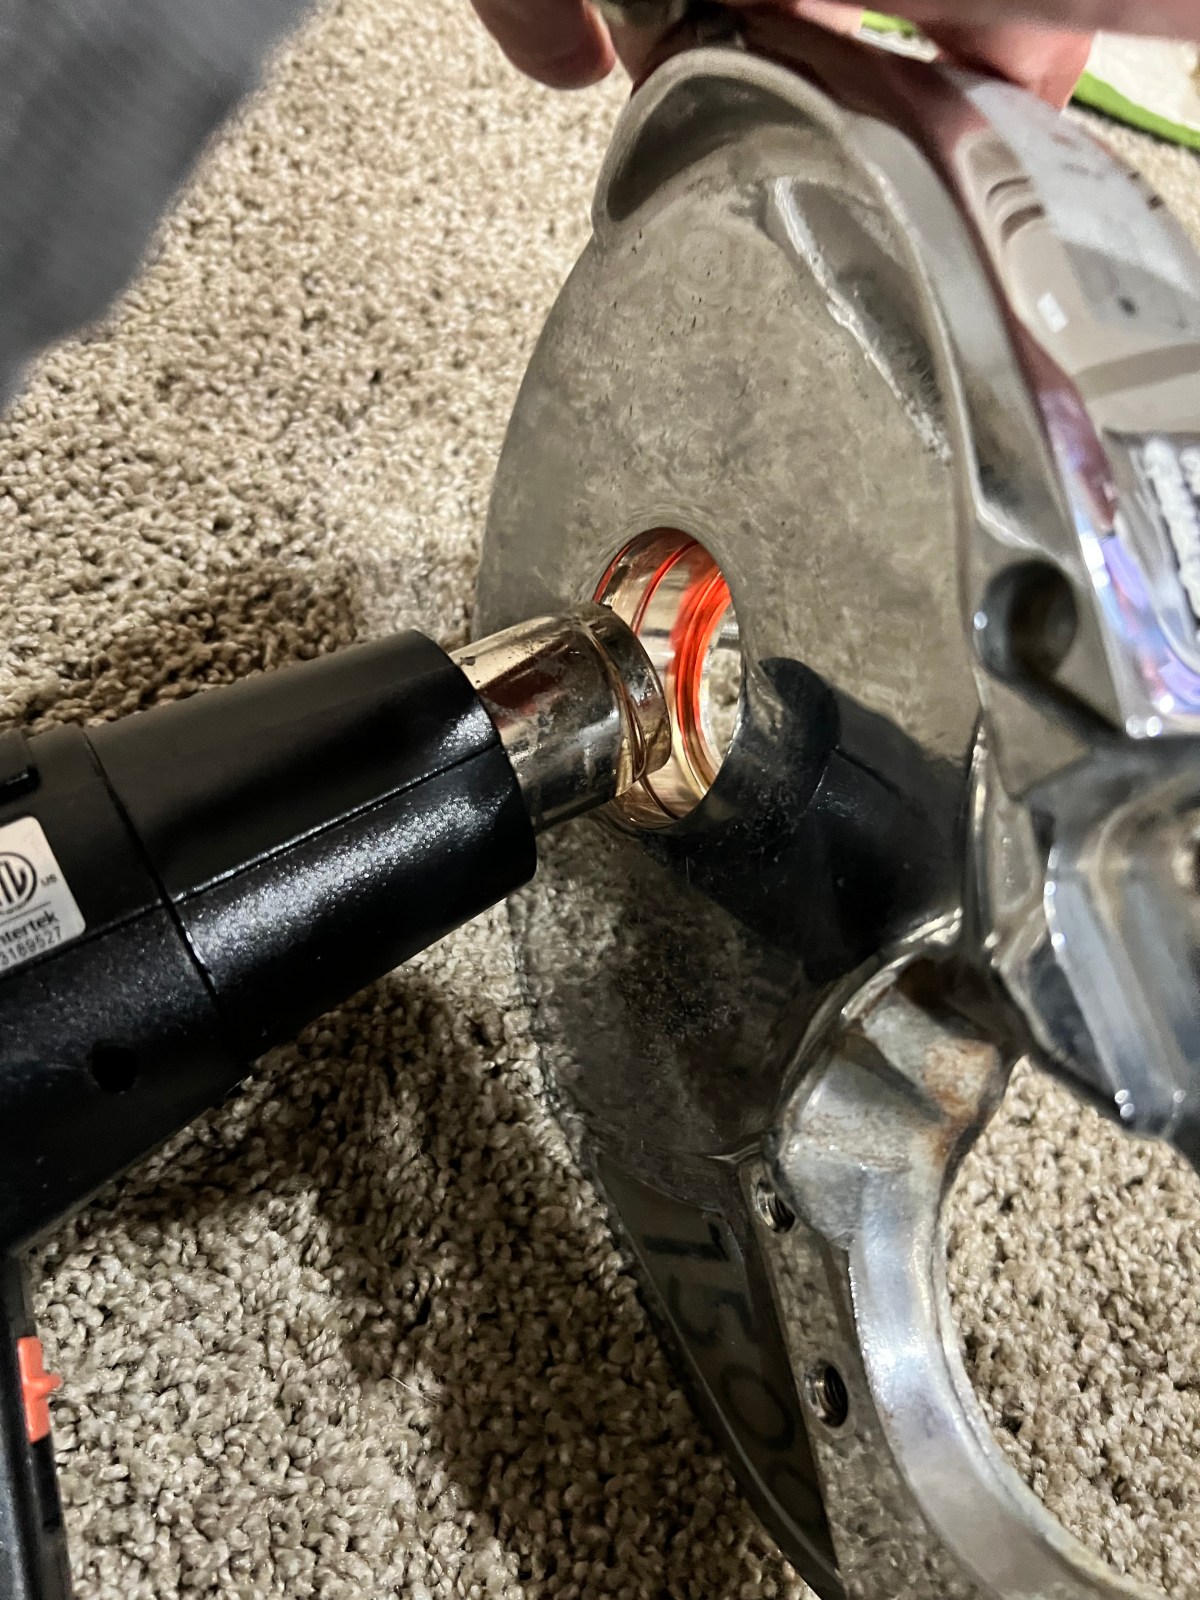
After installing the top circlip, my next brilliant idea was to heat up the base and put the shaft/bearing assembly in the freezer again. After about 15 minutes, I brought out the heat gun and flipped the windlass base on its side so I could get the mass heated up. The heat guns are really quite effective with metal. I moved it all around heating up the large mass and then the area around the mass where the bearing sits.

Then I pulled out the shaft/bearing assembly and started to pound it into the base. It went in but required more influence than I thought would be needed. I toiled with that for maybe 15 minutes. Once it was seated, I breathed a sigh of relief and installed the larger circlip to secure the assembly to the base on the topside.
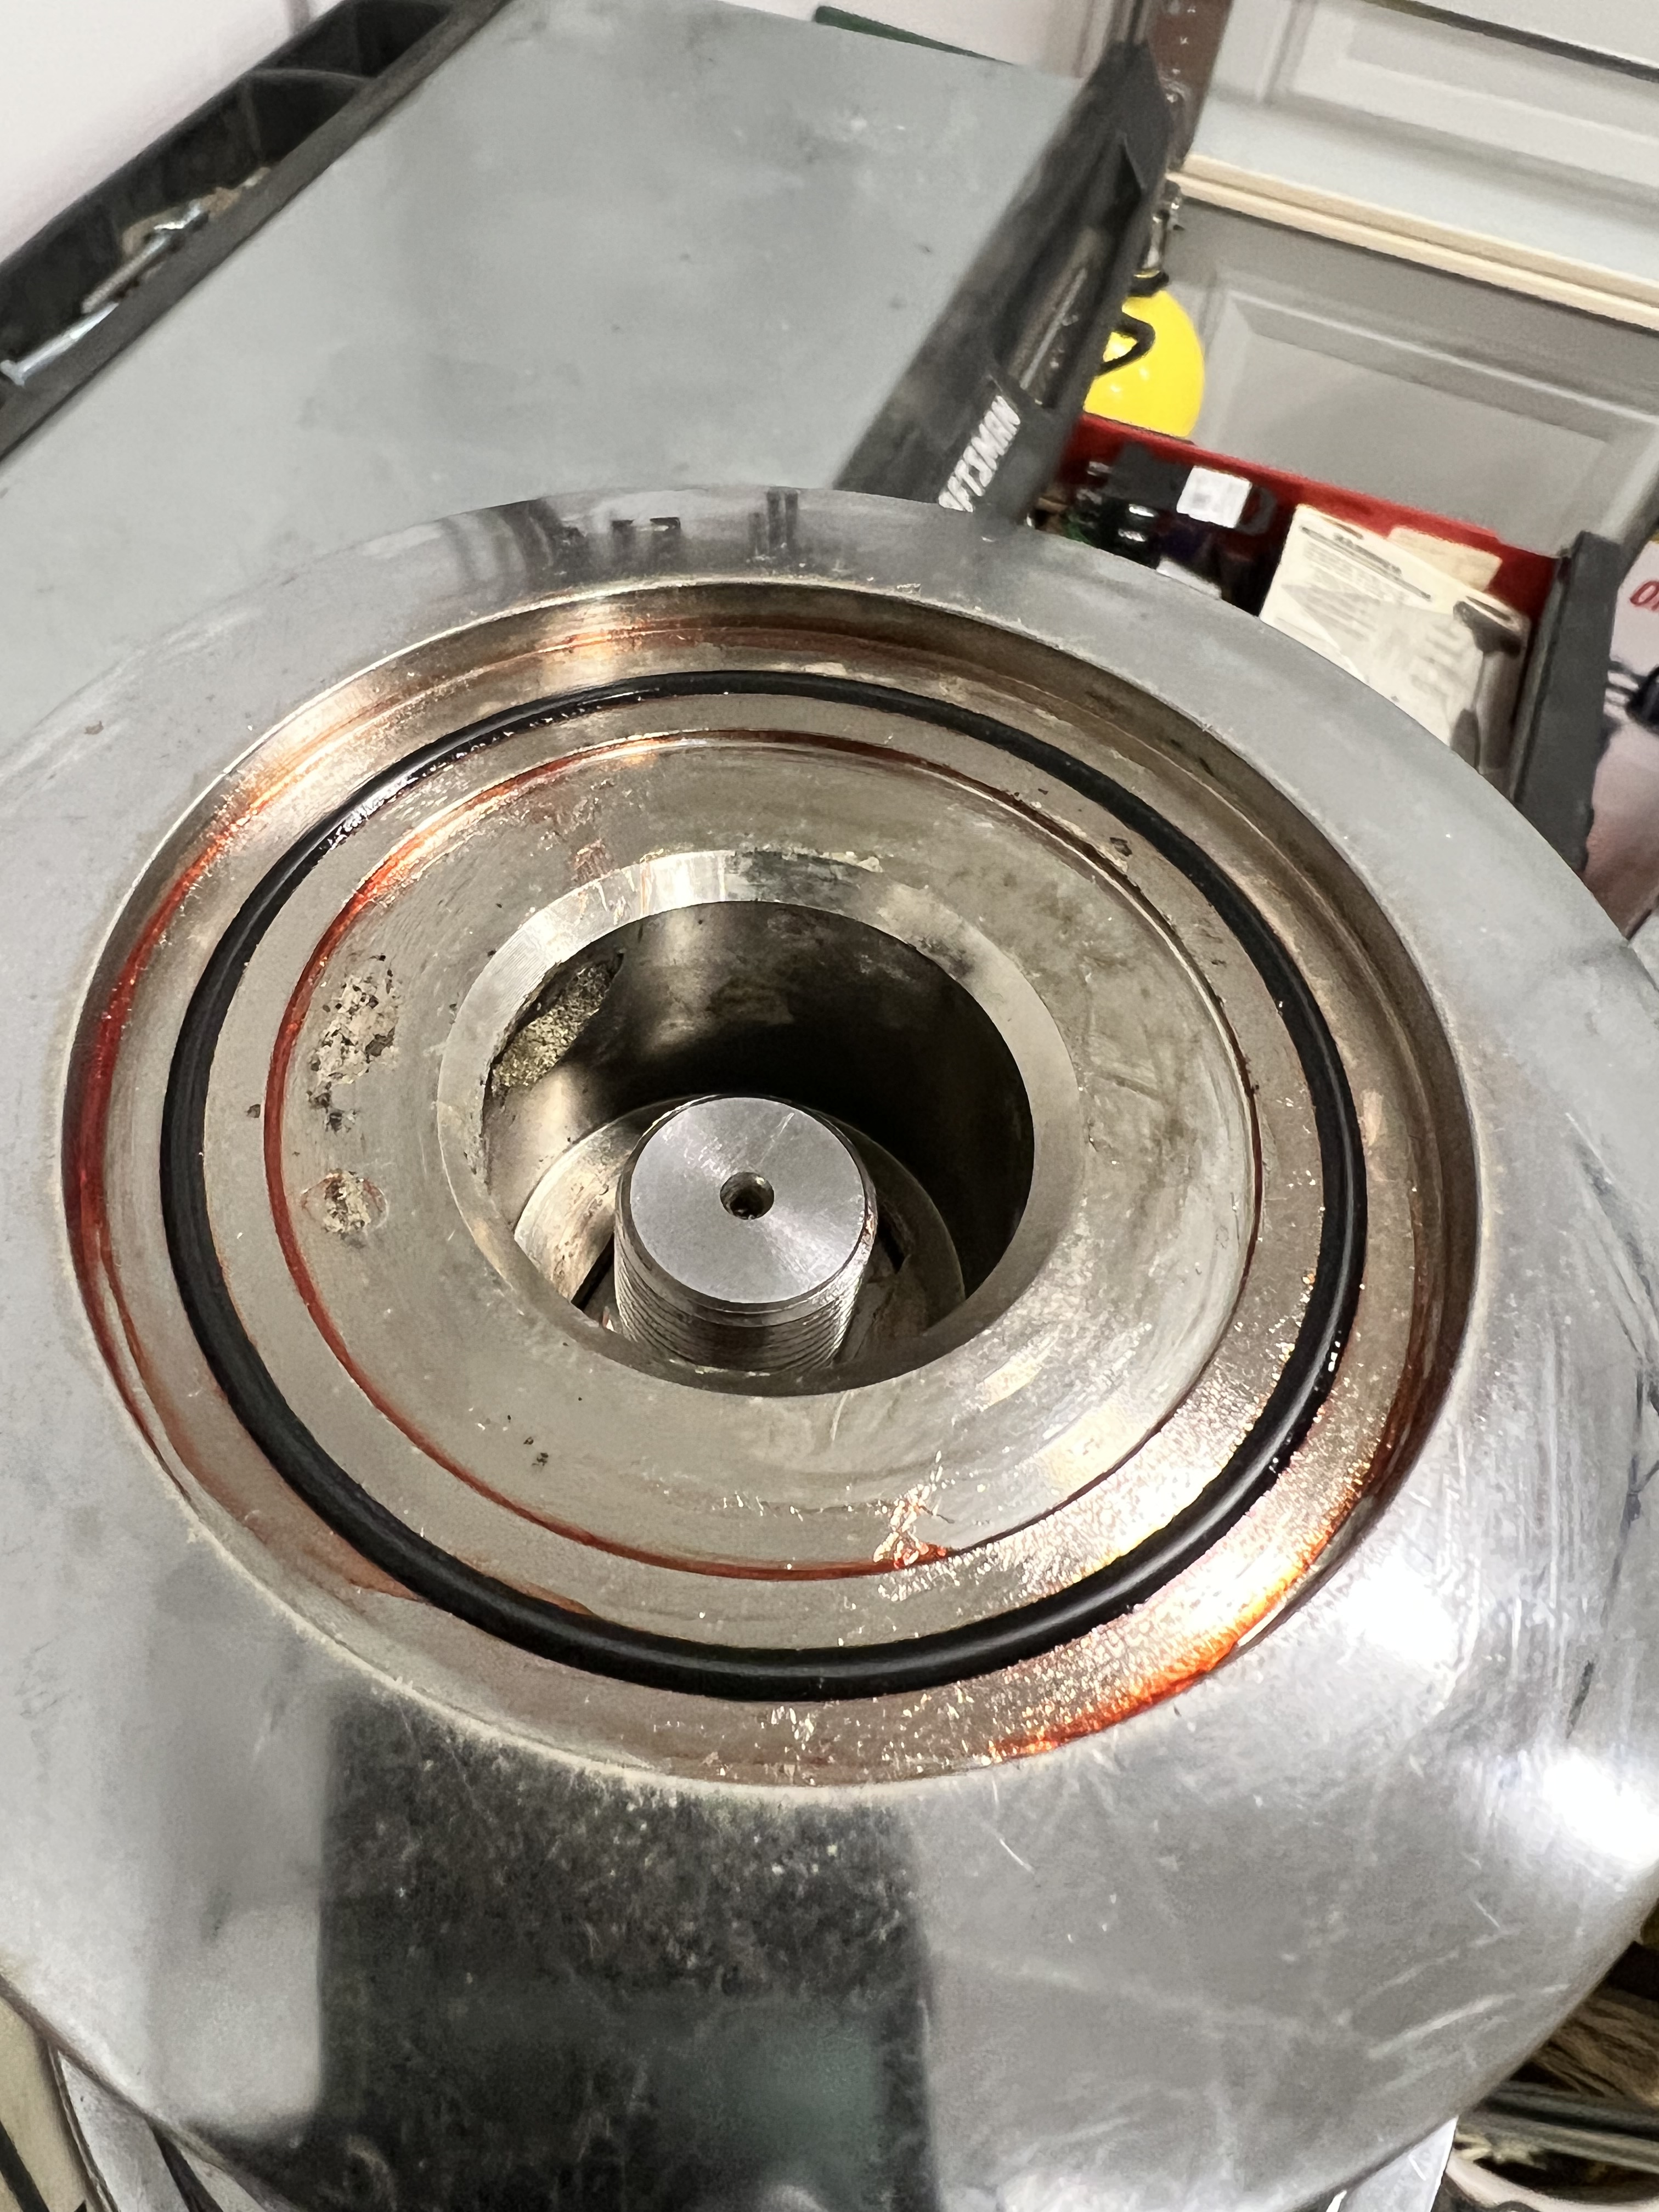
I used lithium great to fill the cavity above the bearing and below where the seal would sit. Then I installed the seal with light tapping with a hammer and other persuasion tools. Once that was on, I greased up the lower and upper clutch cones and set them in place on the shaft.
Finally, I installed an o-ring in the top groove of the rope drum and put the rest of the topside of the windlass together. All done. Simple and fun job. Oh, but back to when I was using the heat gun…well, apparently, I was a little careless and I burnt the carpet. So now I will have another project for the house!
The windlass is in okay shape. It isn’t new, it is 25 years old. I saw some corrosion and markings that you wouldn’t see obviously on a new windlass. But a new replacement windlass would cost about $4000 from P2 Marine. Maybe this would be worthwhile having as a spare? I’d have to do more research before dropping that kind of money.

