
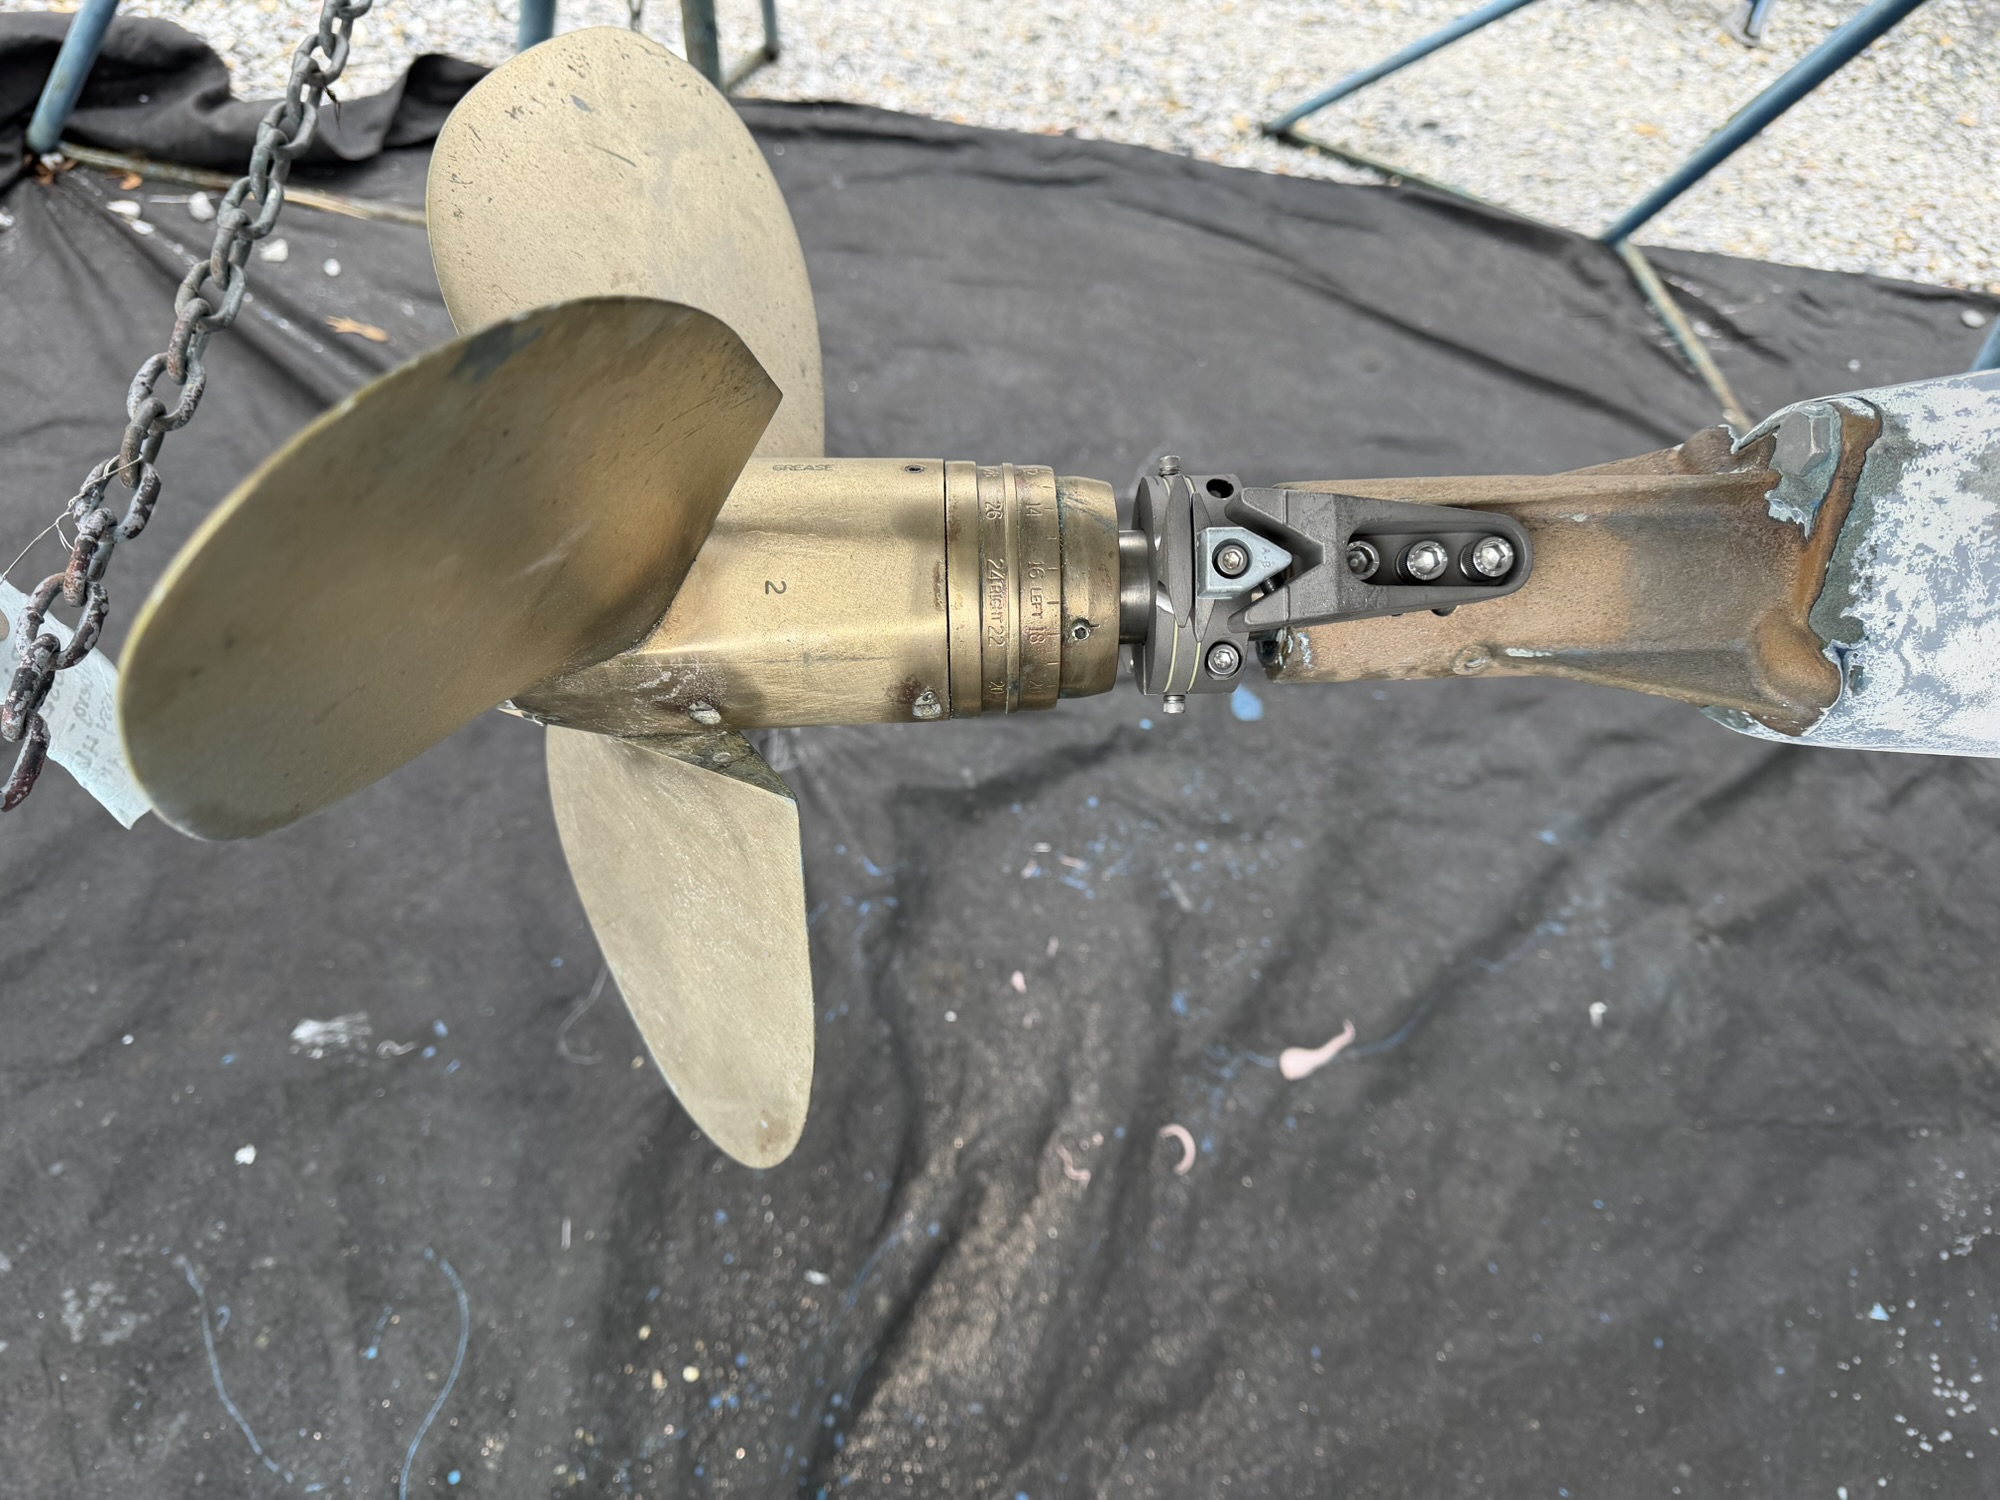
The last trip I took on Astra (HR48), we caught something in the proppeller while running the engine 100’s of miles offshore Between Bermuda and Antigua. It made a very loud bang sound and we could feel a vibration above a certain RPM. When we turned on the engine, we kept it at low speed the rest of the way. Upon arrival in Jolly Harbour, the captain dove and found remnants of a fishing net wrapped around the propeller. That boat had a rope cutter, but I do not recall which brand/style. This post is all about how I installed a new rope cutter on Skyward starting with a fresh slate.
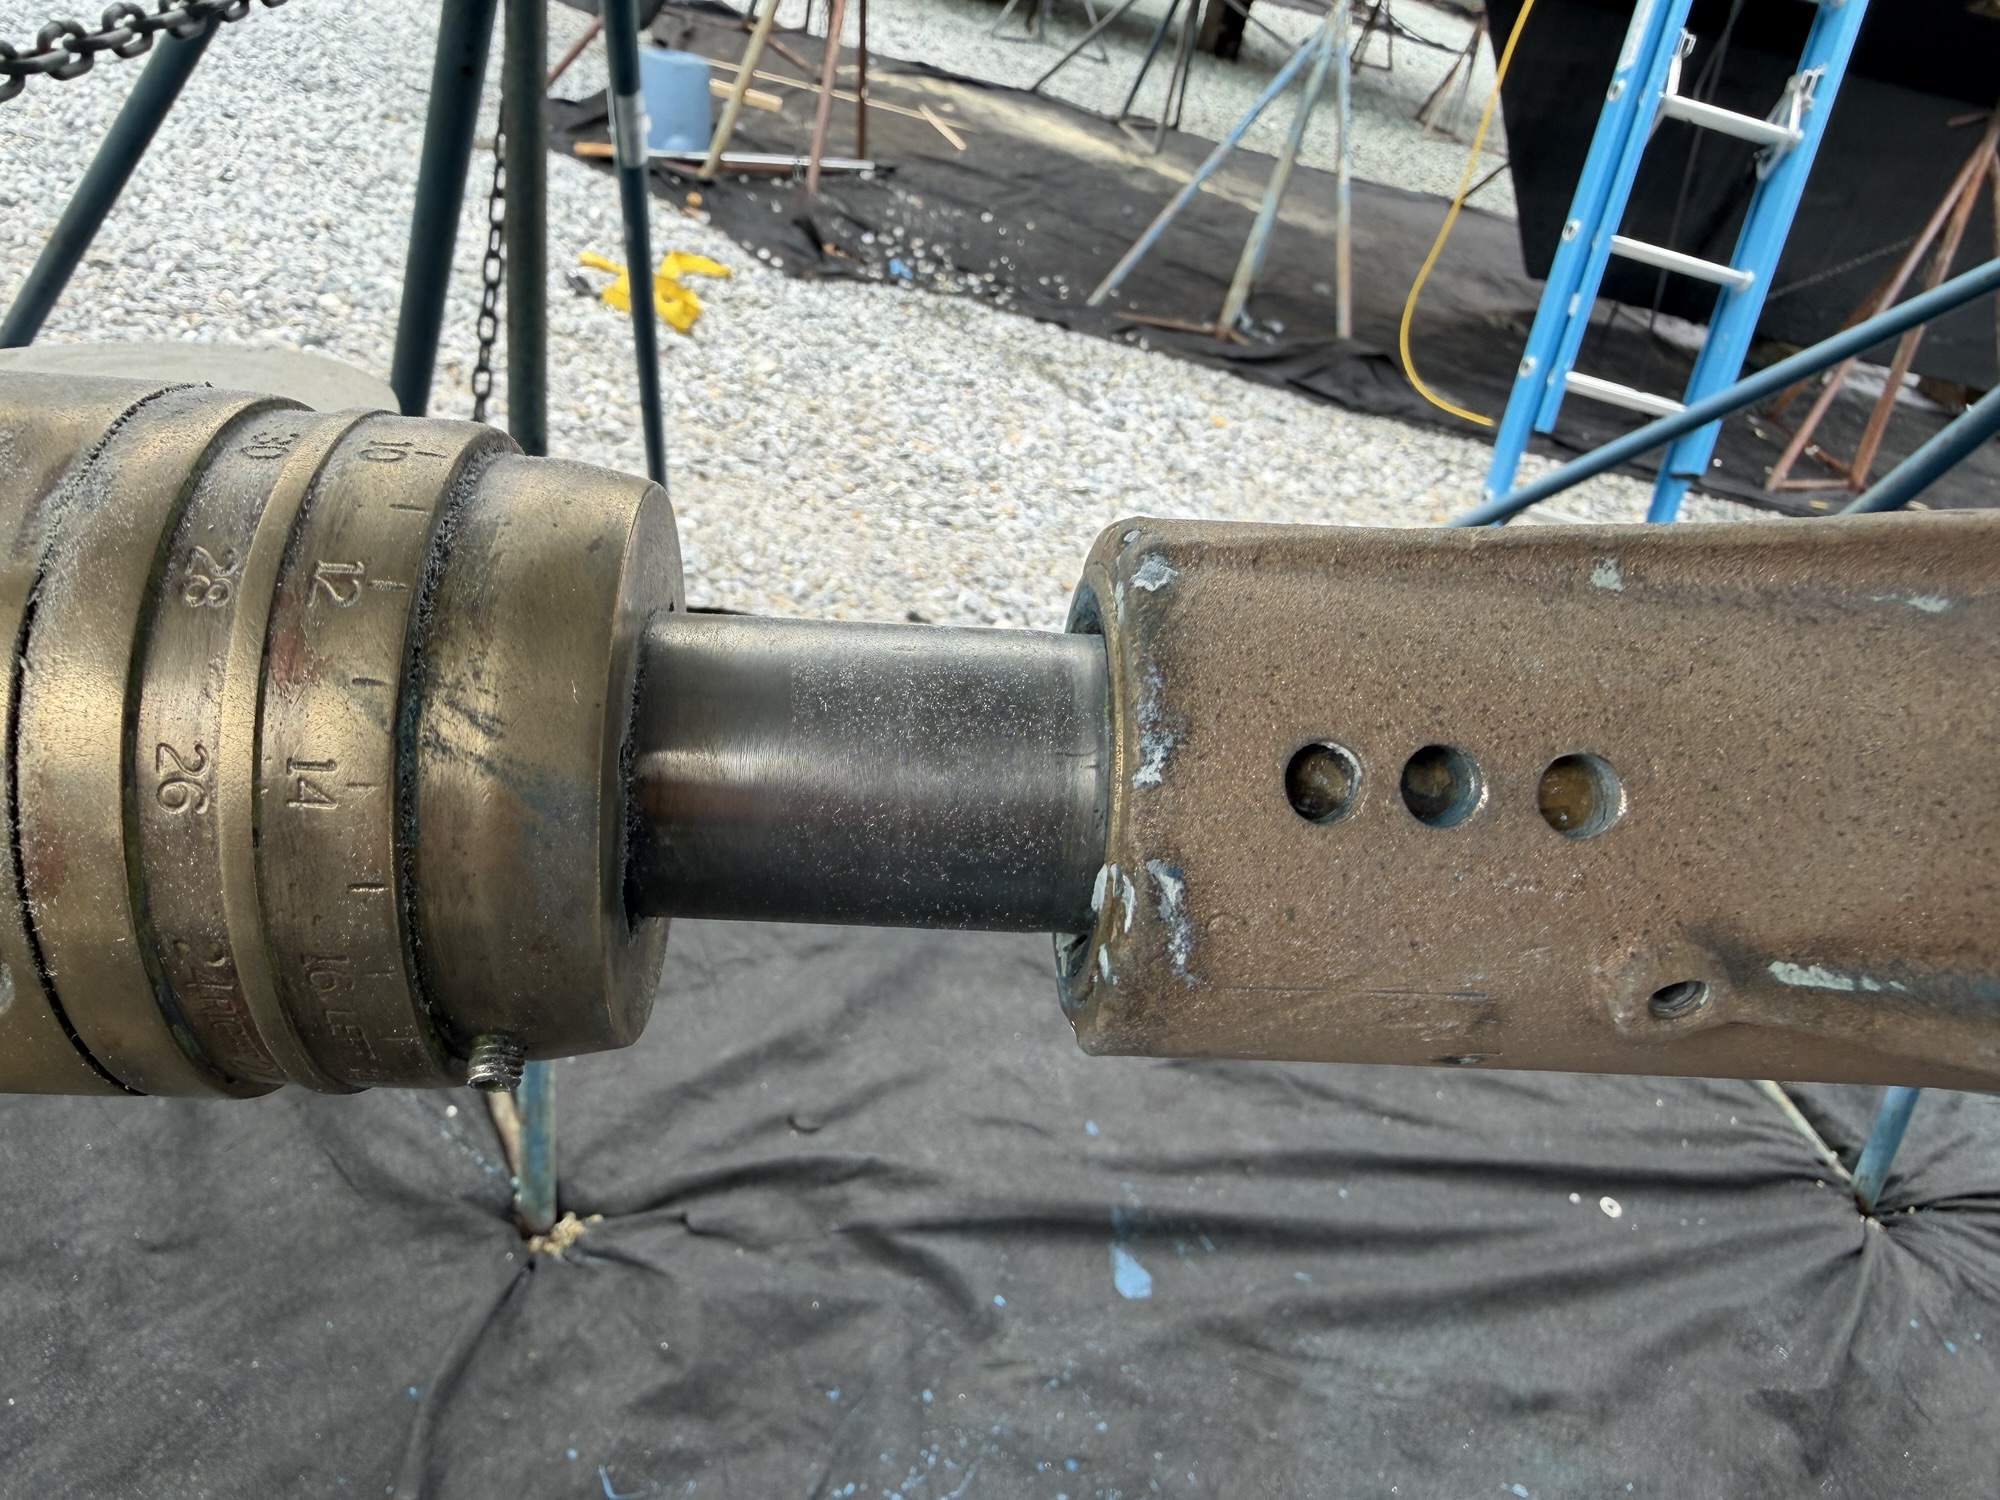
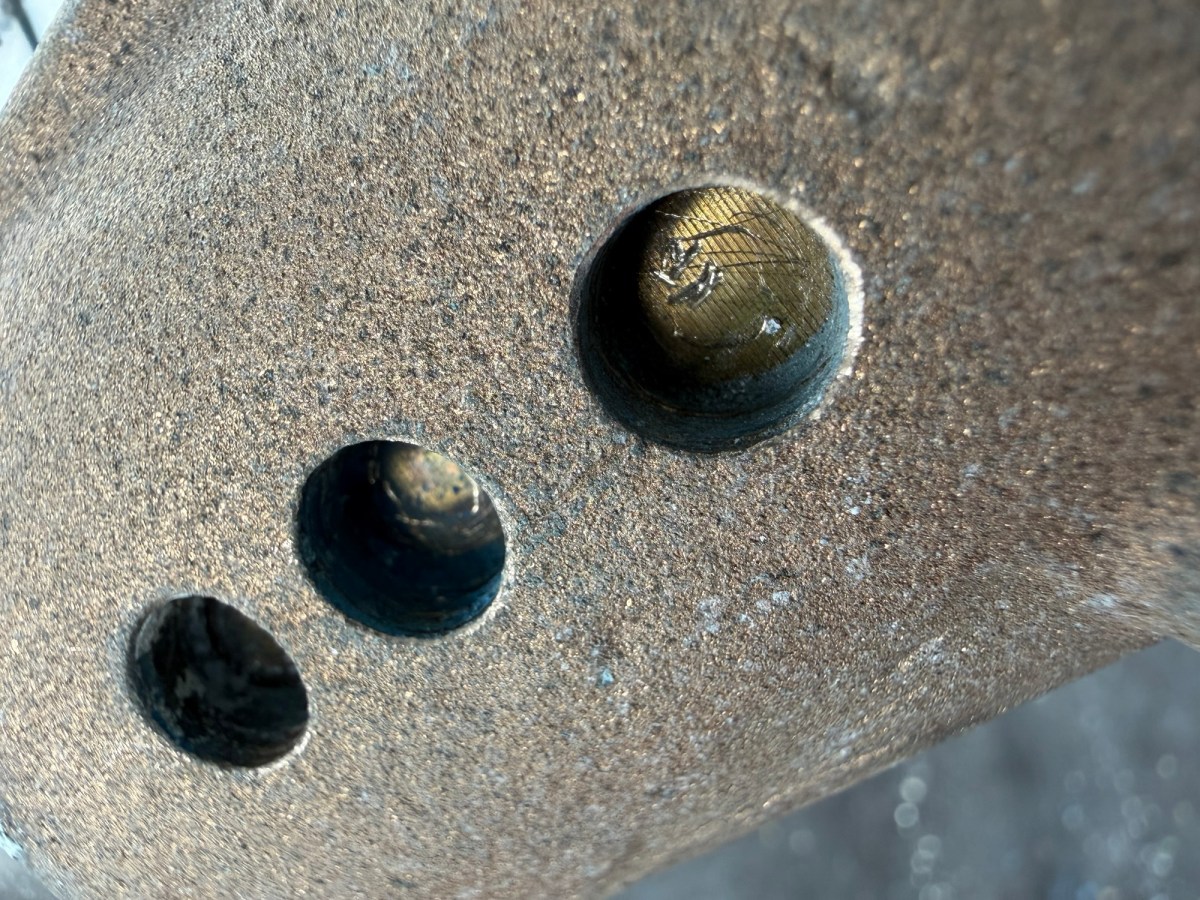
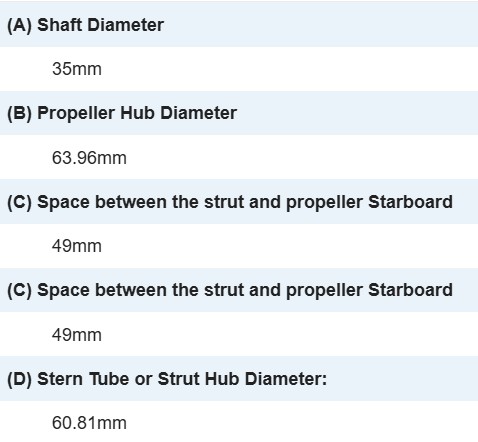
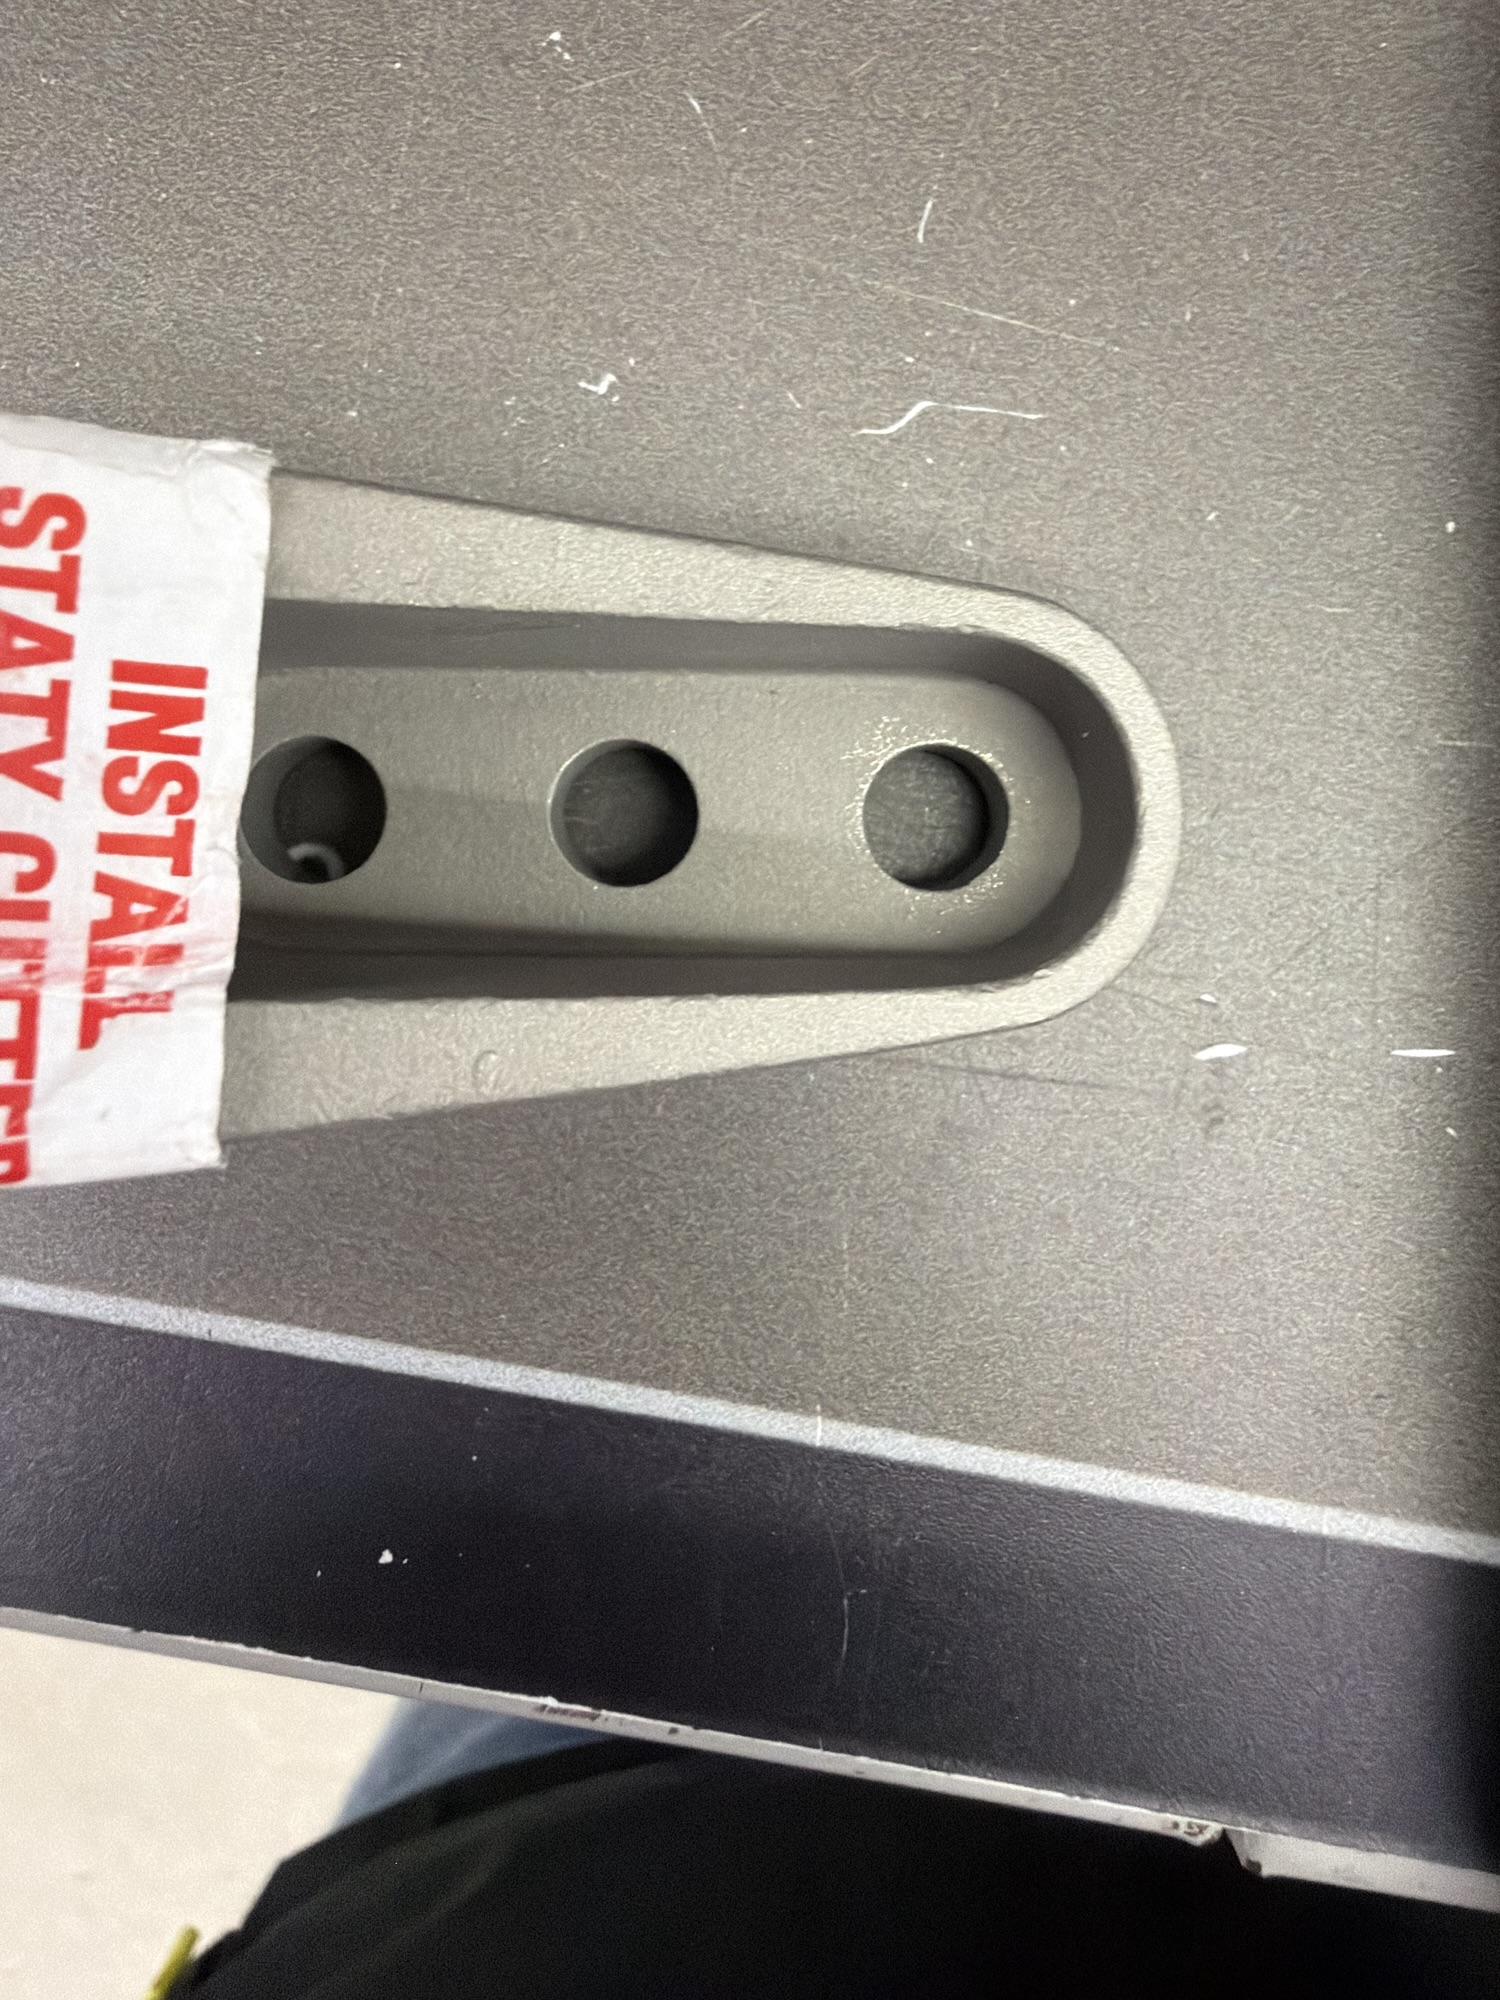
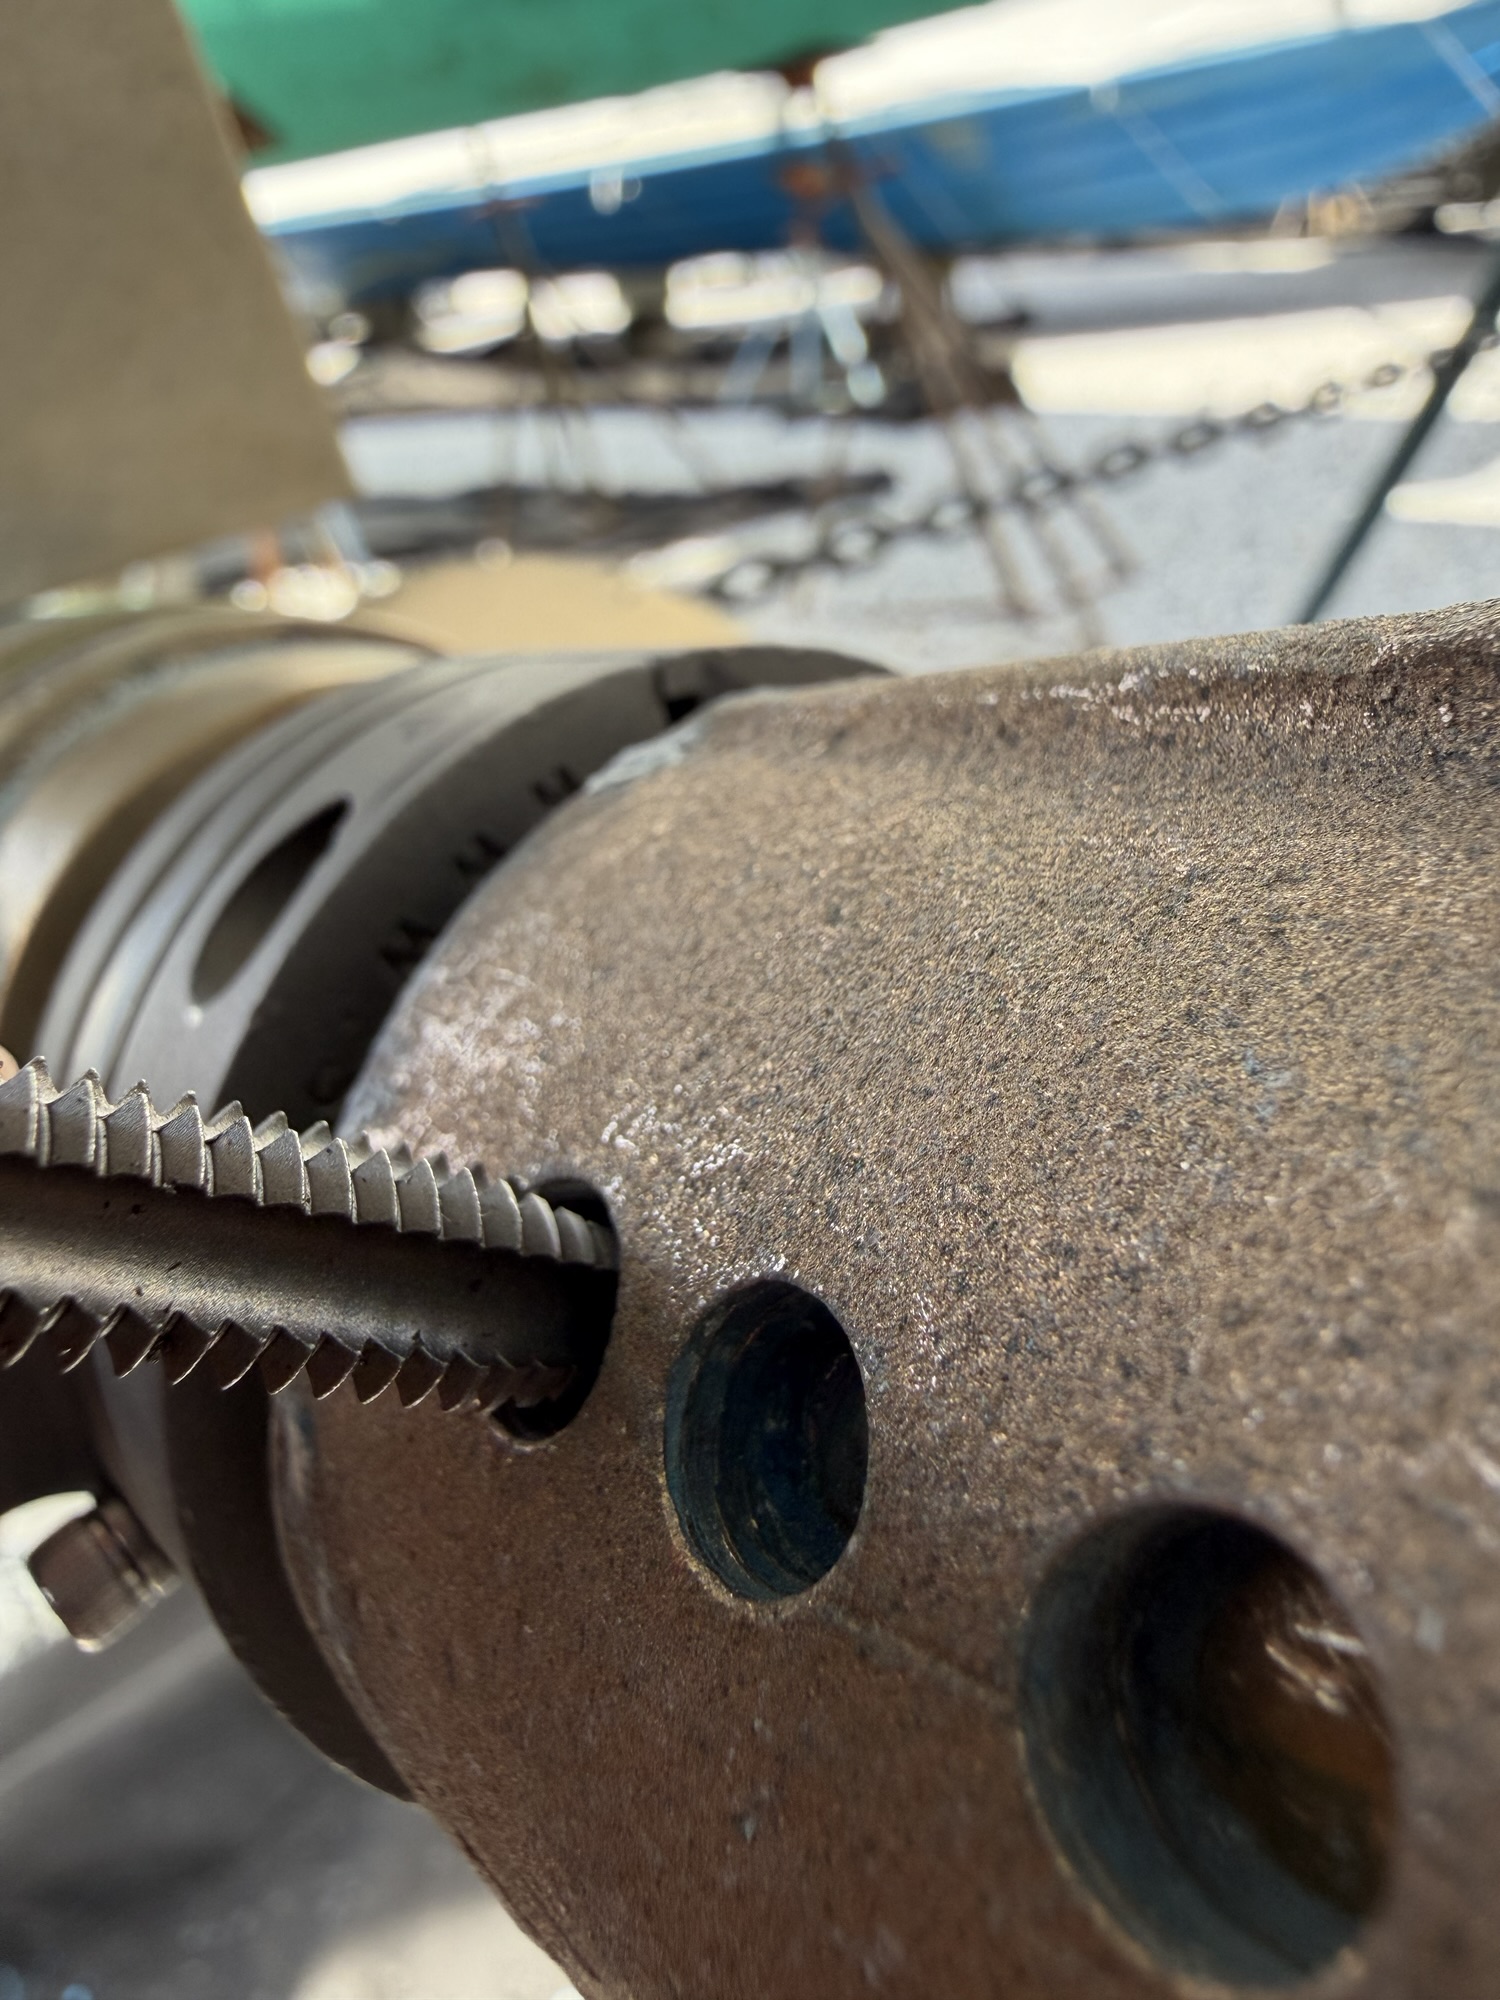
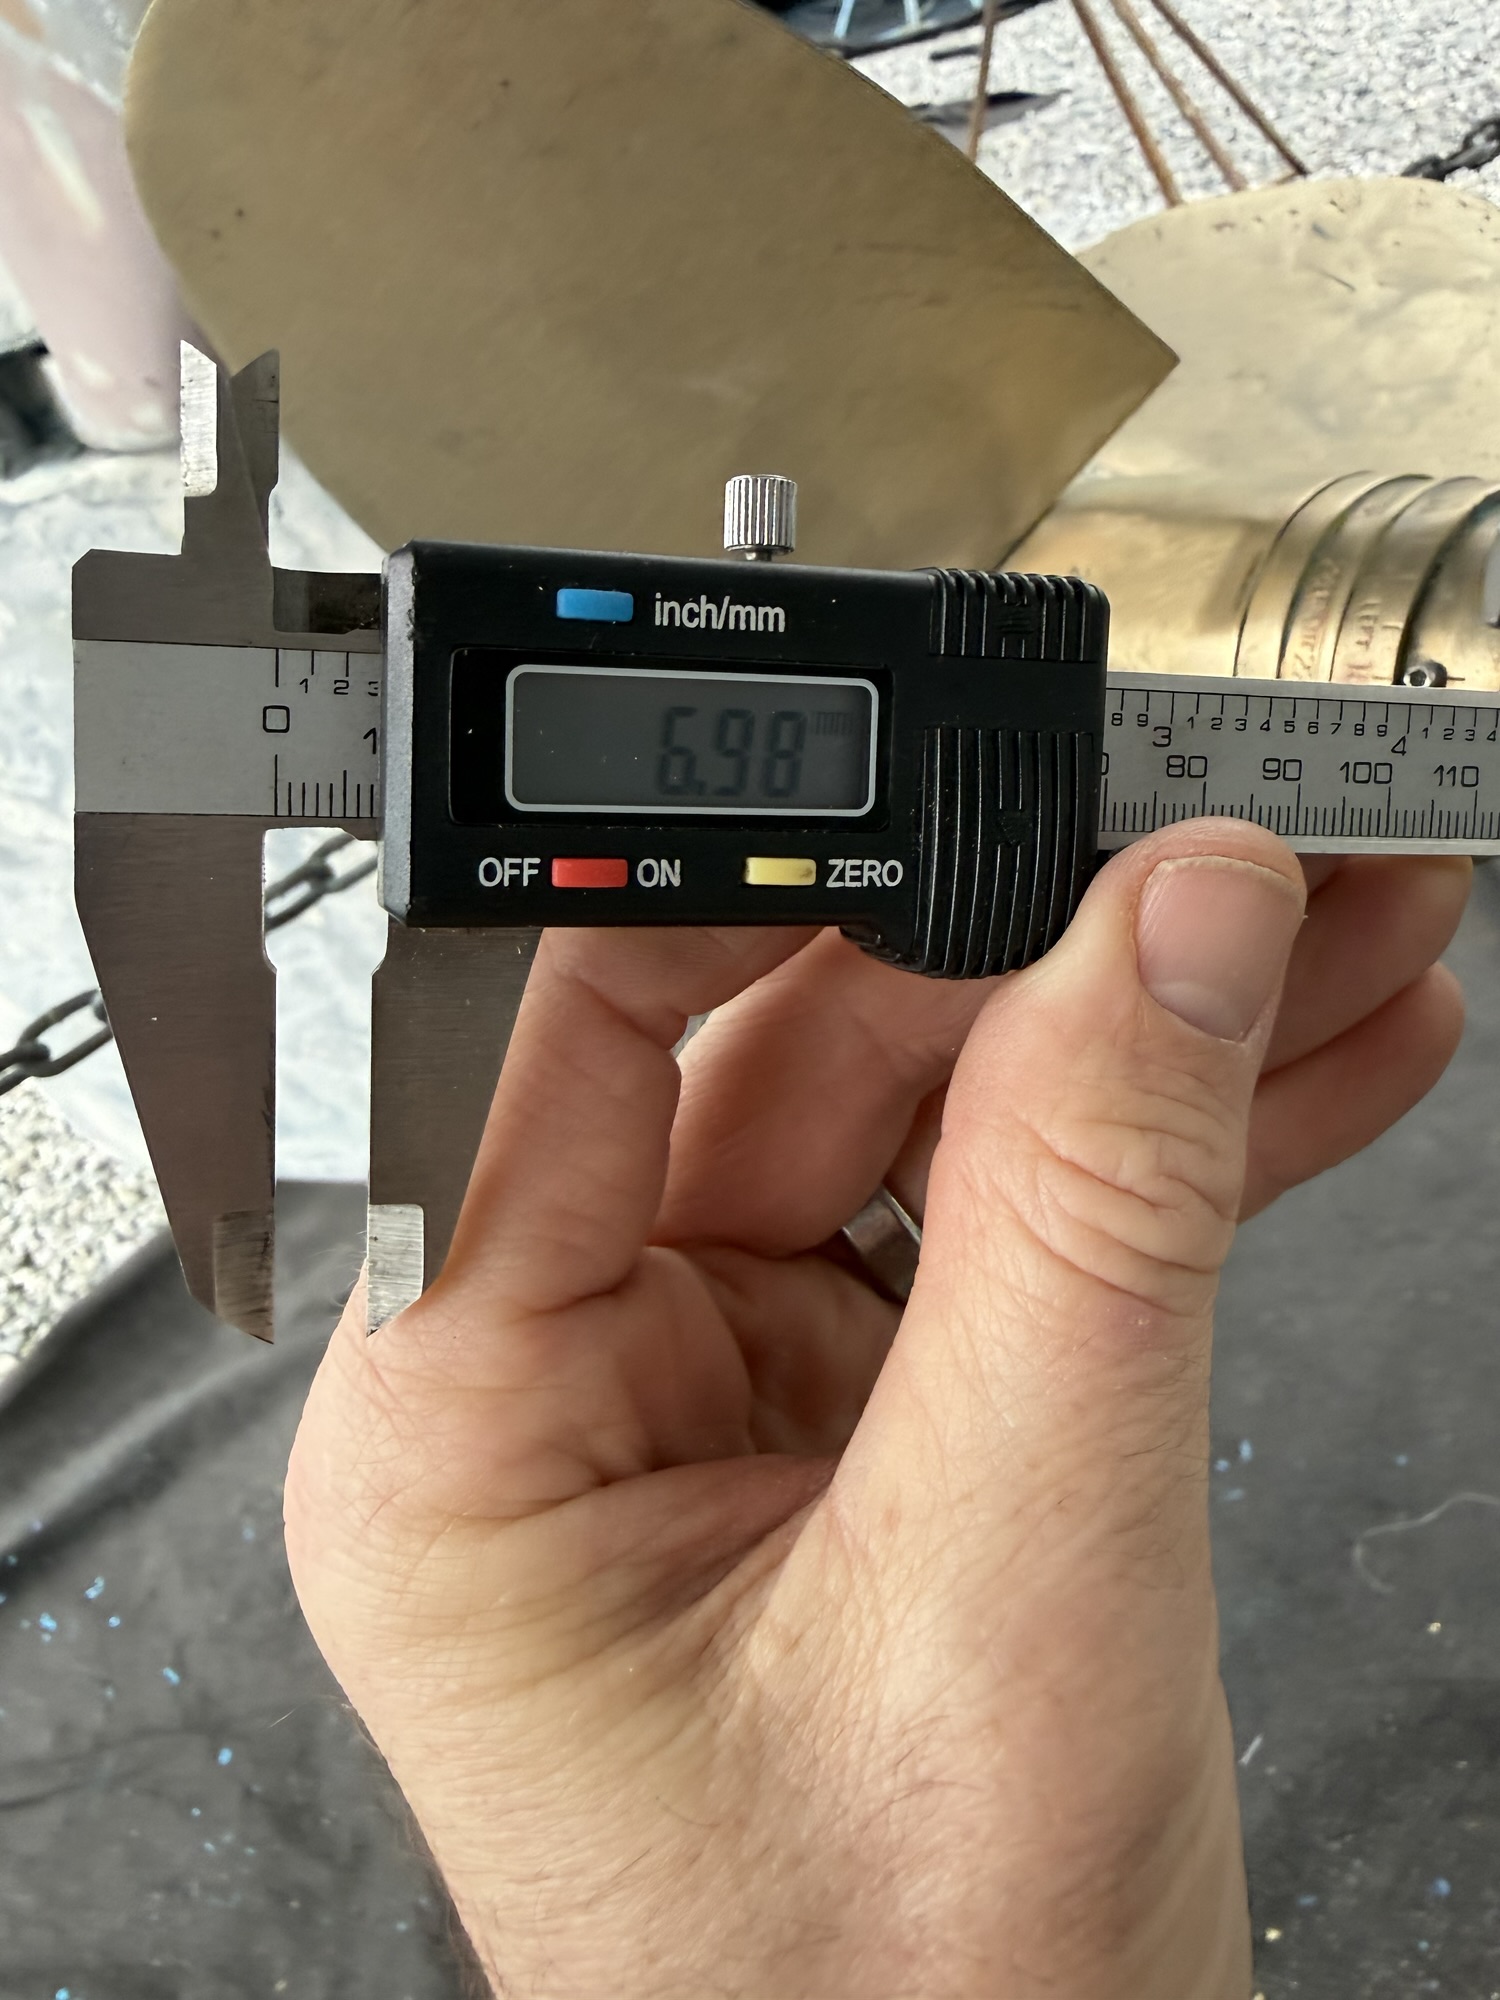
From the research I did, I was determined to install a Spurs rope cutter. I mistakenly thought that the three (3) pre-drilled holes in the bronze bearing housing match up with the Spurs system. These hold are all around 8-9 mm in diameter and seemed to have an uneven spacing between them. Spurs Marine, based in Florida, has been very easy to order from online, and talk with on the phone. I provided the following measurements for Skyward:
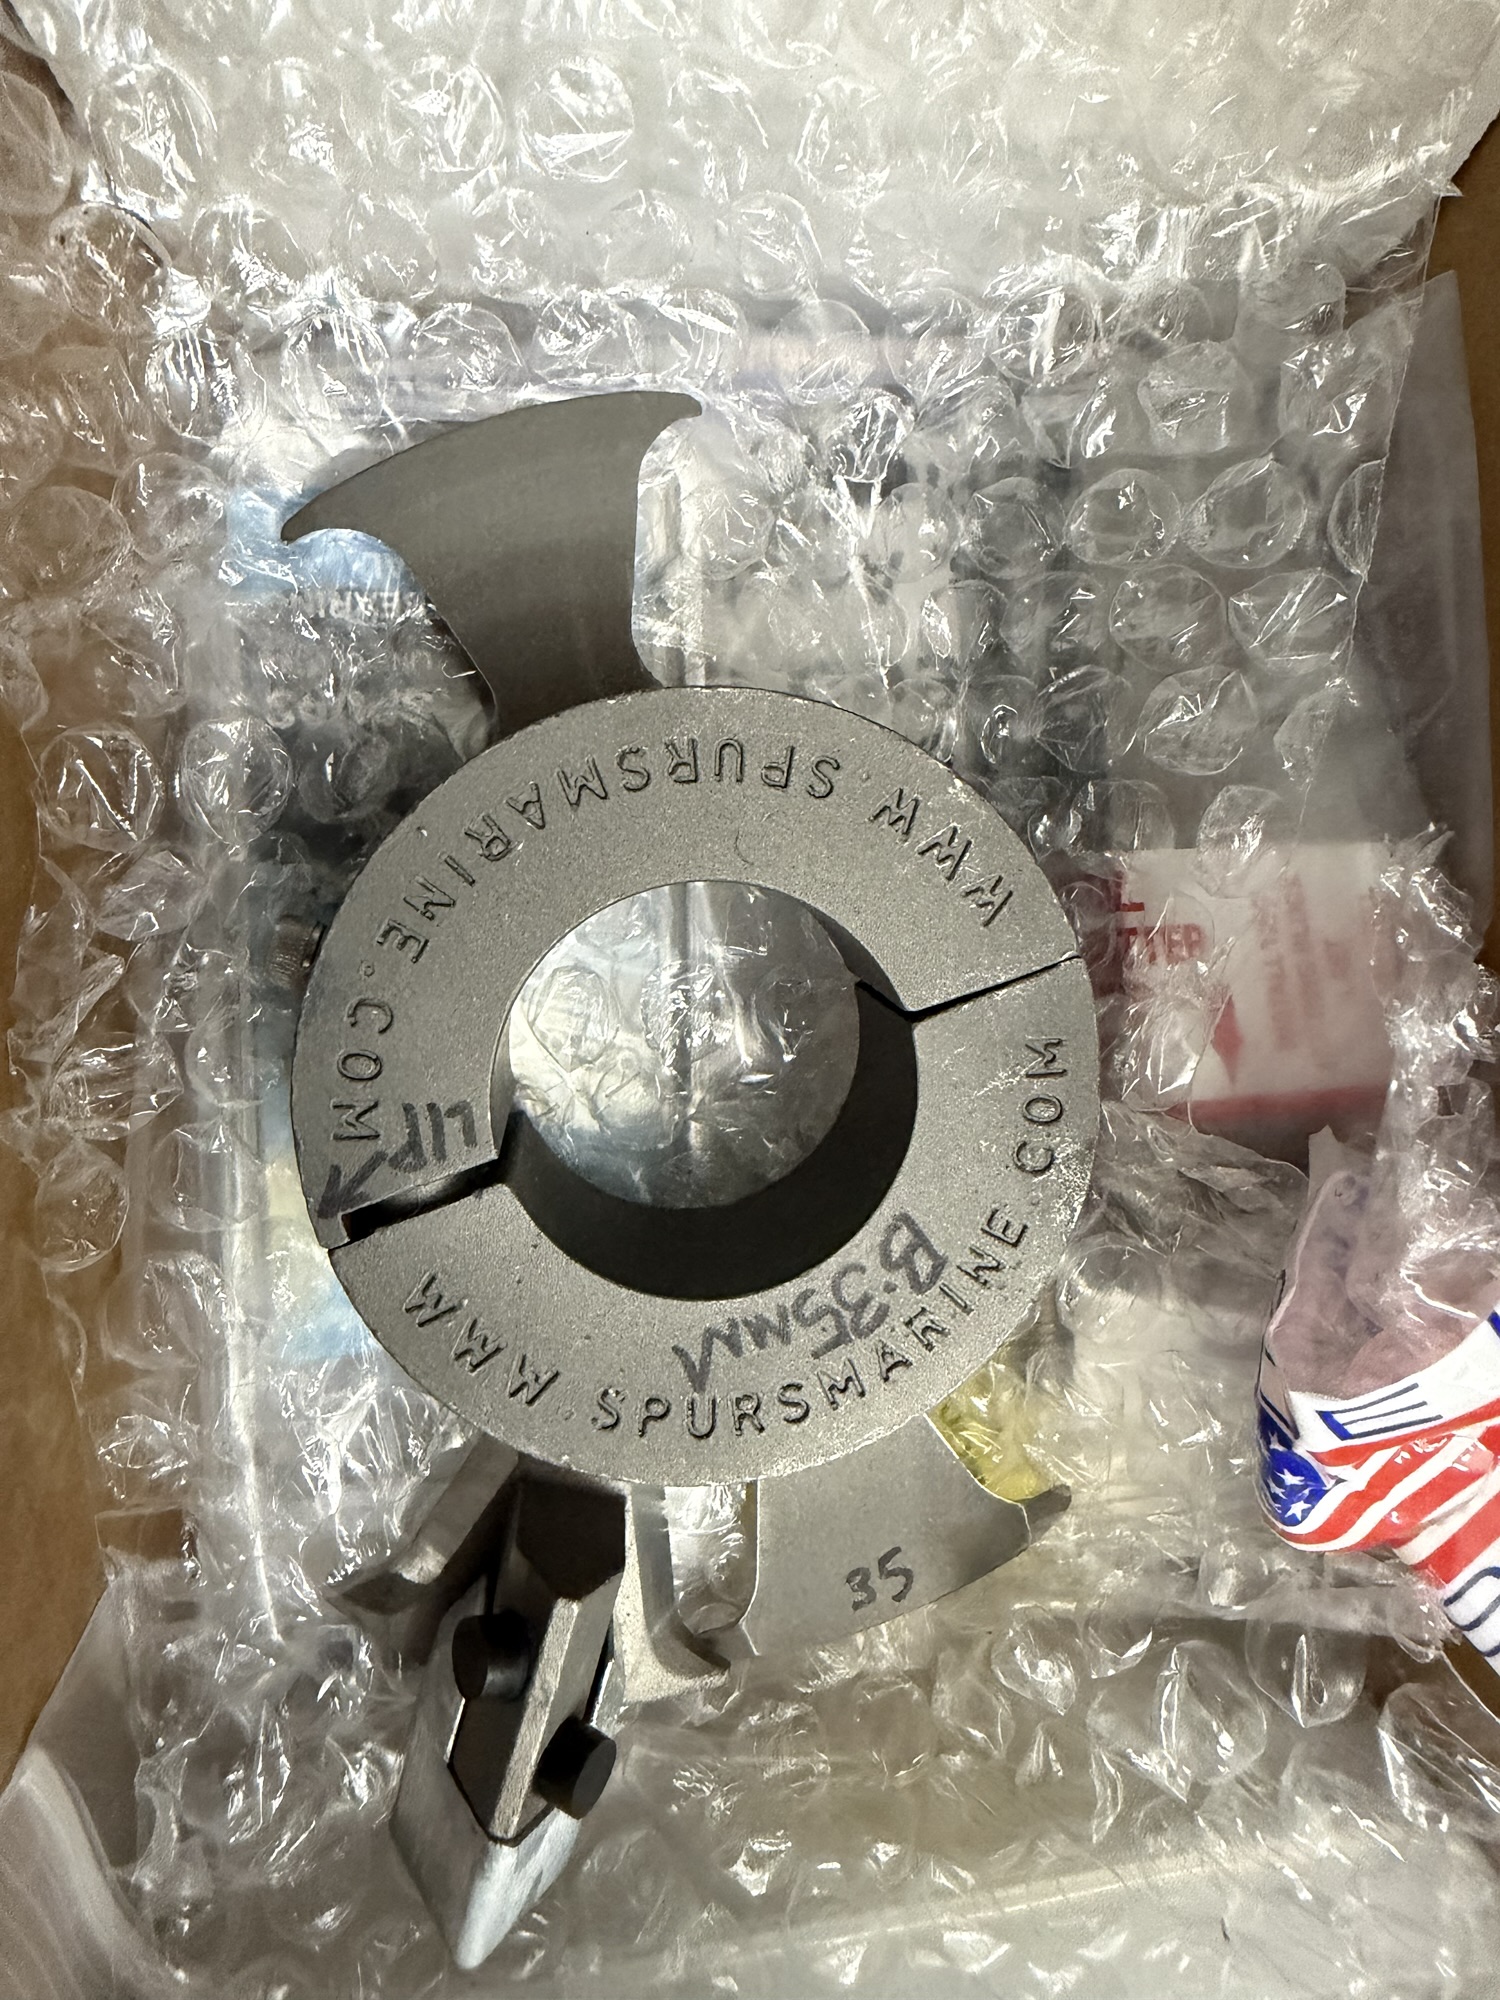
Spurs responded the next day with a couple of additional questions. Within a day I received a quote, I placed the order, and the package arrived quickly -overall about 1 week from inquiry to receiving the cutter. Spurs specified a Cutter Assembly B (for my 35mm shaft) and Holding Block 2A. I also ordered a spares kit for a total around $700 with shipping. In the box was a pre-assembled rotary and fixed blade as well as the holding block to be secured to the bronze bearing housing. All parts were very high quality and packaged well.
It was immediately obvious that the Holding Block would not simply bolt up to the bronze bearing housing given the size and pattern of the holes. Something that I didn’t contemplate before starting this was that the thickness of the housing was around 5-7 mm. When I received the package from Spurs, the hex head bolts provided were of 5/16-18 which means 18 threads per inch – a relatively coarse thread for such a short depth to secure the Holding Block to the housing. Furthermore, my rusty but trusty Craftsman set of taps had a standard taper design, which meant the correct diameter tap wouldn’t be effective on such a short depth hole. Re-engineering was necessary.
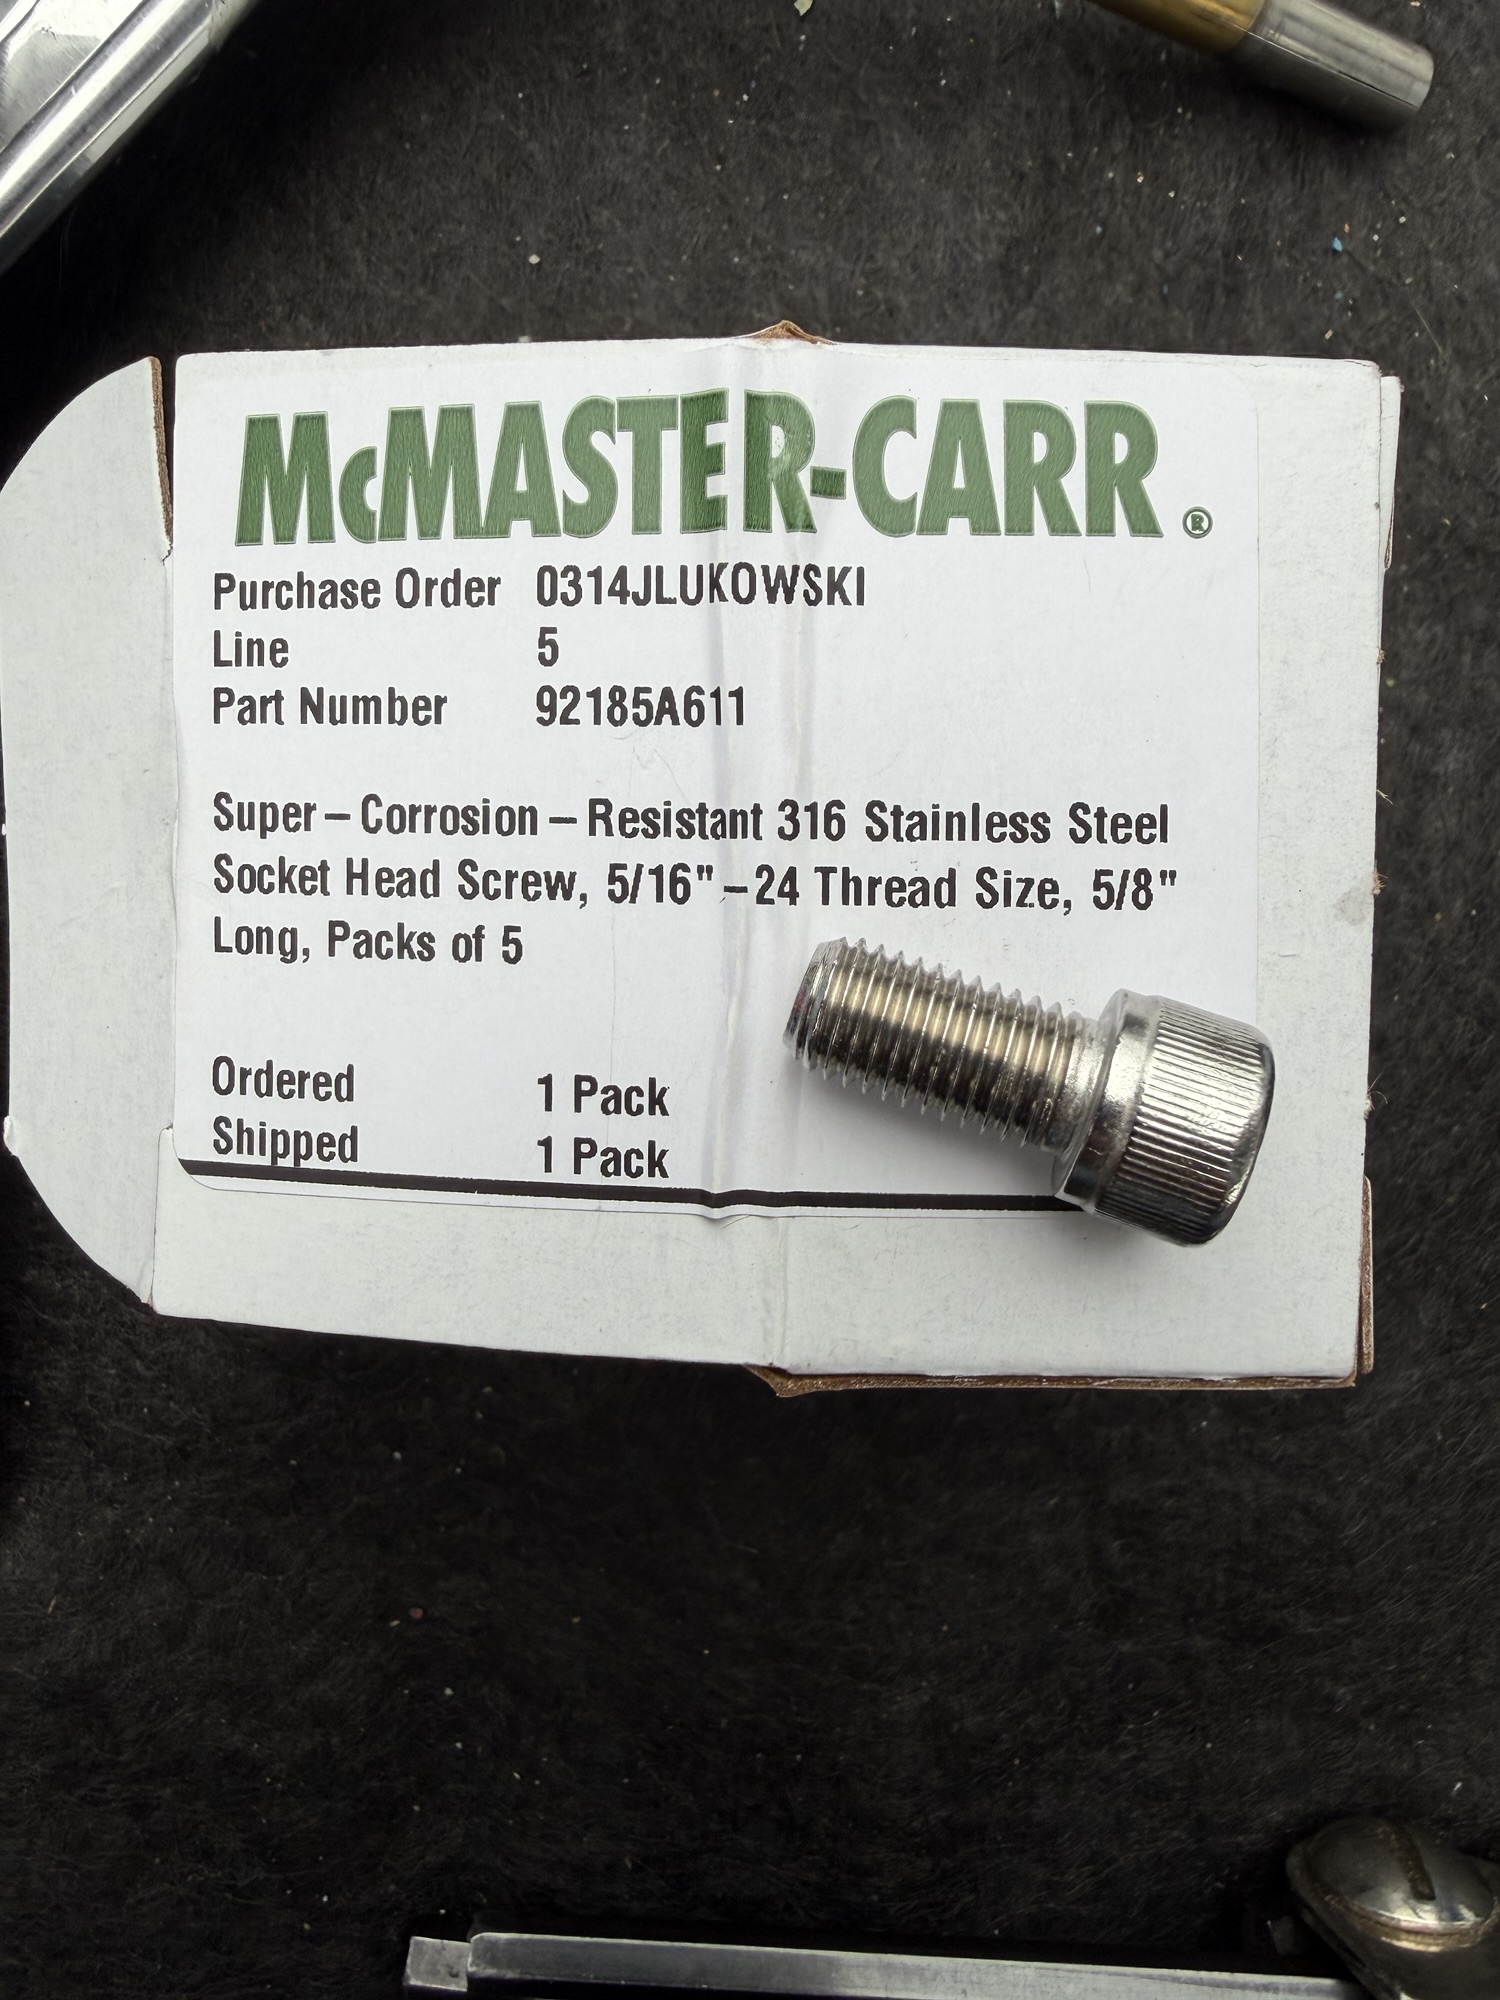
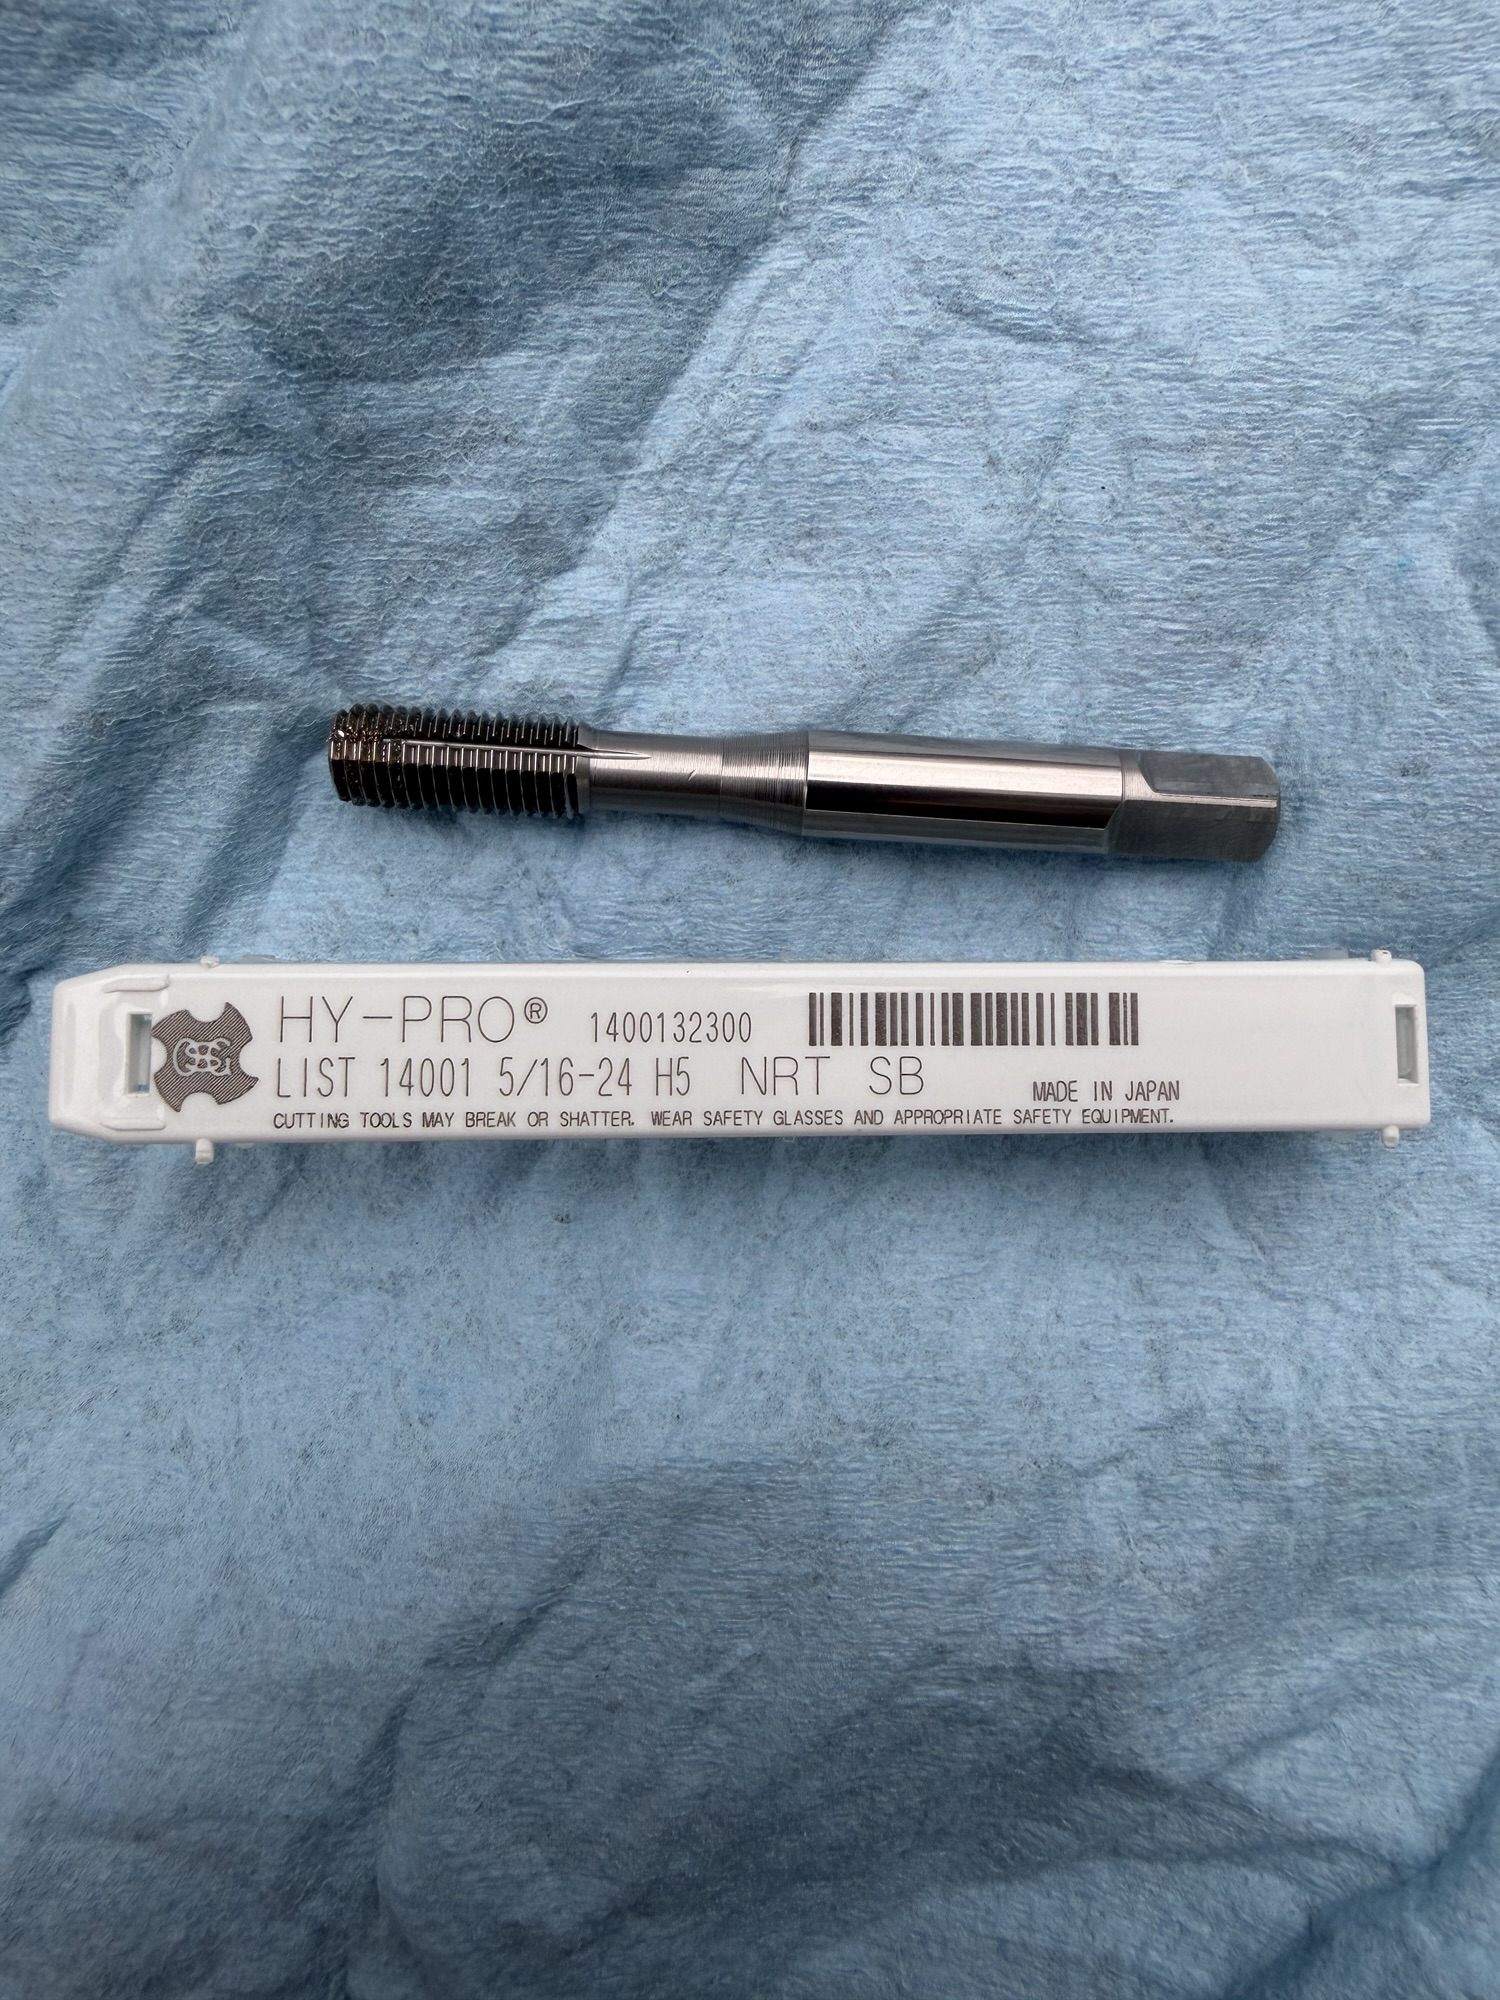
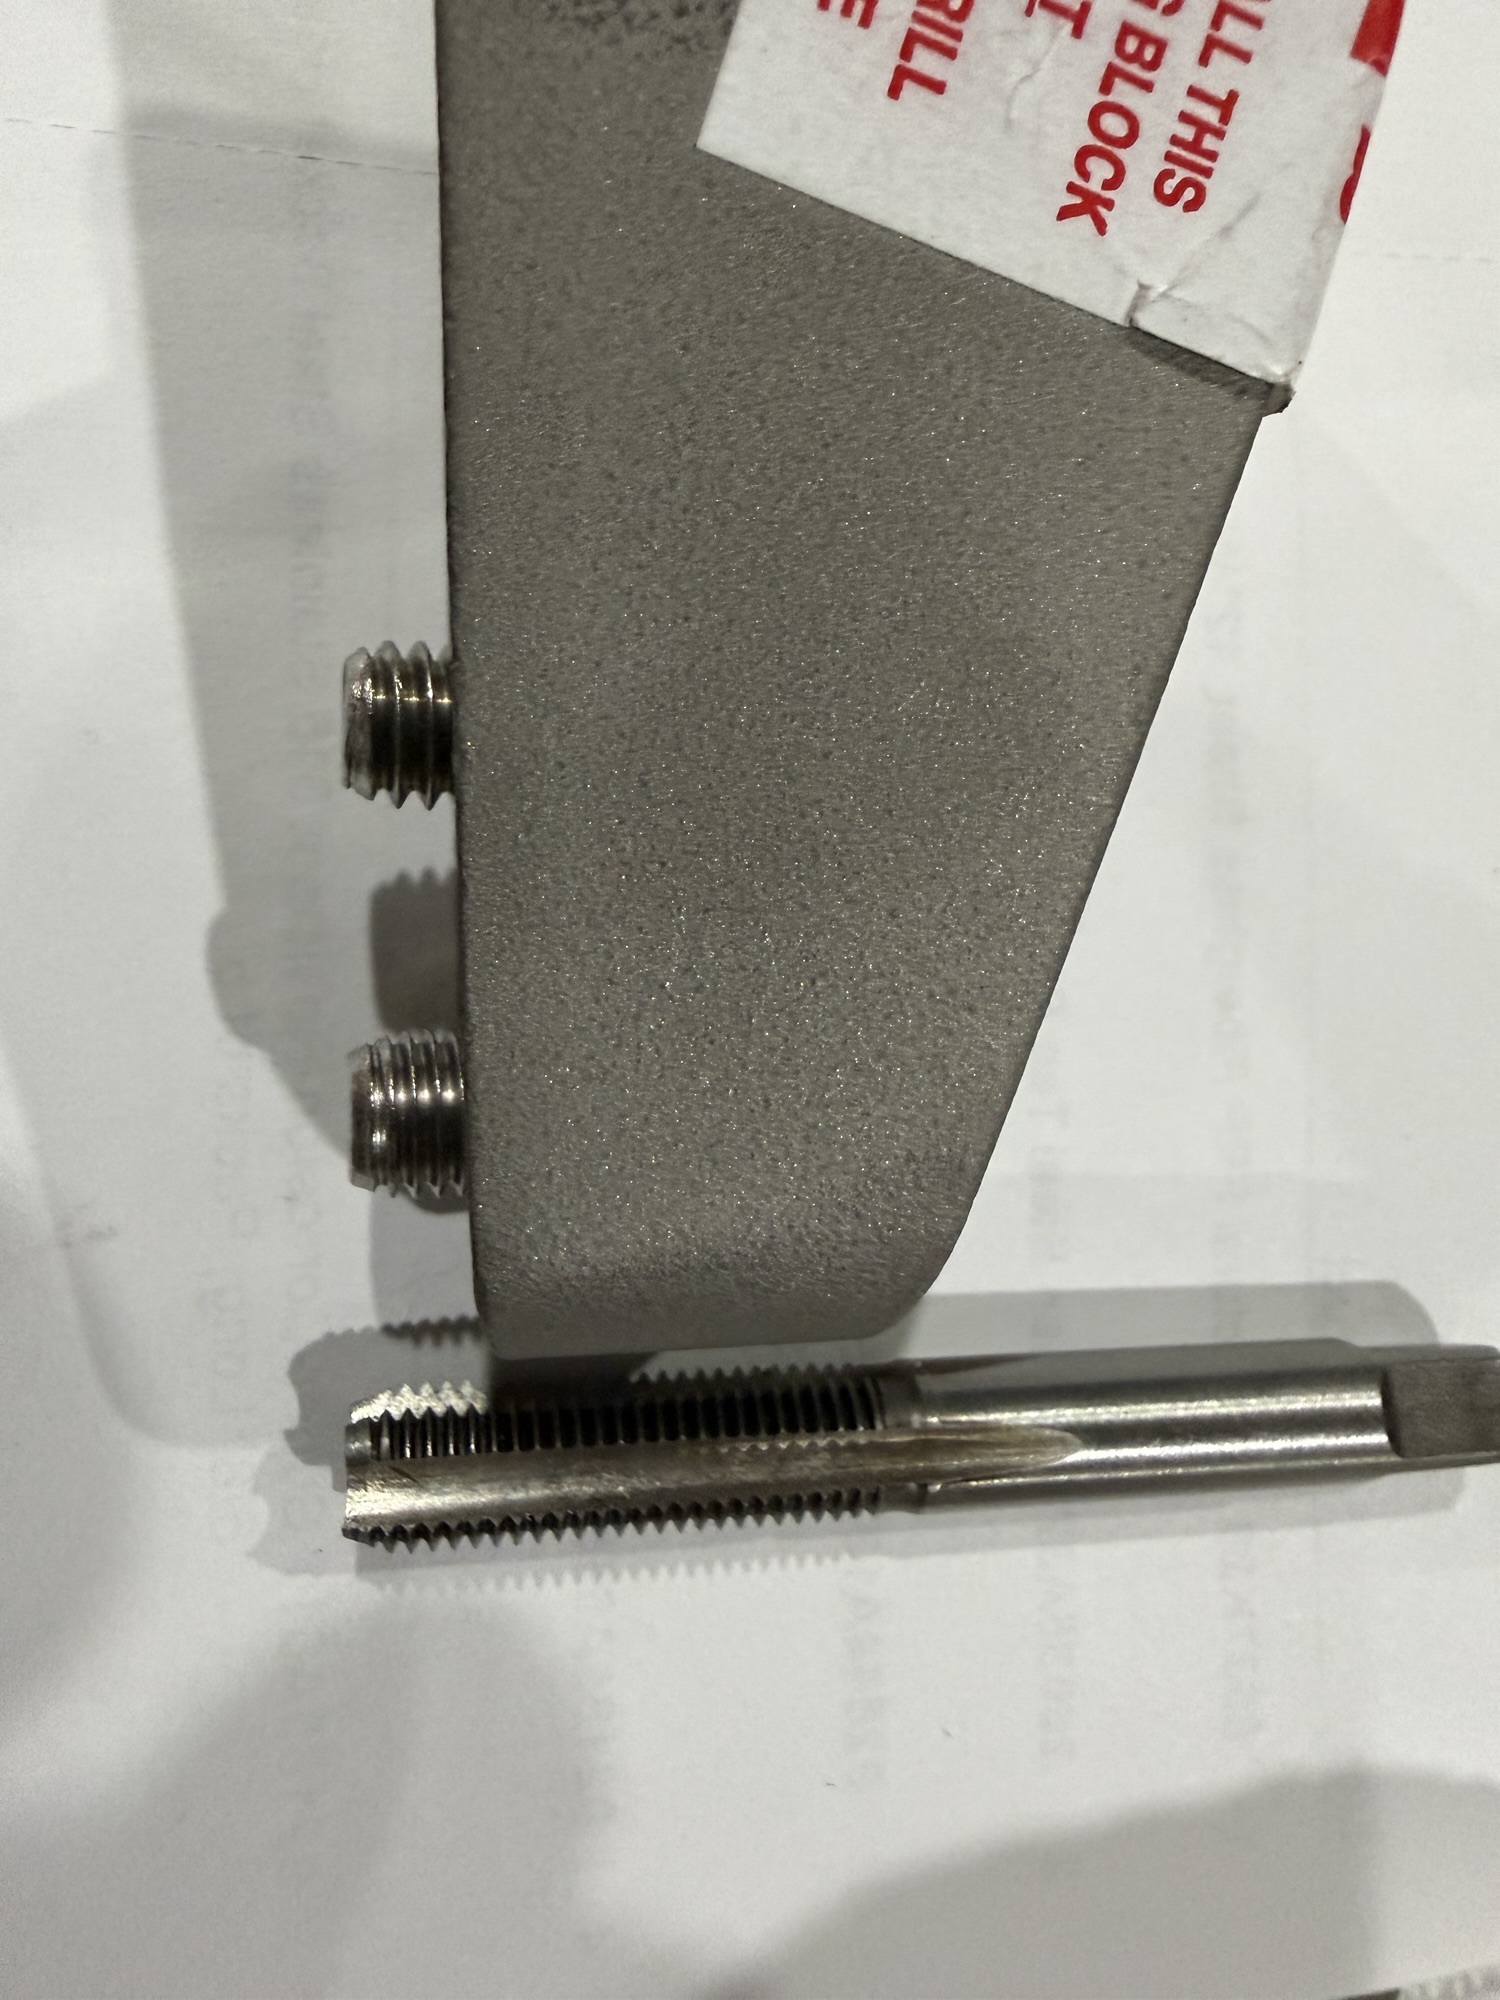
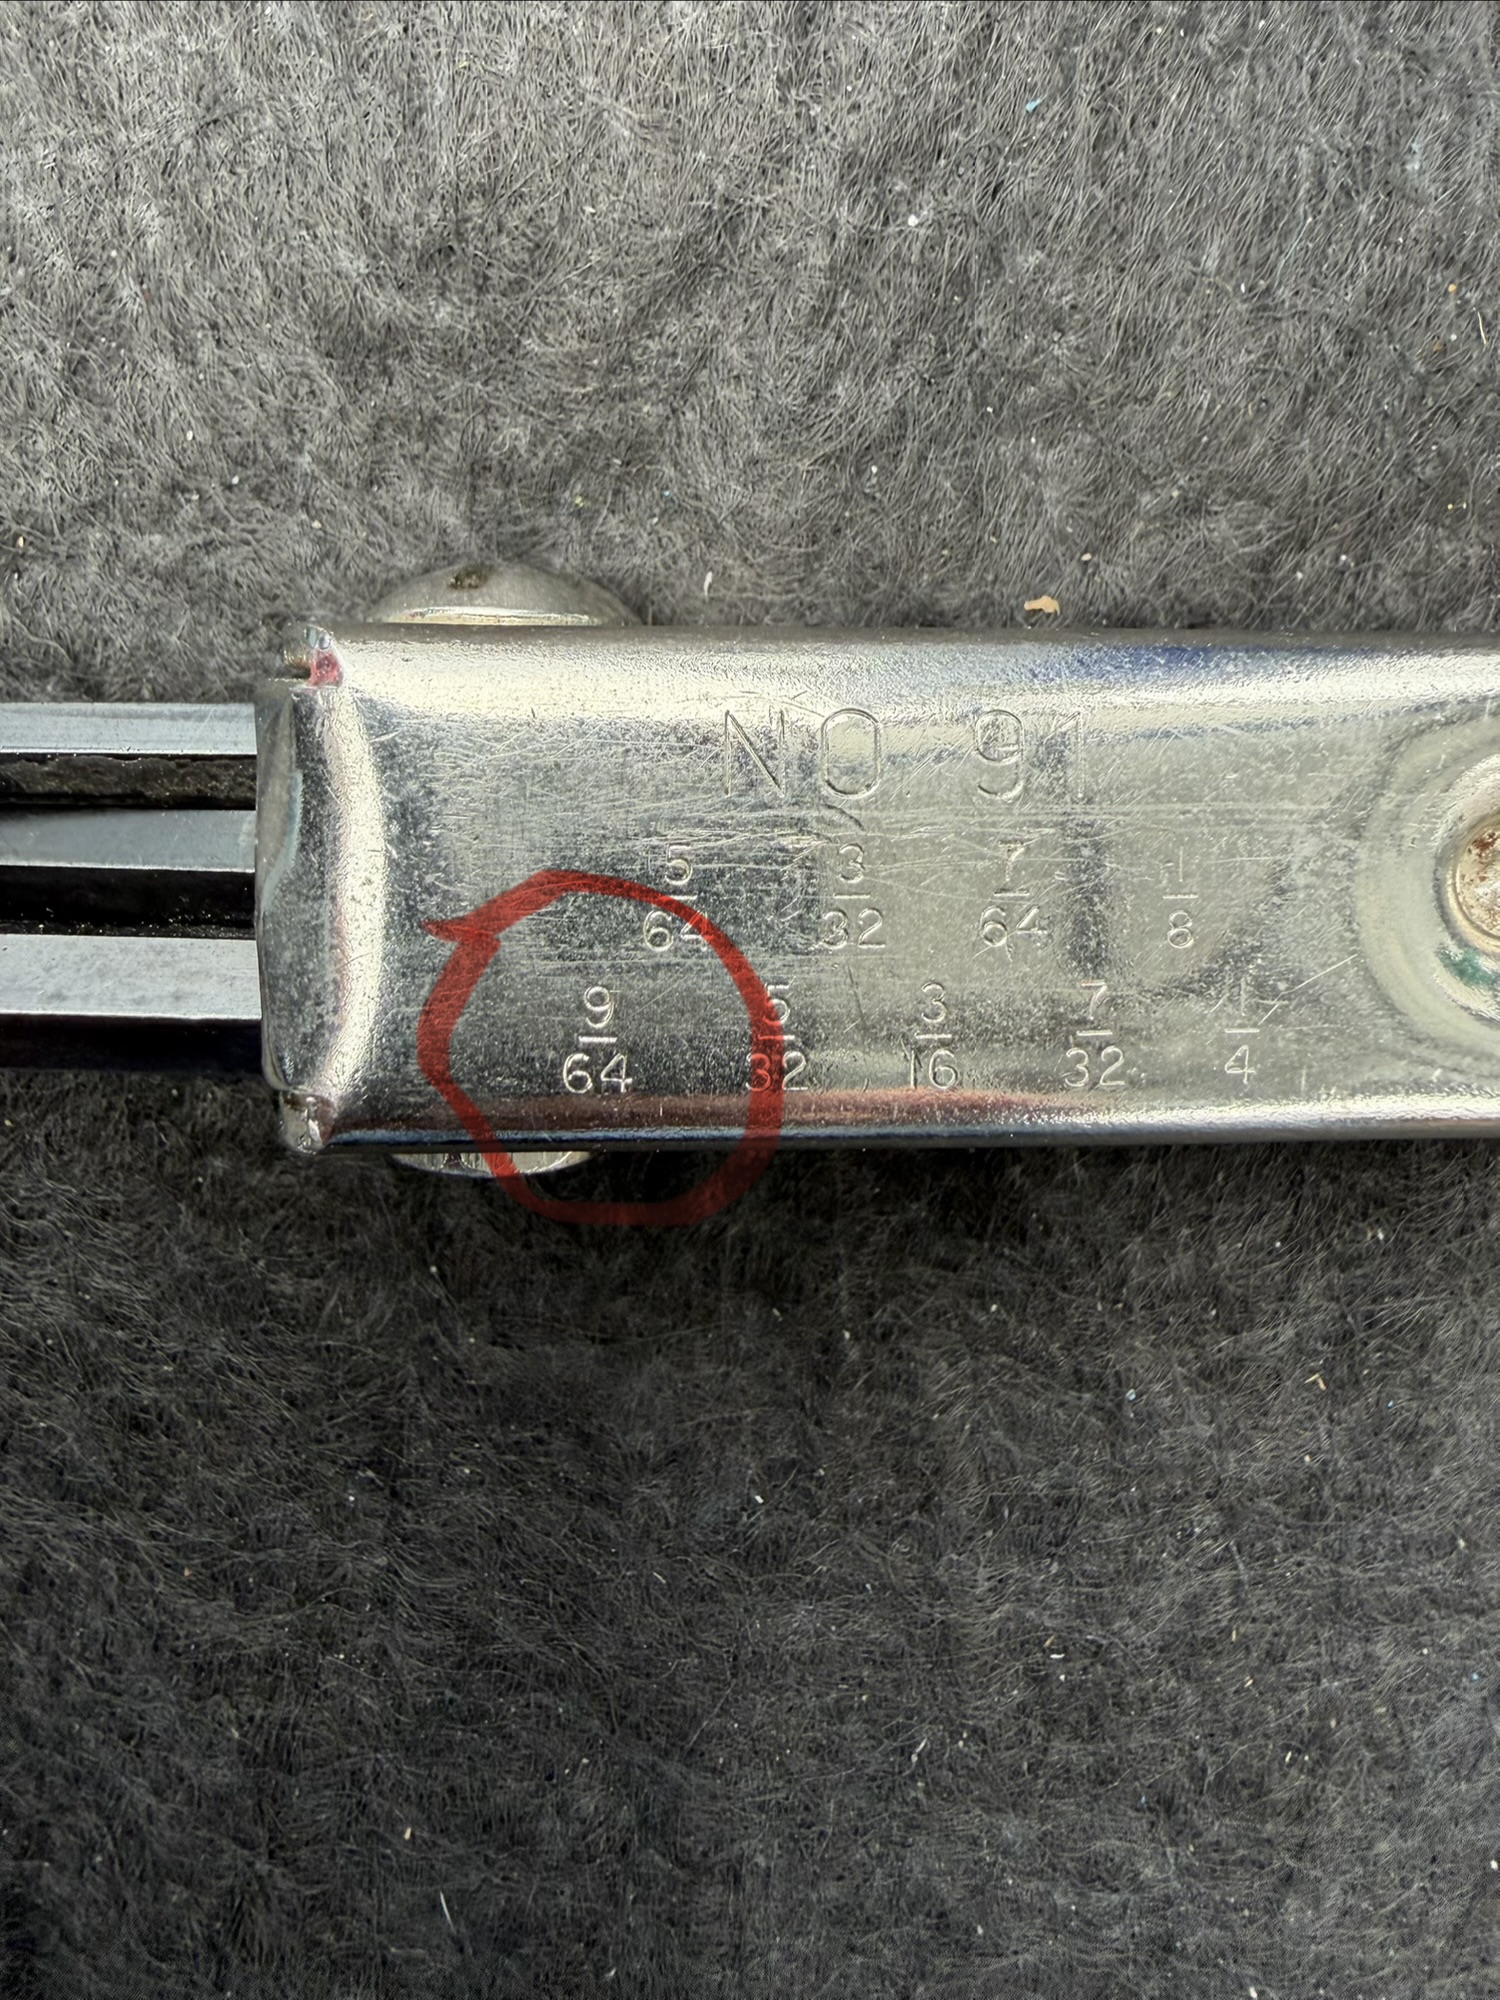
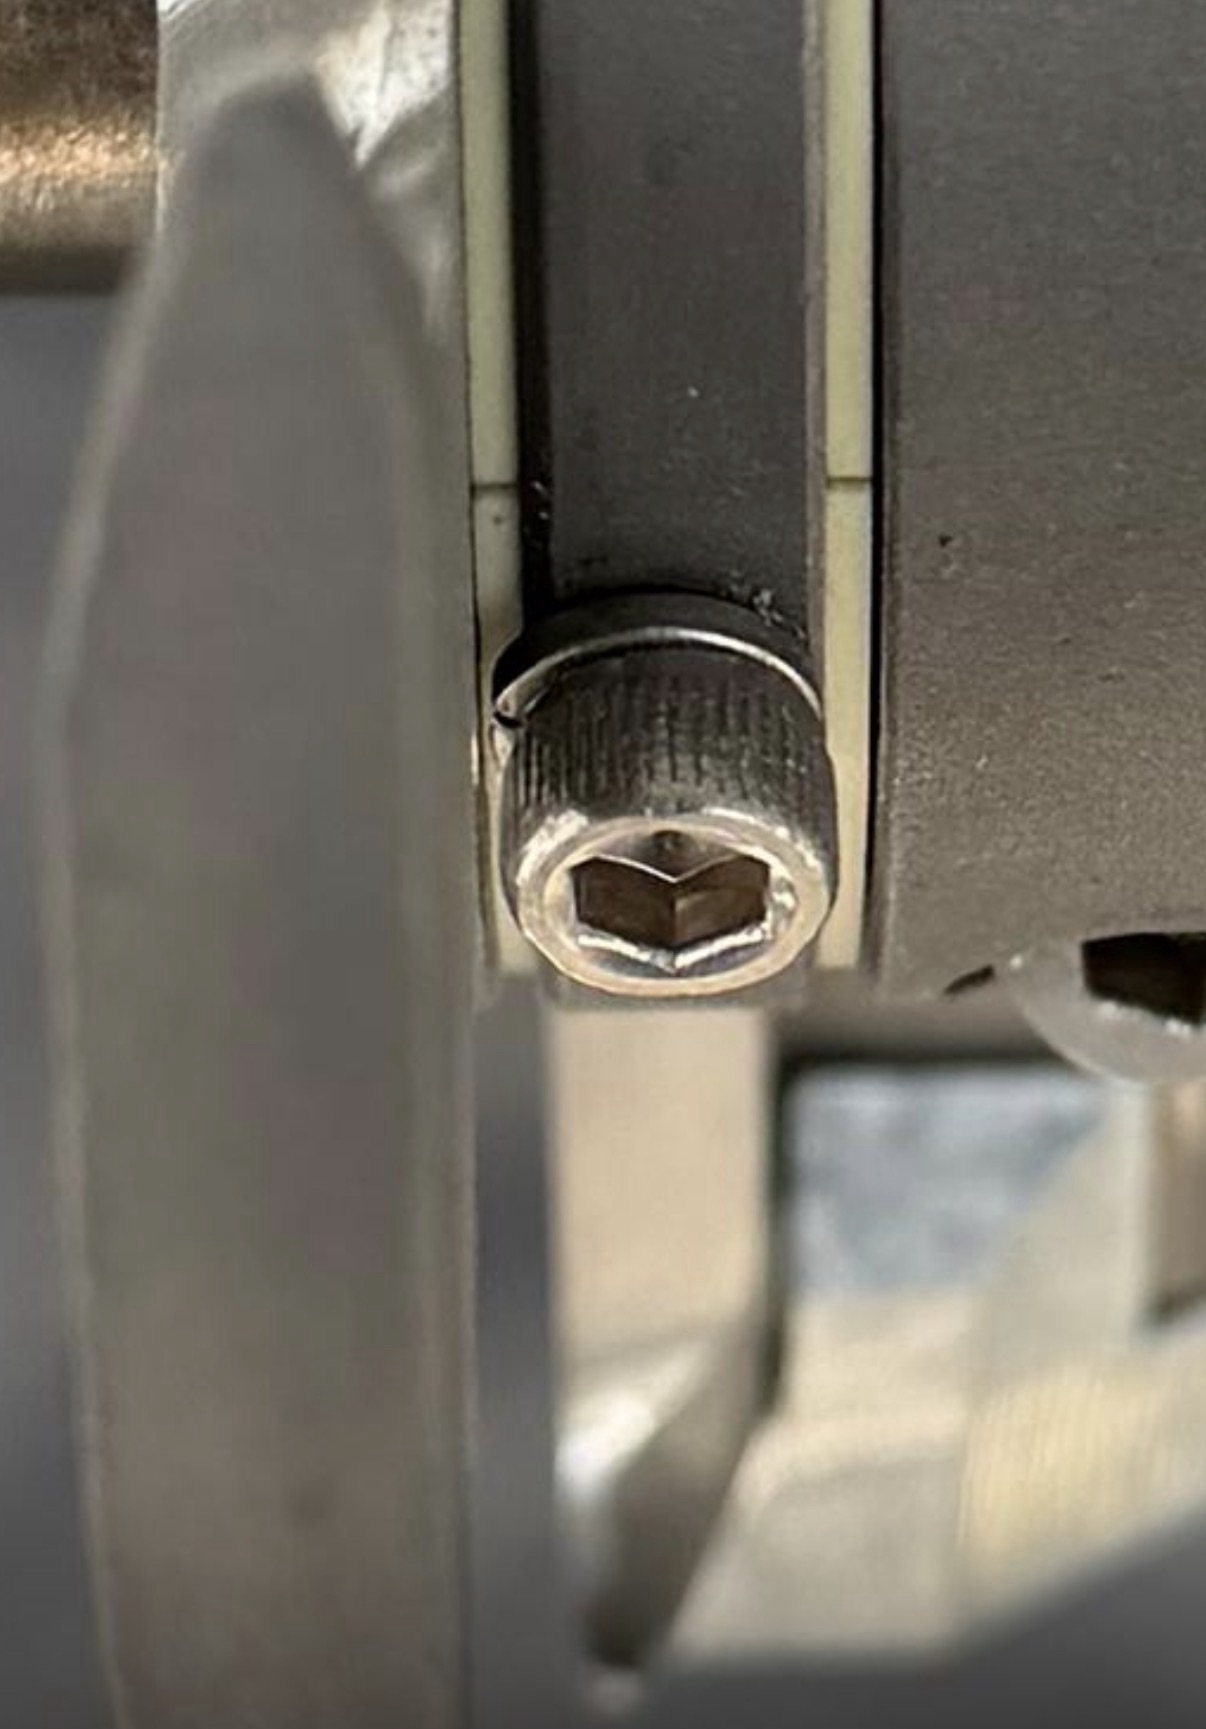
My plan was to source new socket head screws with finer thread pitch 5/16-24. I used 5/8″ long and 316 stainless steel screws even though Spurs claims the original screws are 304 staninless steel. They claim 304 is a softer metal compared to the Holding Block and will “break” first in the event of something getting lodged into the cutter and requiring excessive breaking force. I also sourced a high quality 5/16-24 bottom tap; I purchased 3 different ones and used this one from HY-PRO which had to least amount of starting taper. You can see that the 24 threads per inch (lower in the picture) give an increased amount of surface area and therefore holding force compared to the 18 threads per inch screw (upper in the picture).
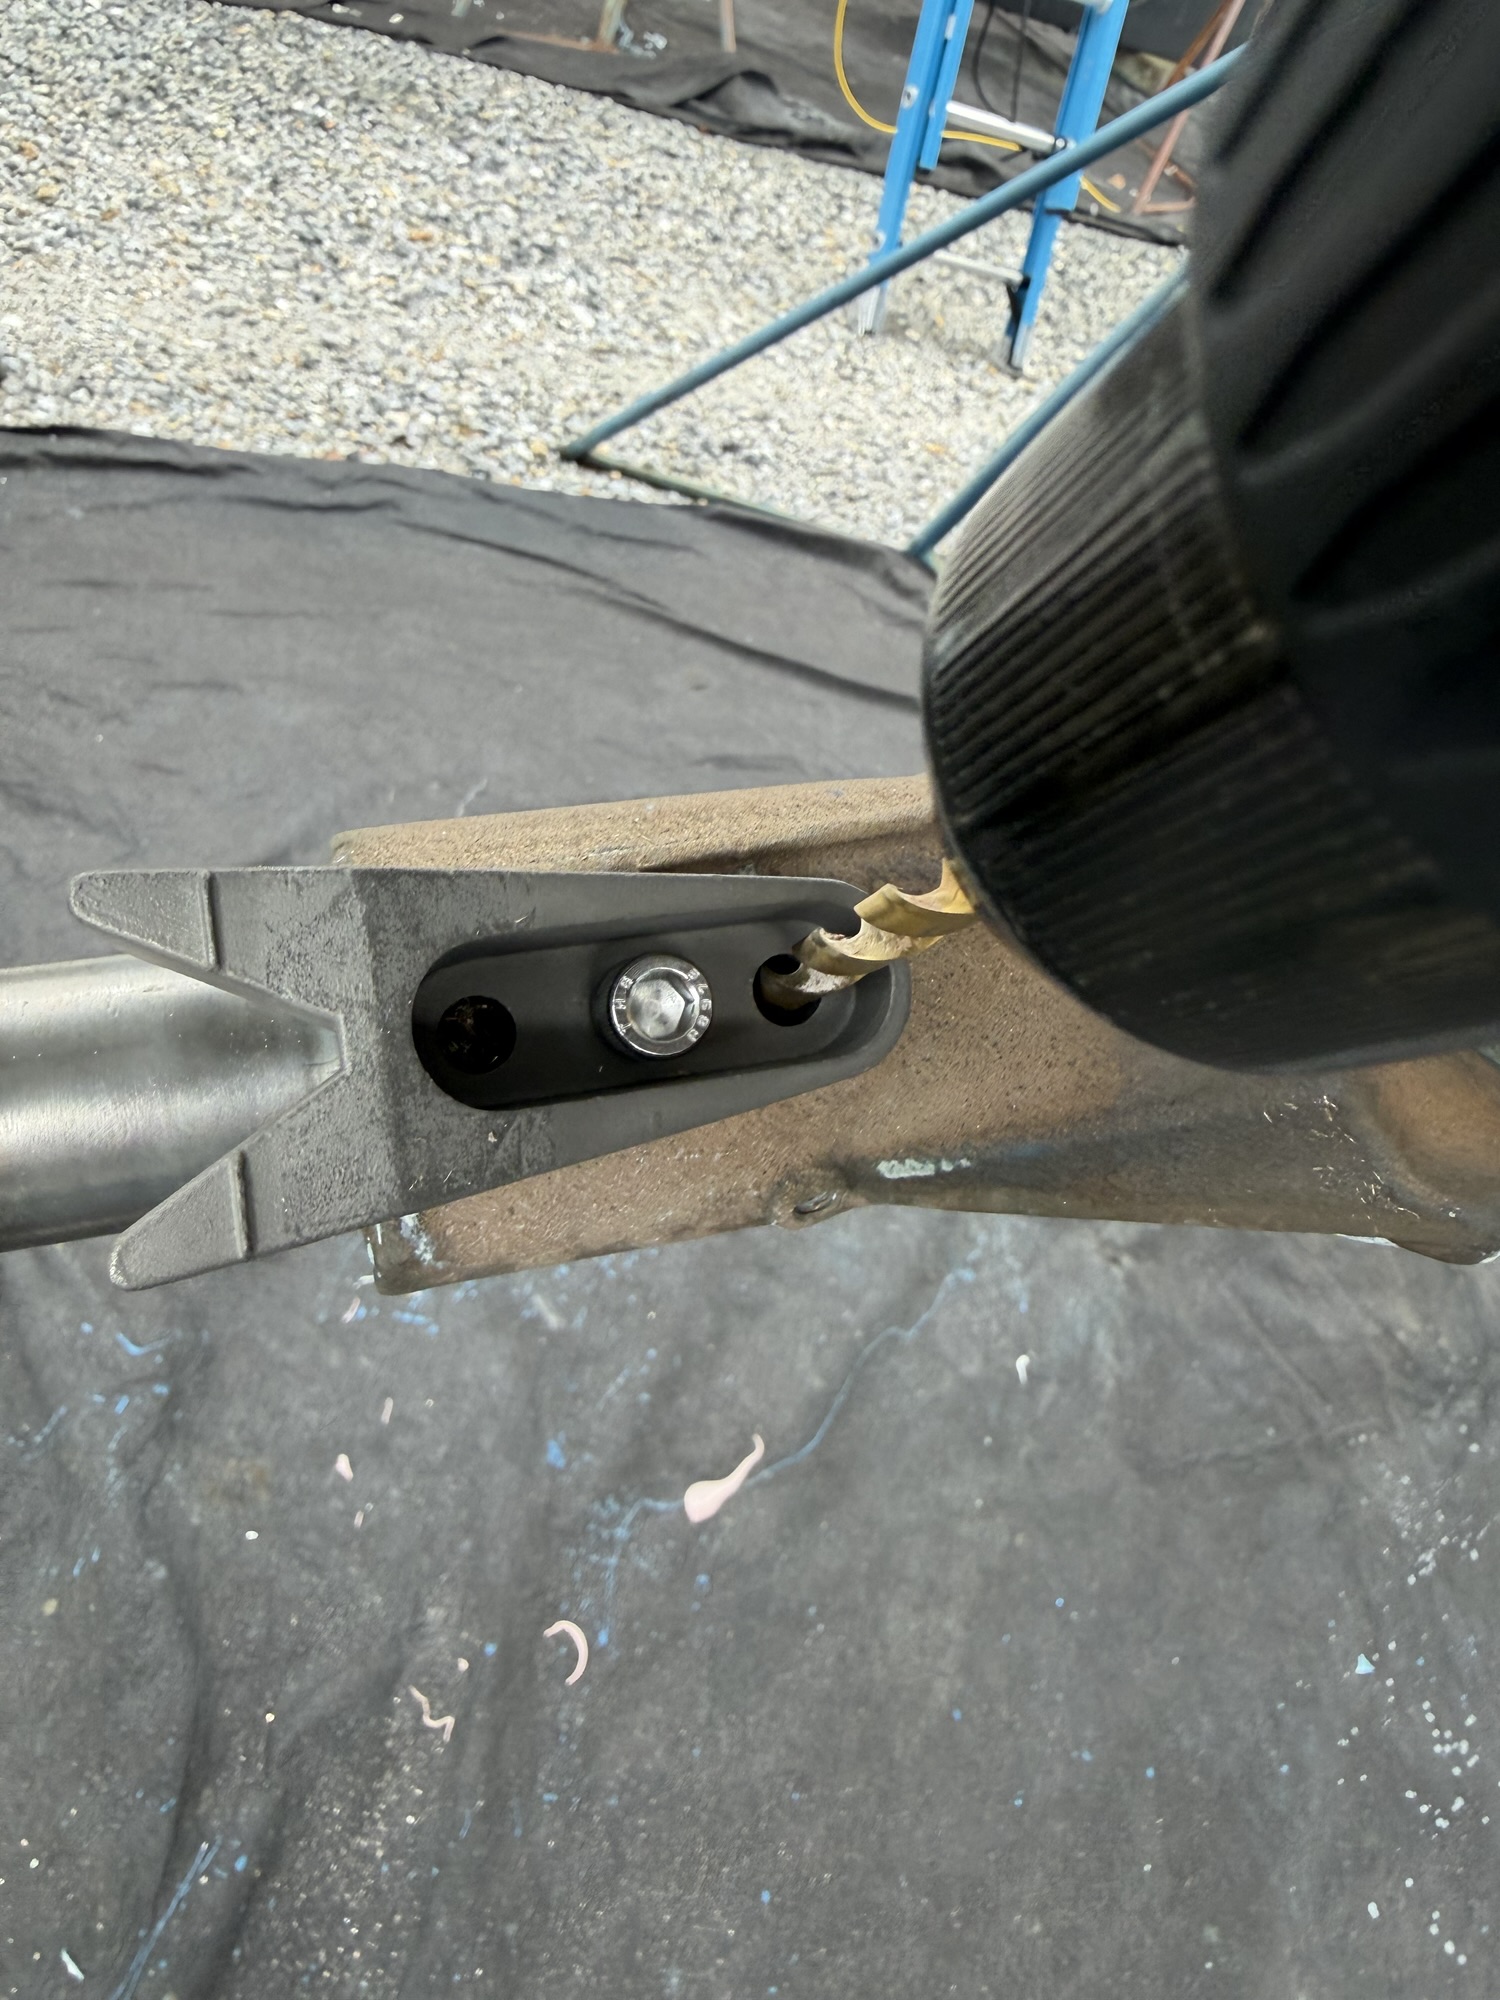
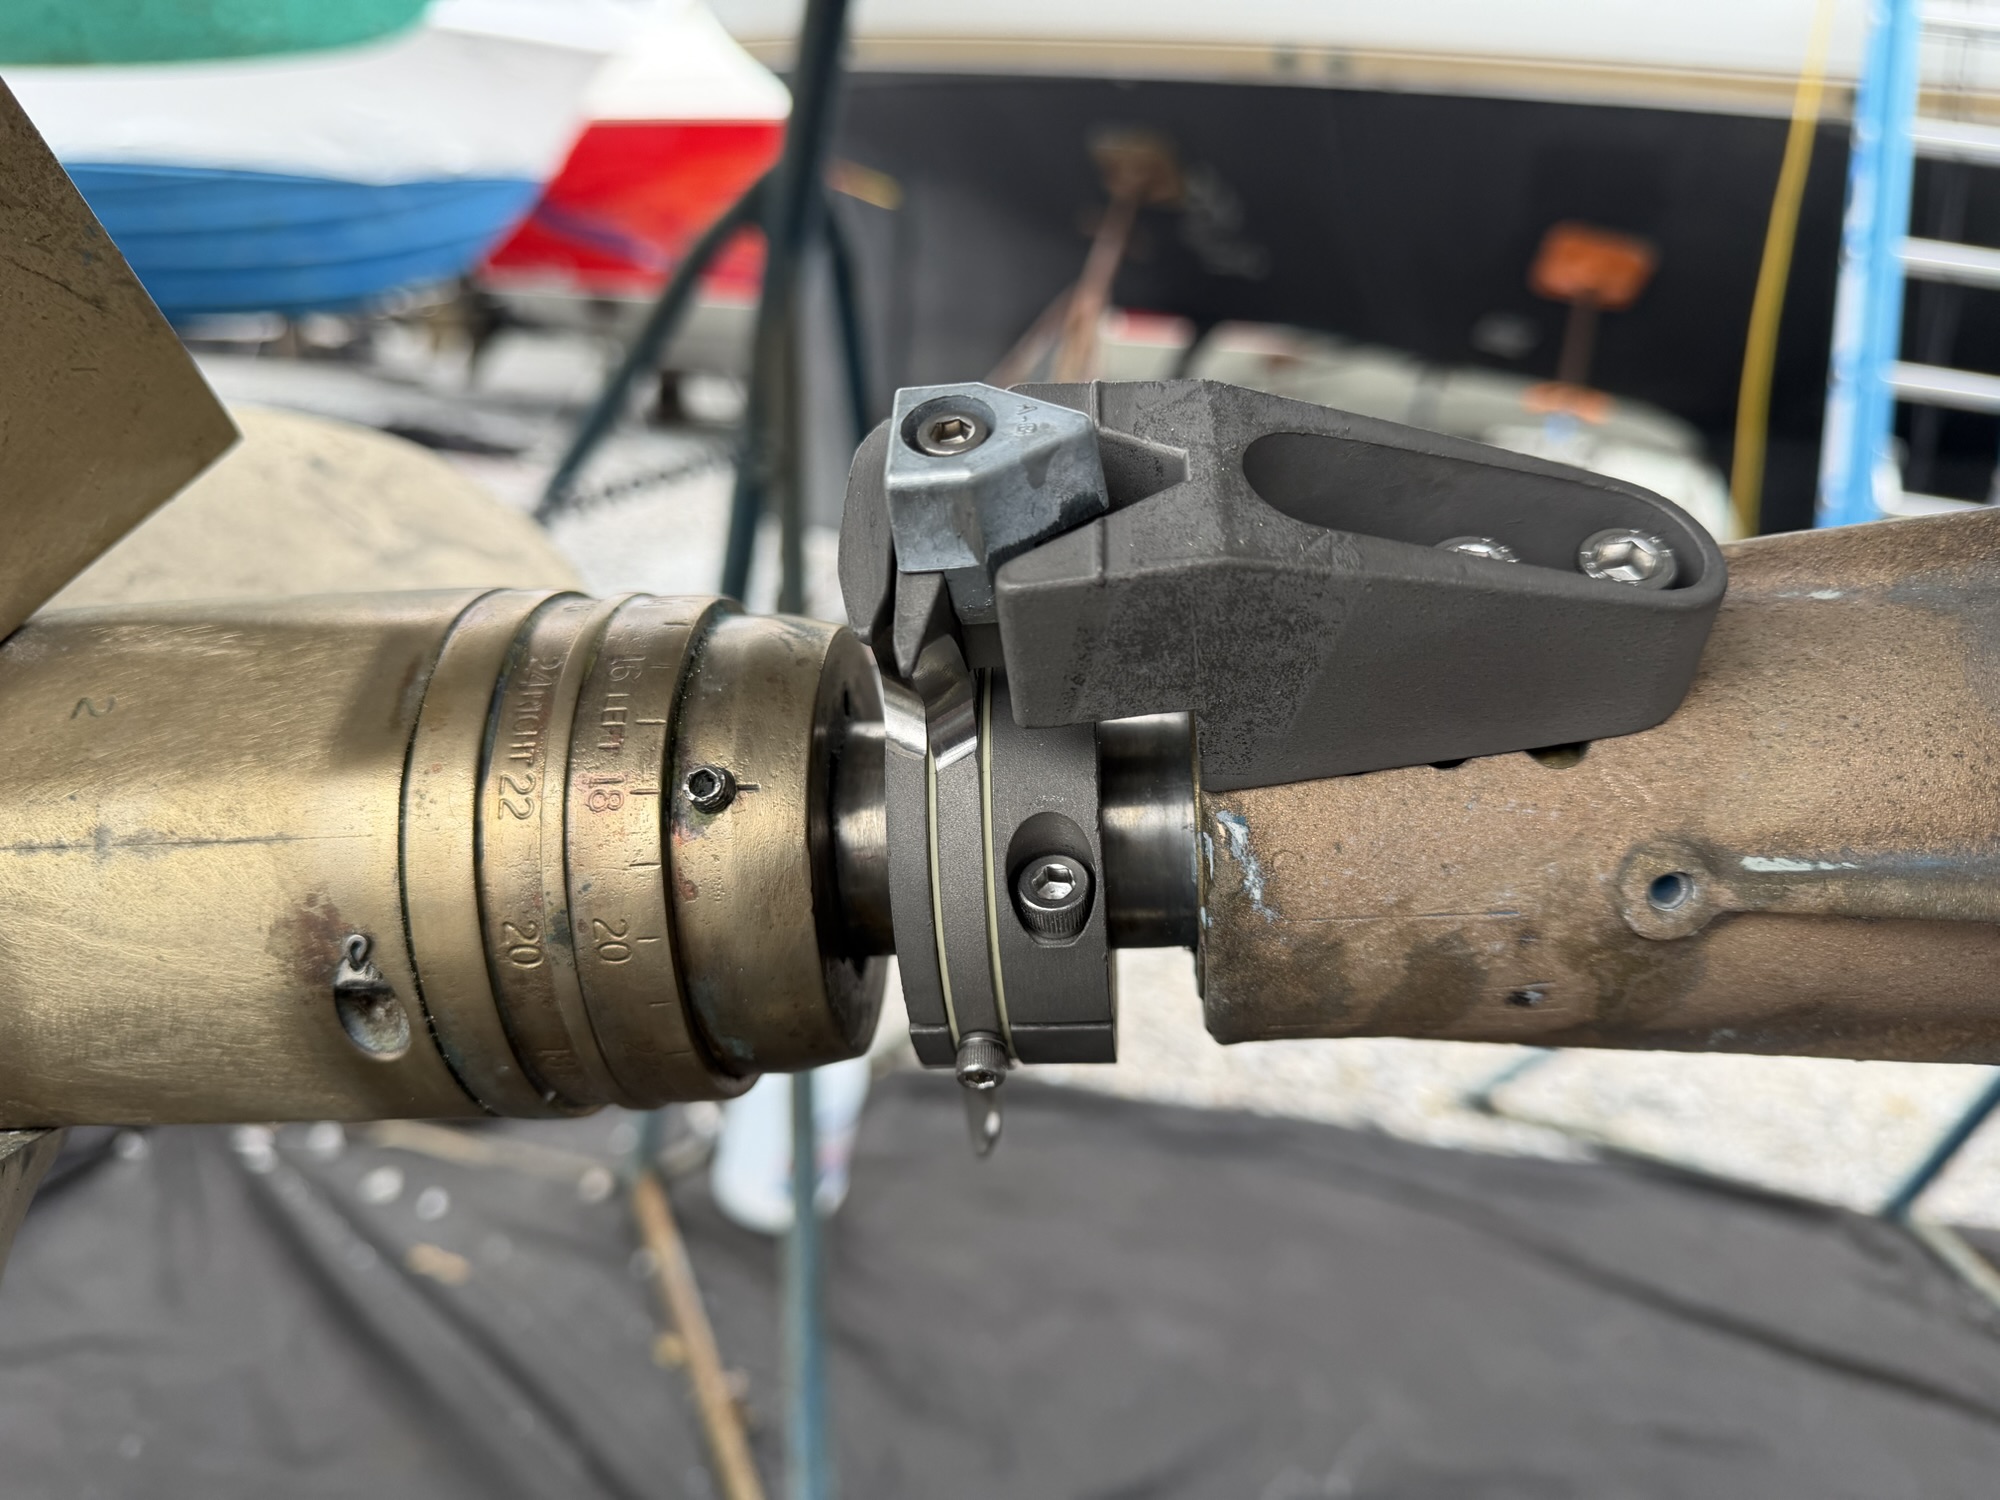
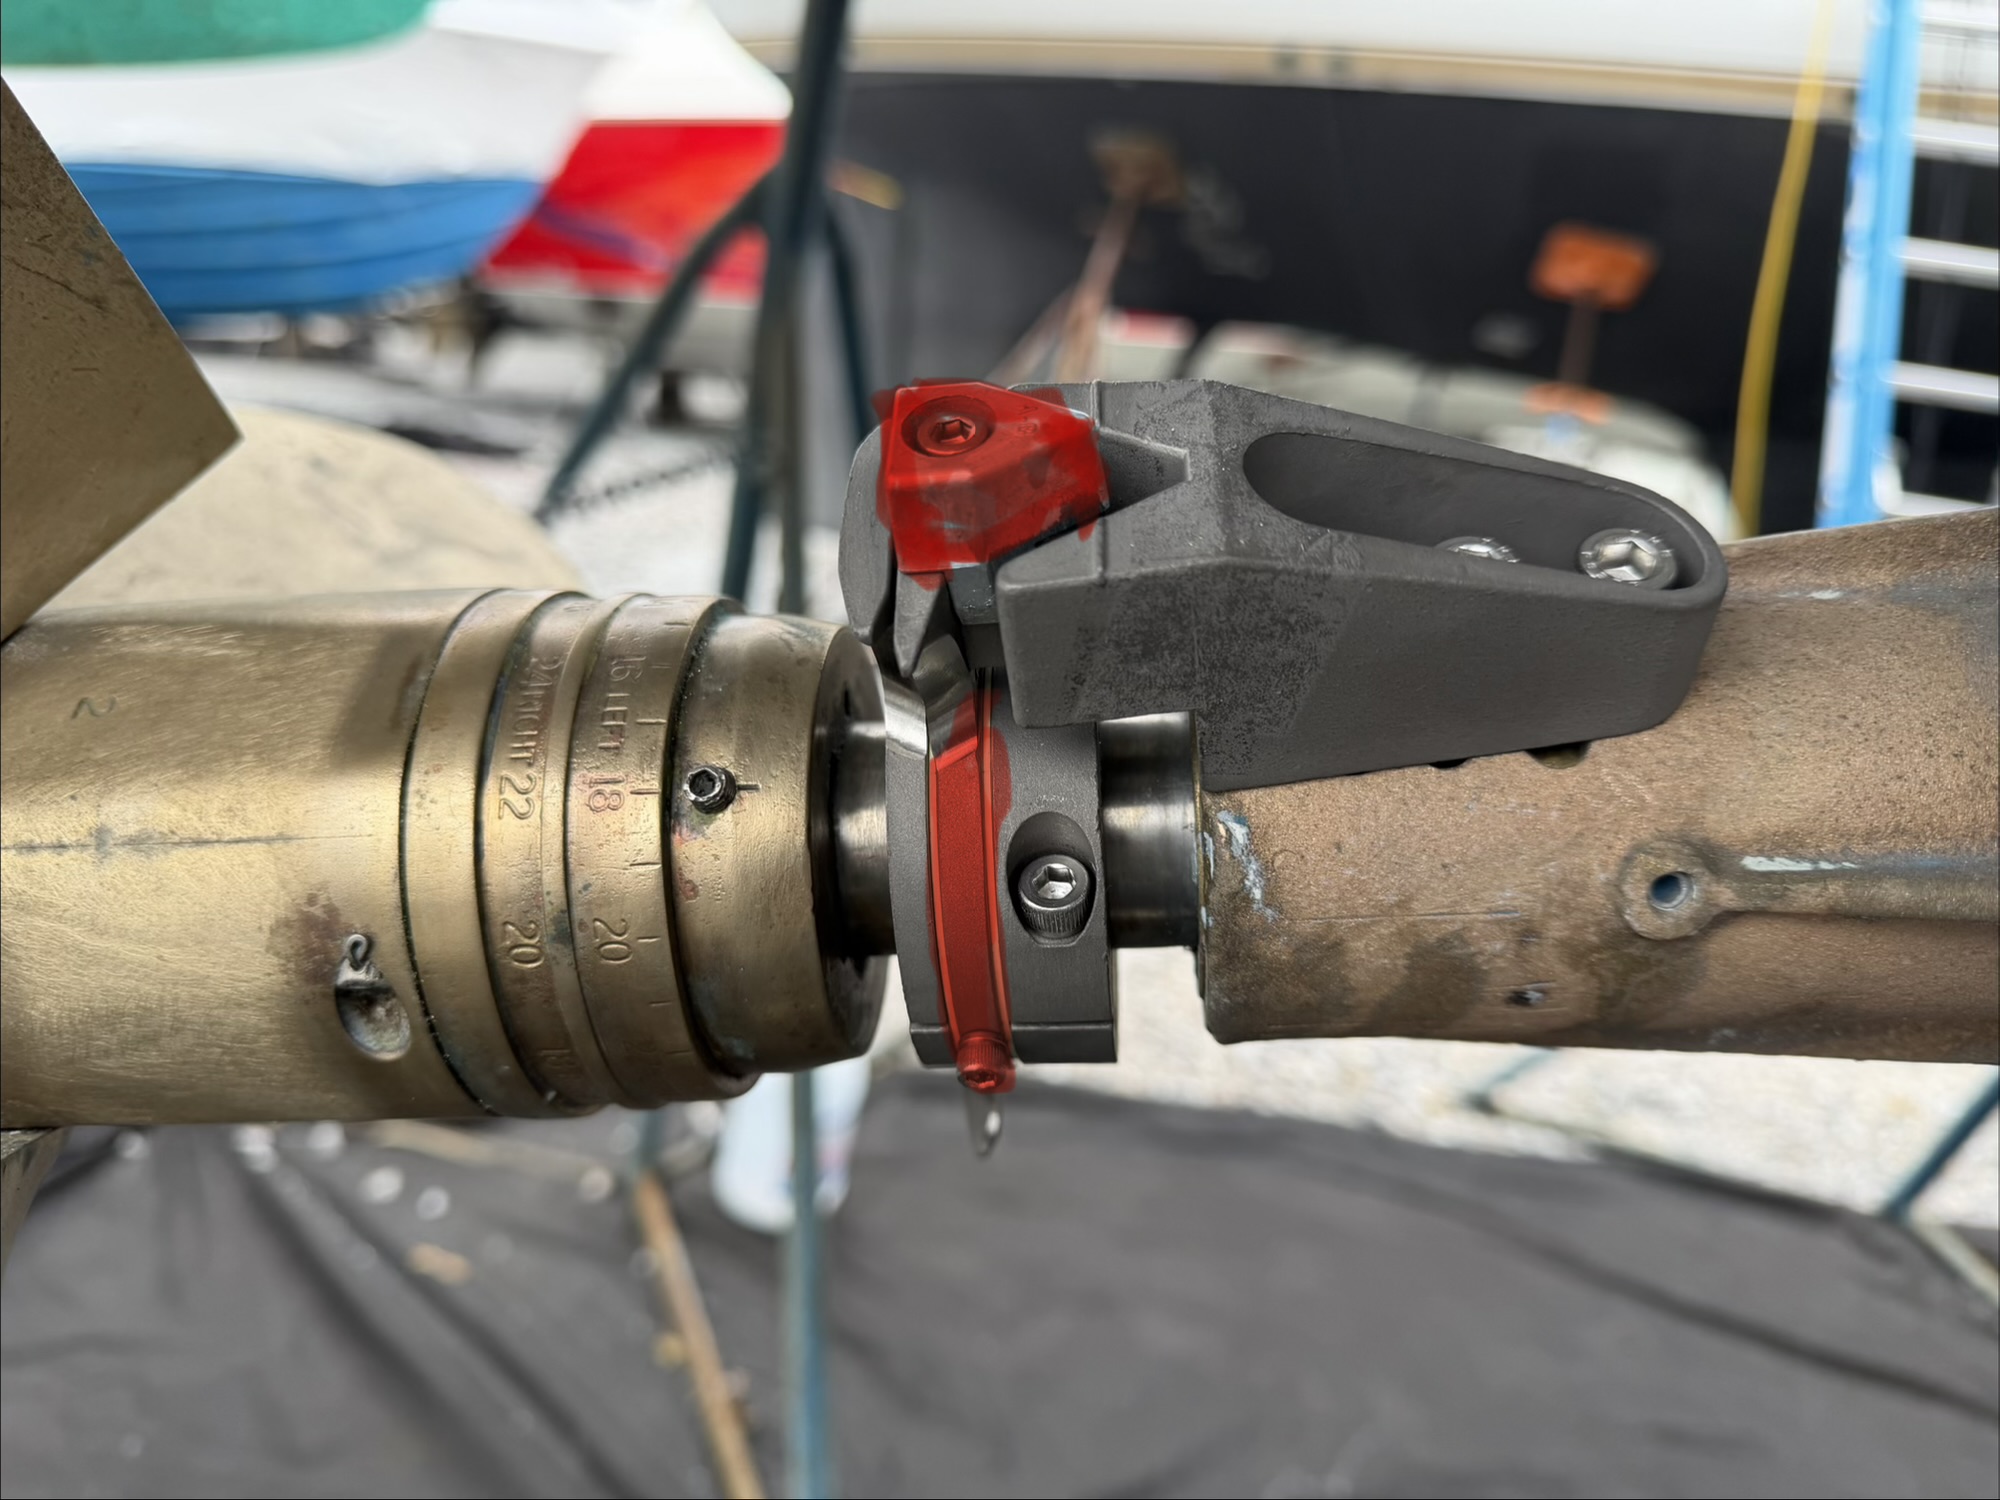
The most complex part of this install was securing the Holding Block to the housing. I adjusted the cutting parts on the shaft and placed the Holding Block on the housing where it needed to go and above the original holes. I first drilled and tapped the center hole, and then secured that with it’s socket head screw and locking washer (provided by Spurs). Then I drilled and tapped the other two holes — all holes drilled to a center depth around 7mm.
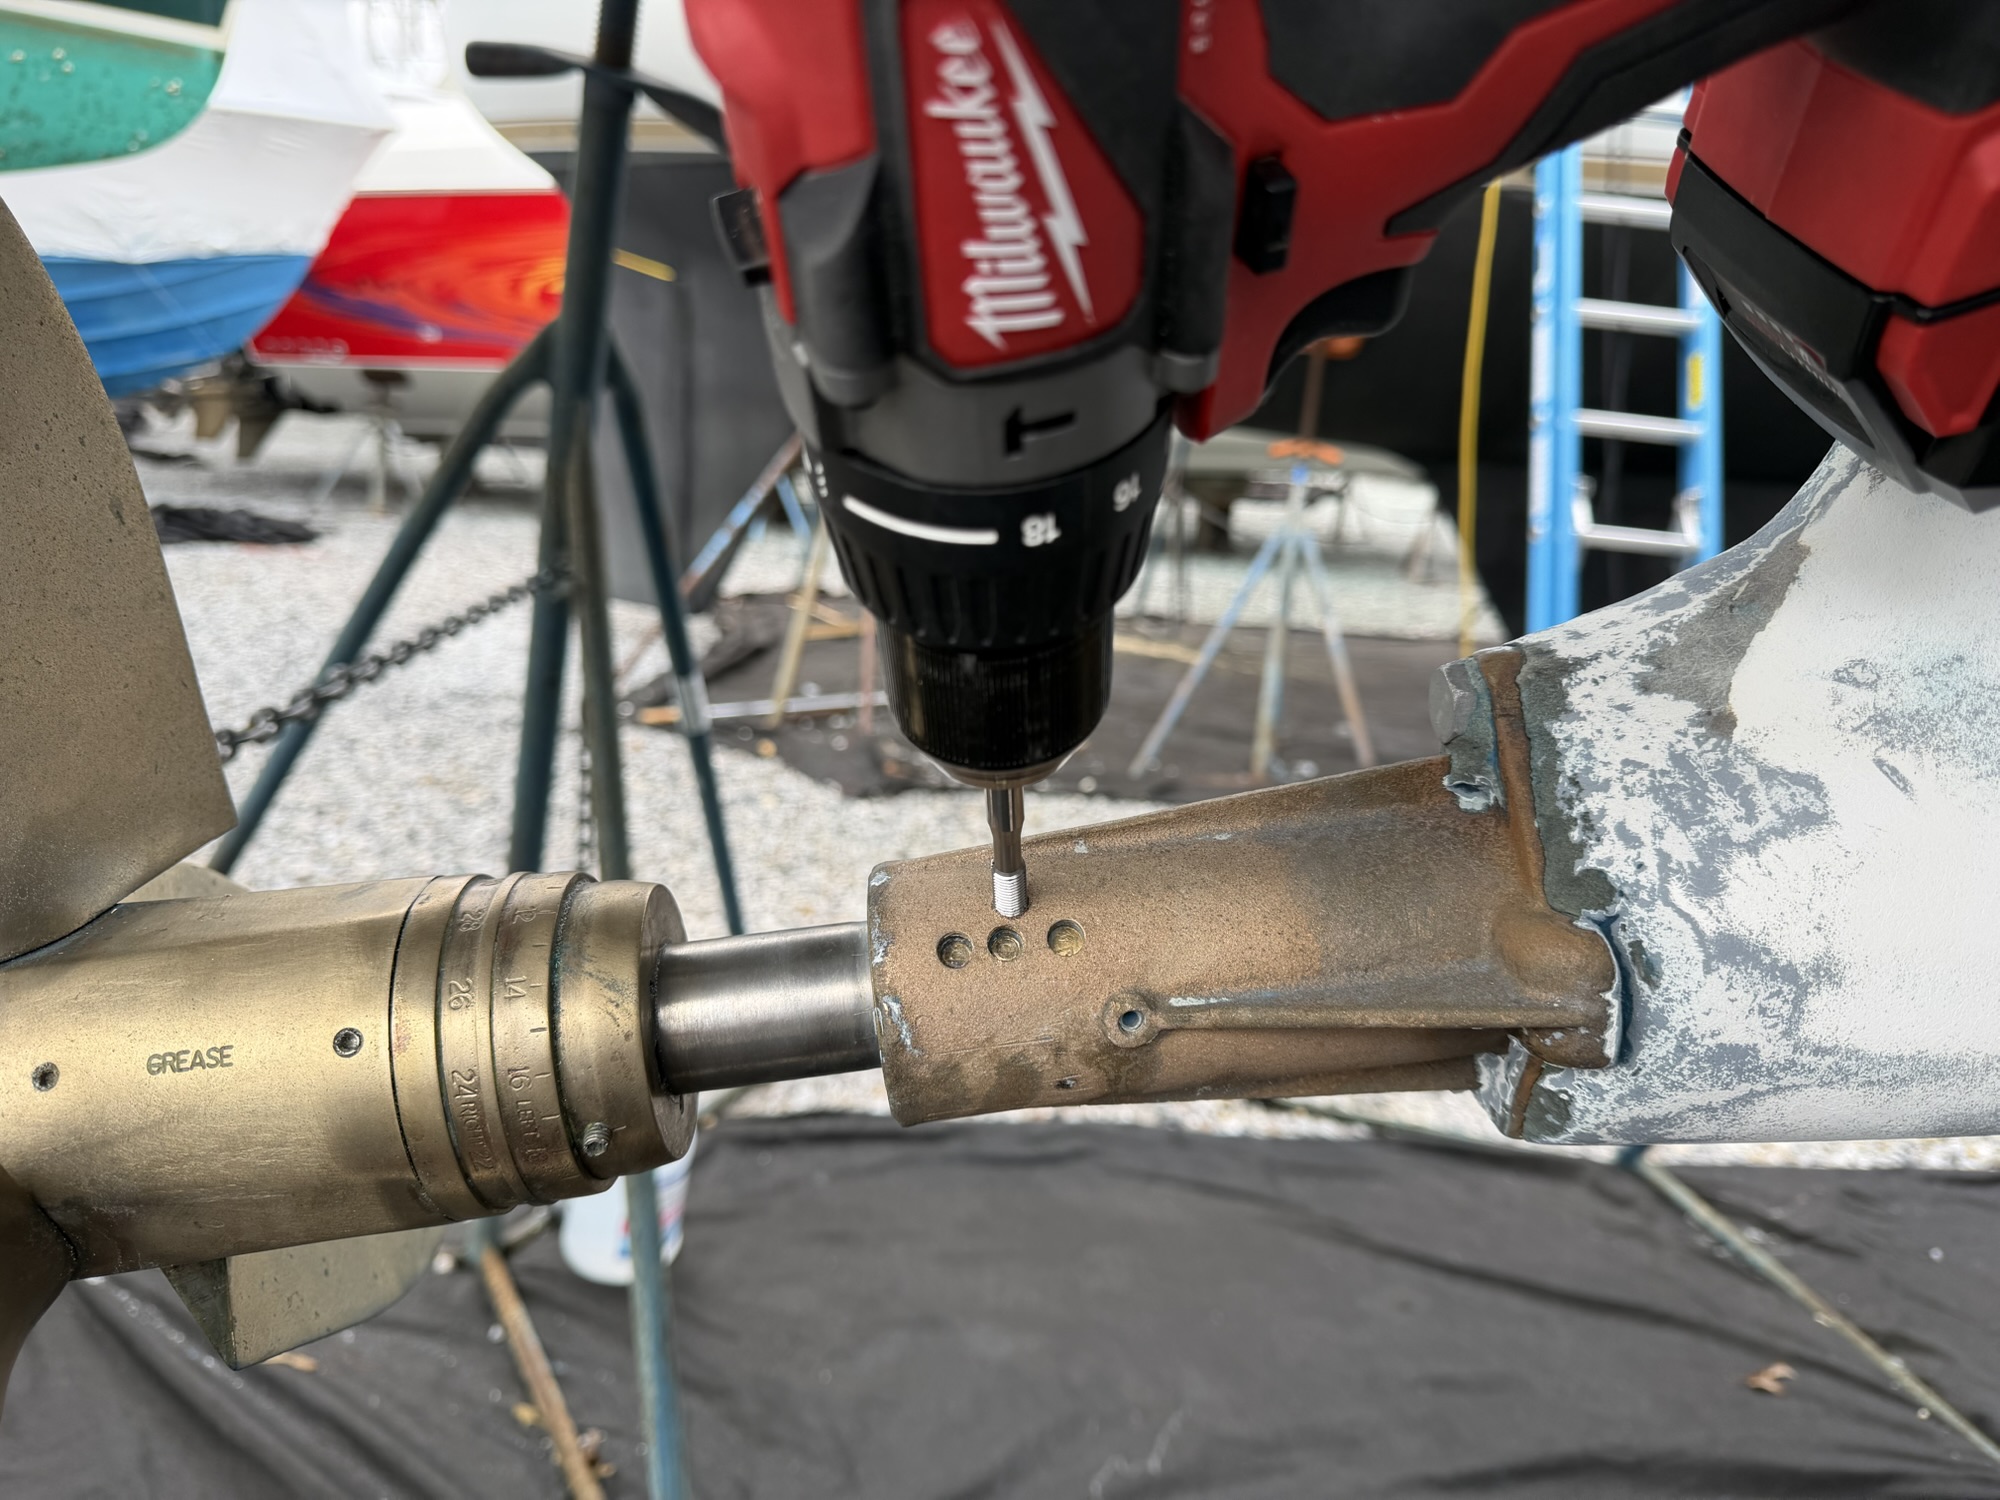

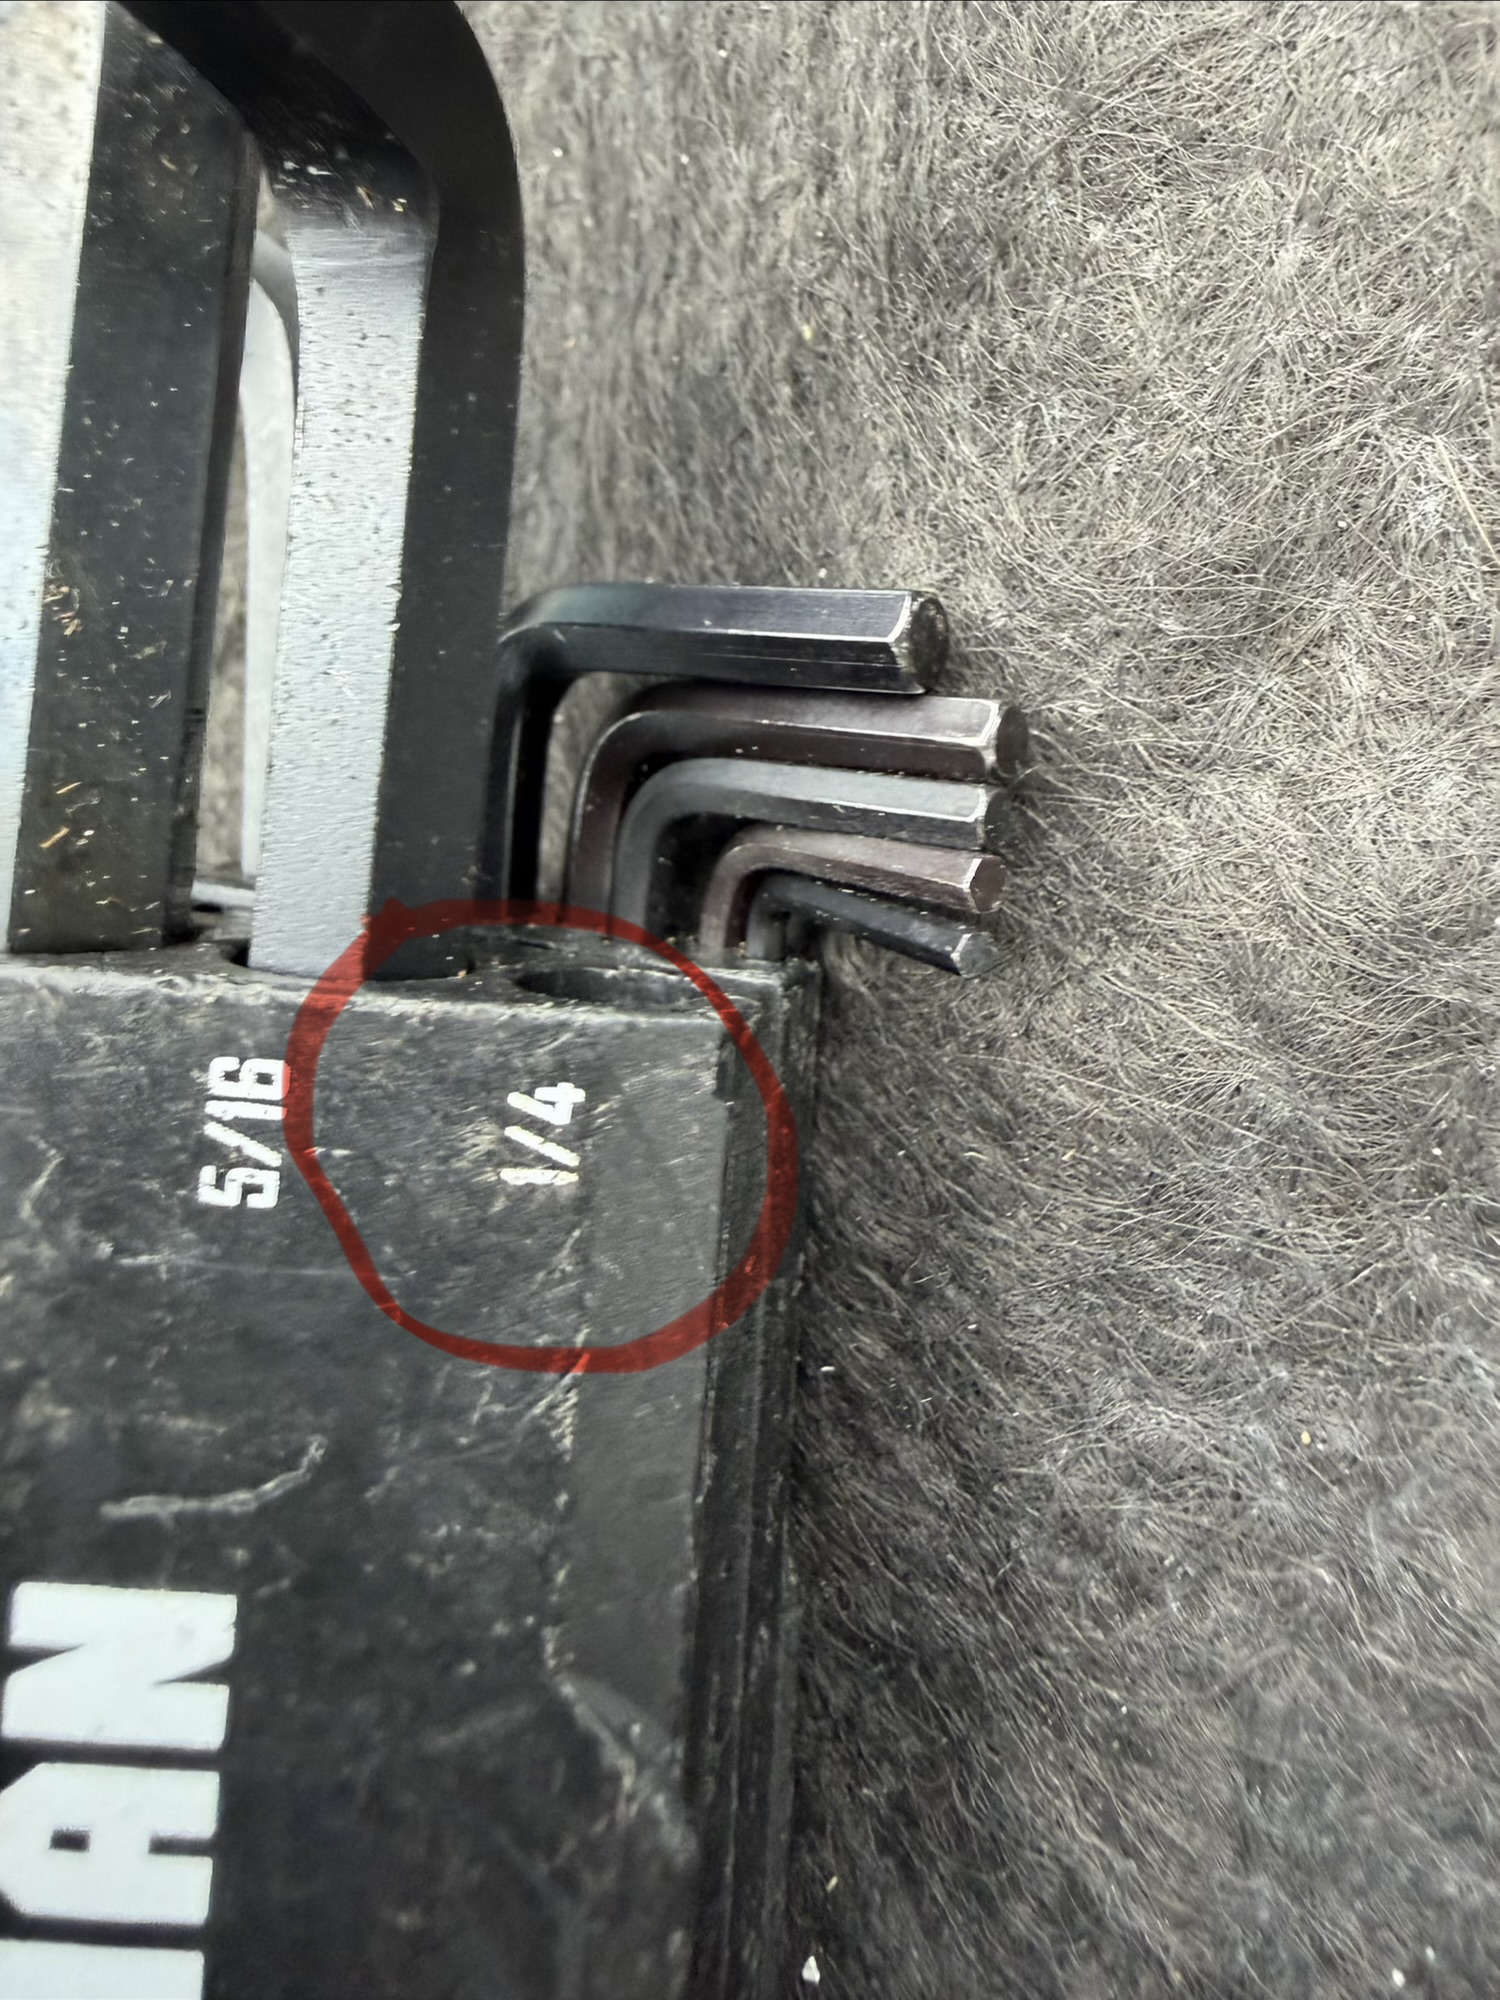
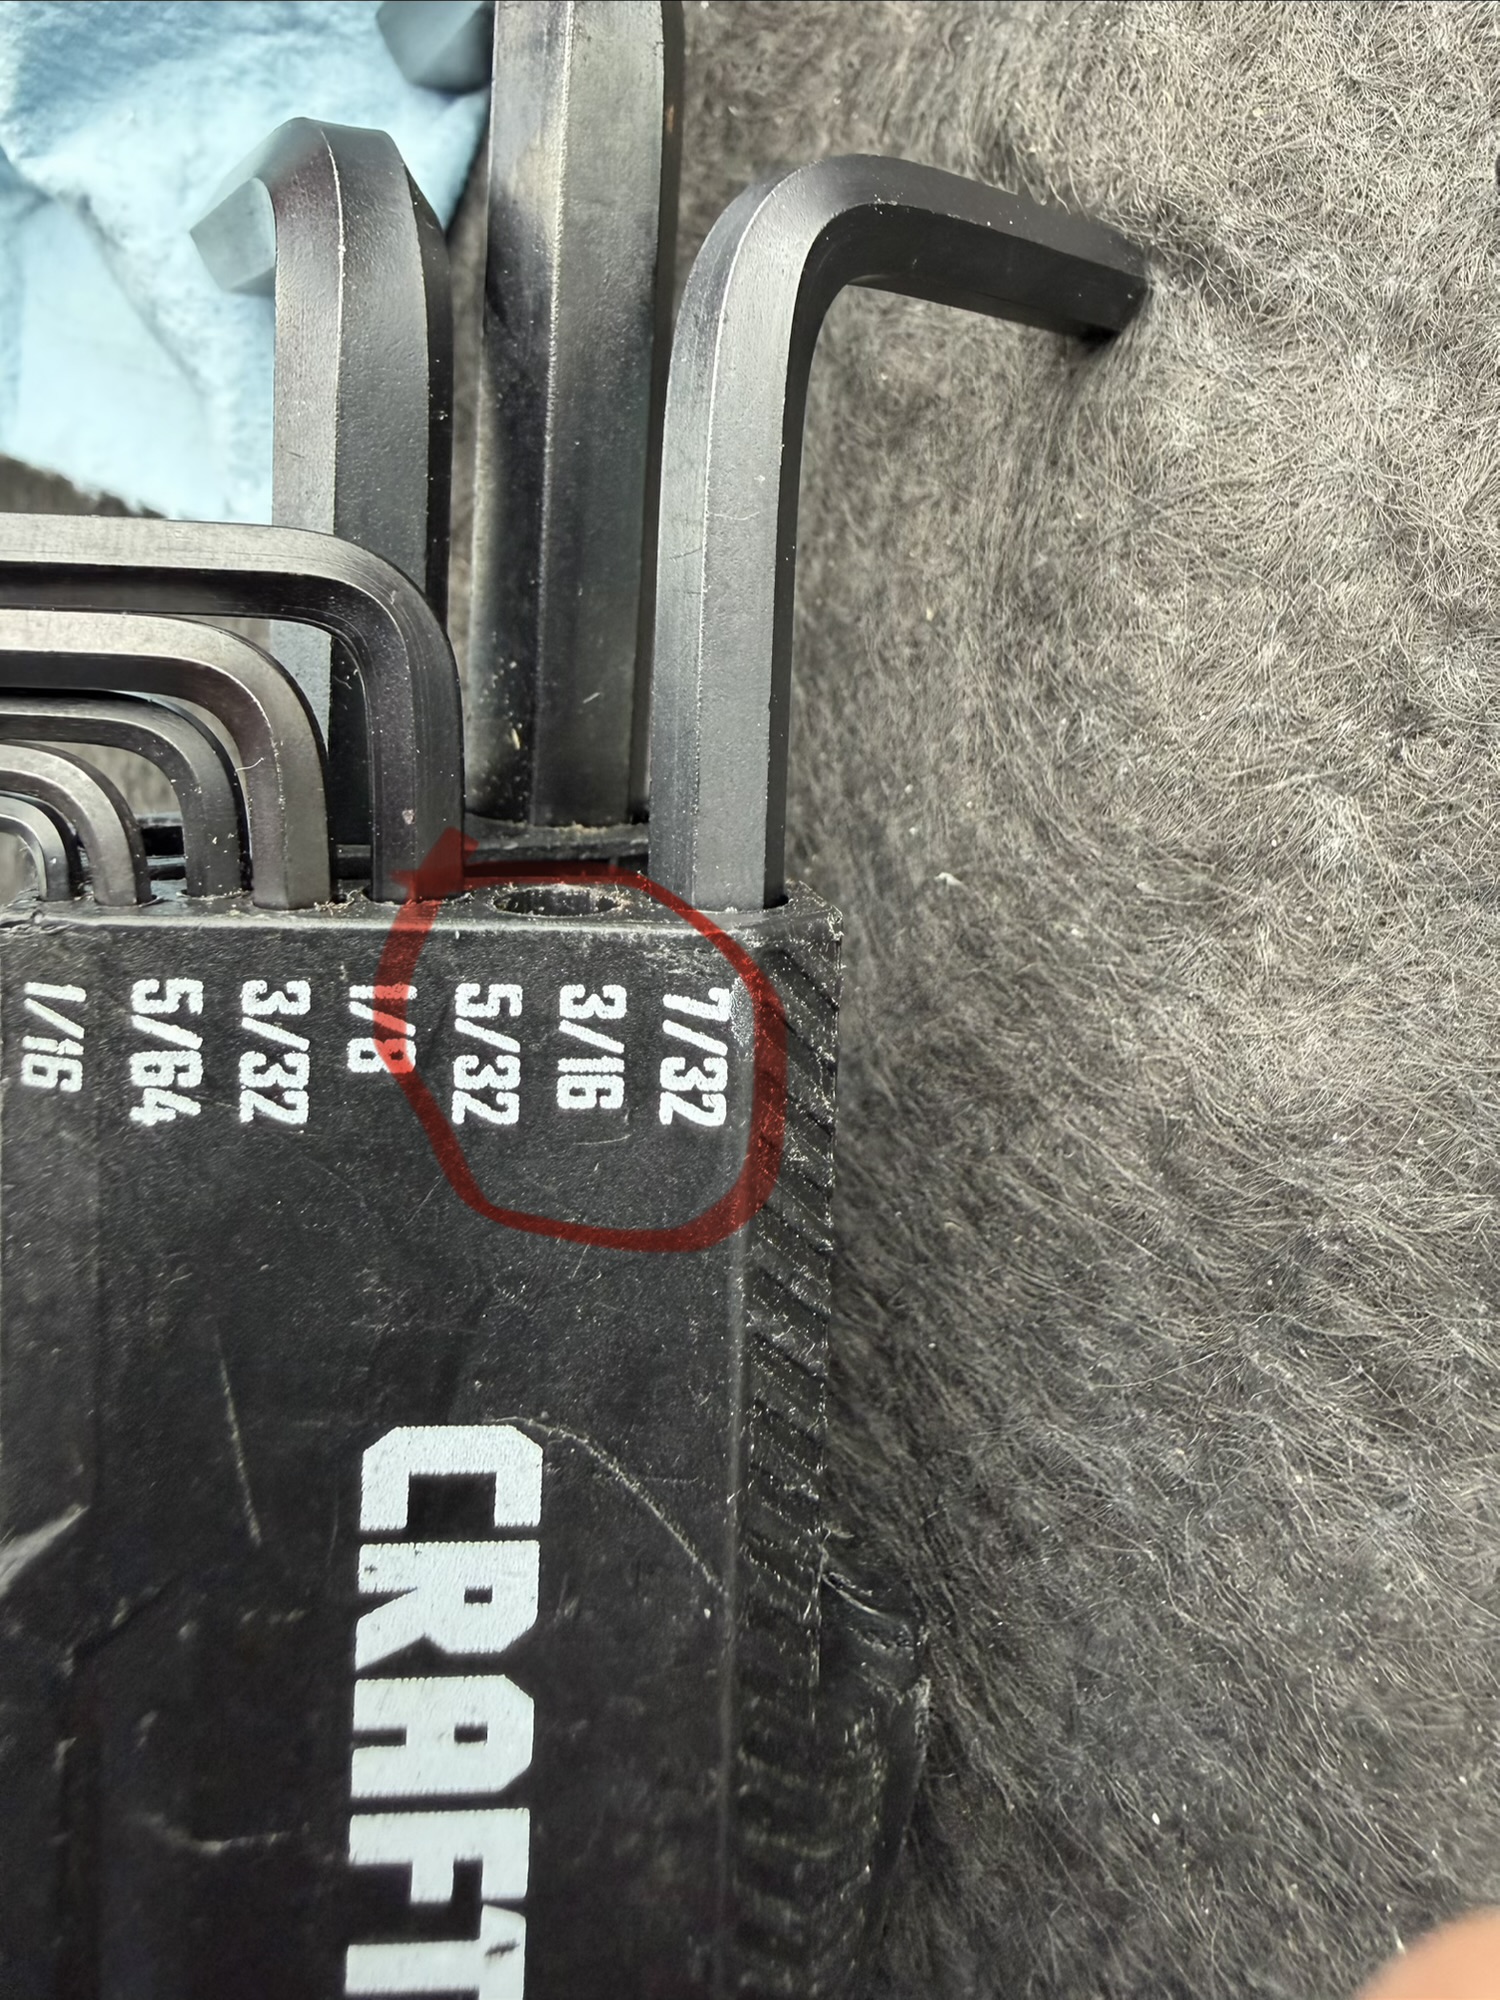
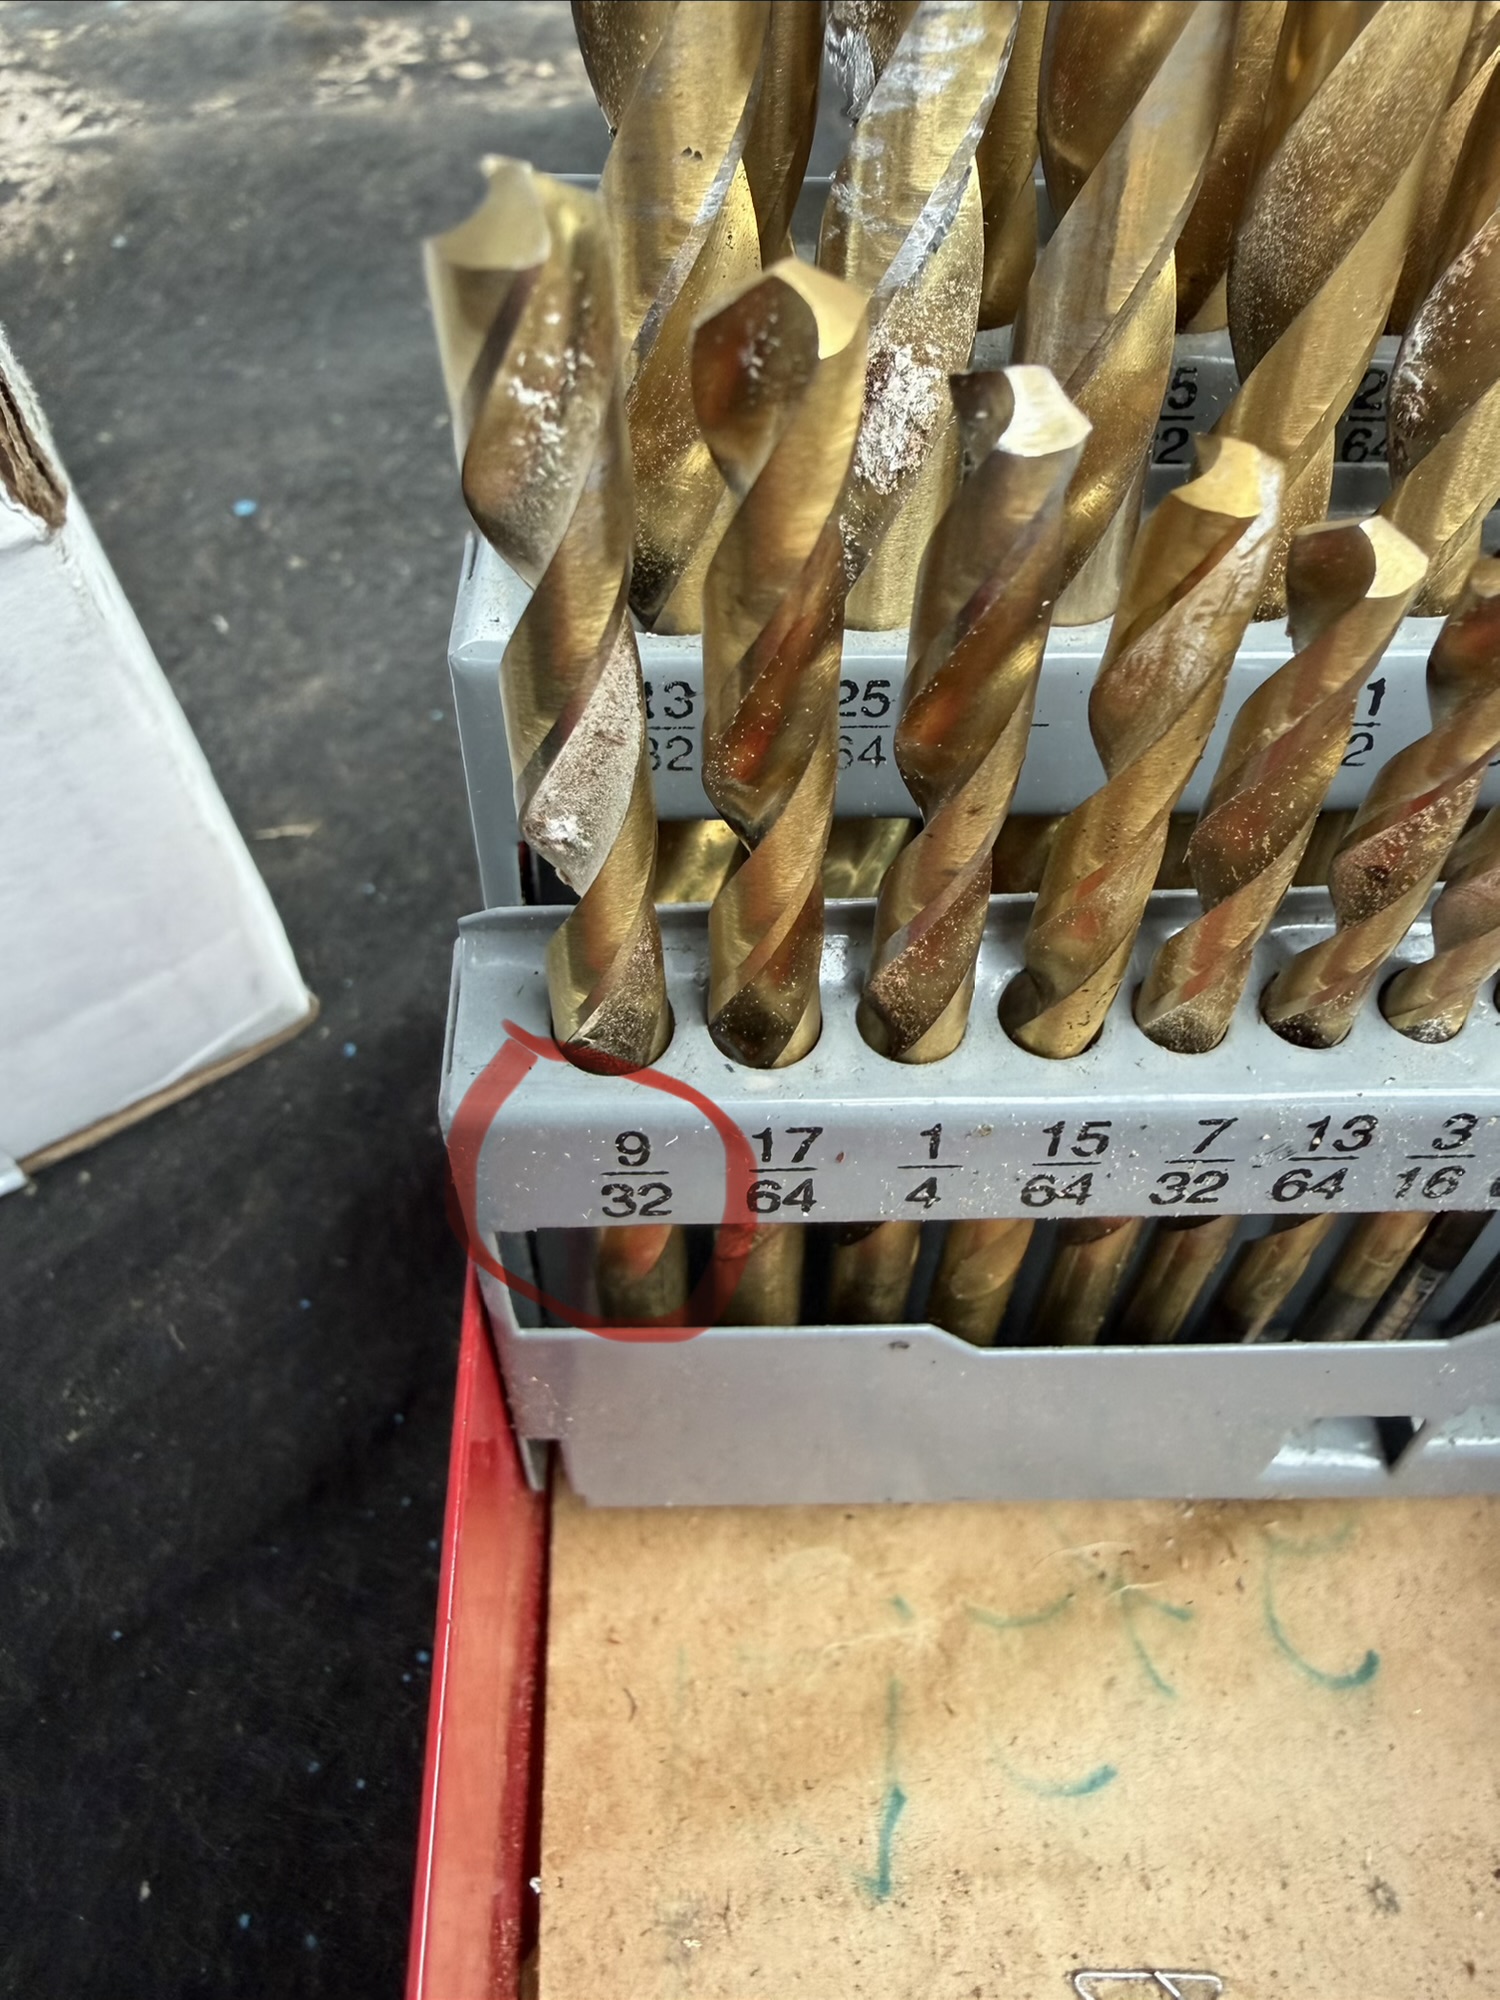
Toold that were required to do this job include a 9/64″, 3/16″ and 1/4″ hex as well as a 9/32″ drill for pre-drilling the new holdes. After I drilled the new holes, I carefully blew them down with air from a can to remove all debris. The 9/64″ hex is a MUST have to tighten the stationary blade.
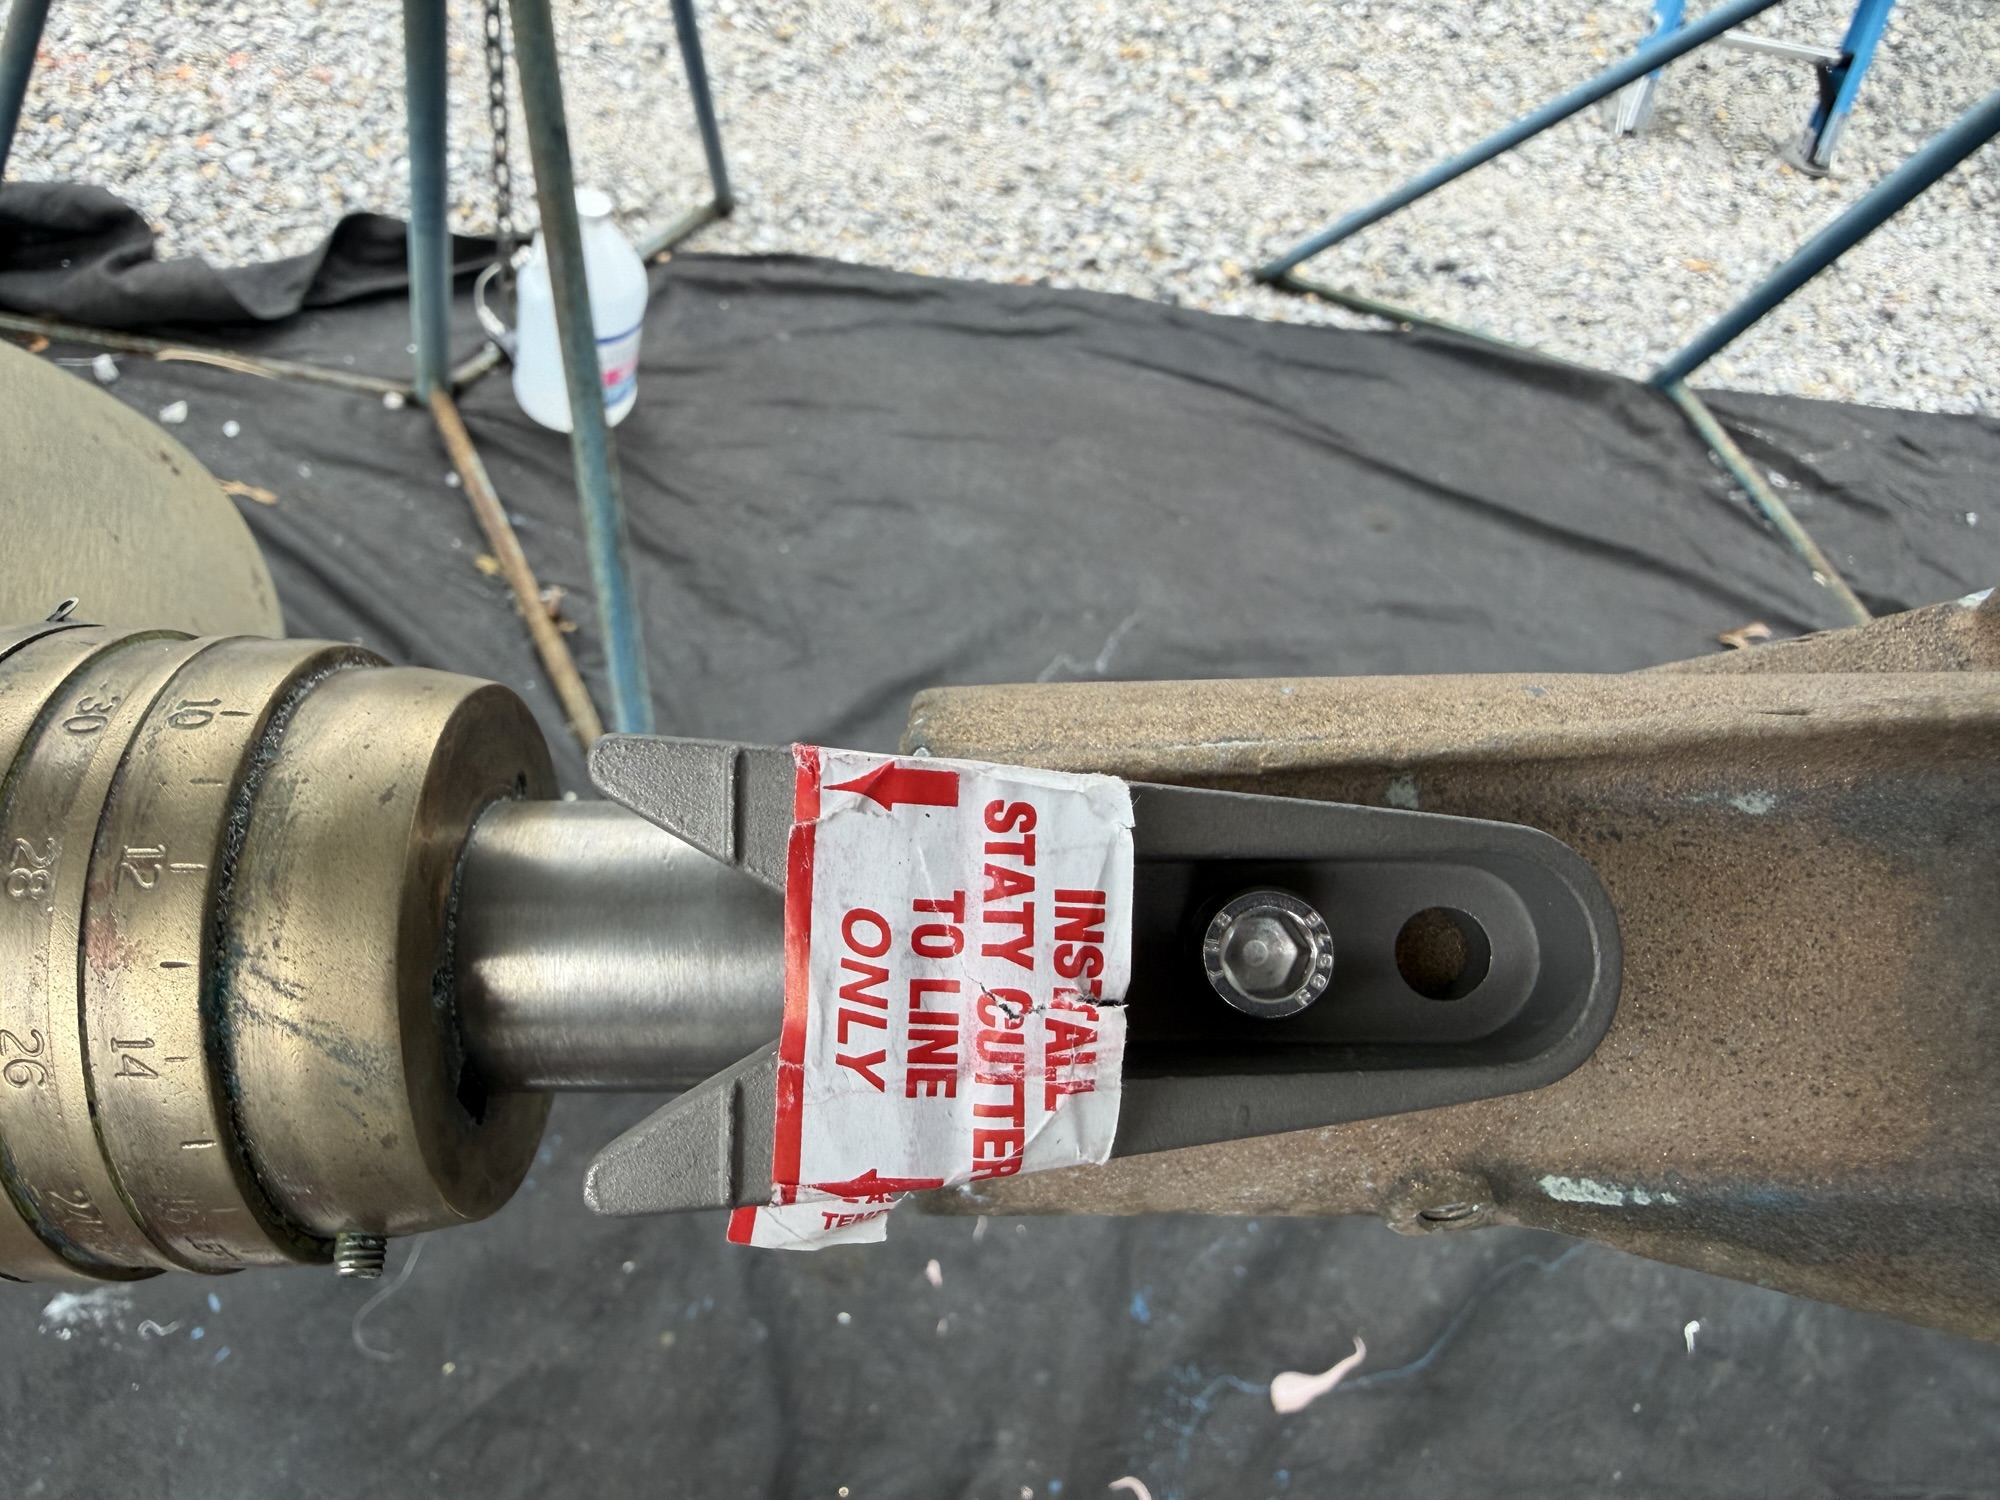
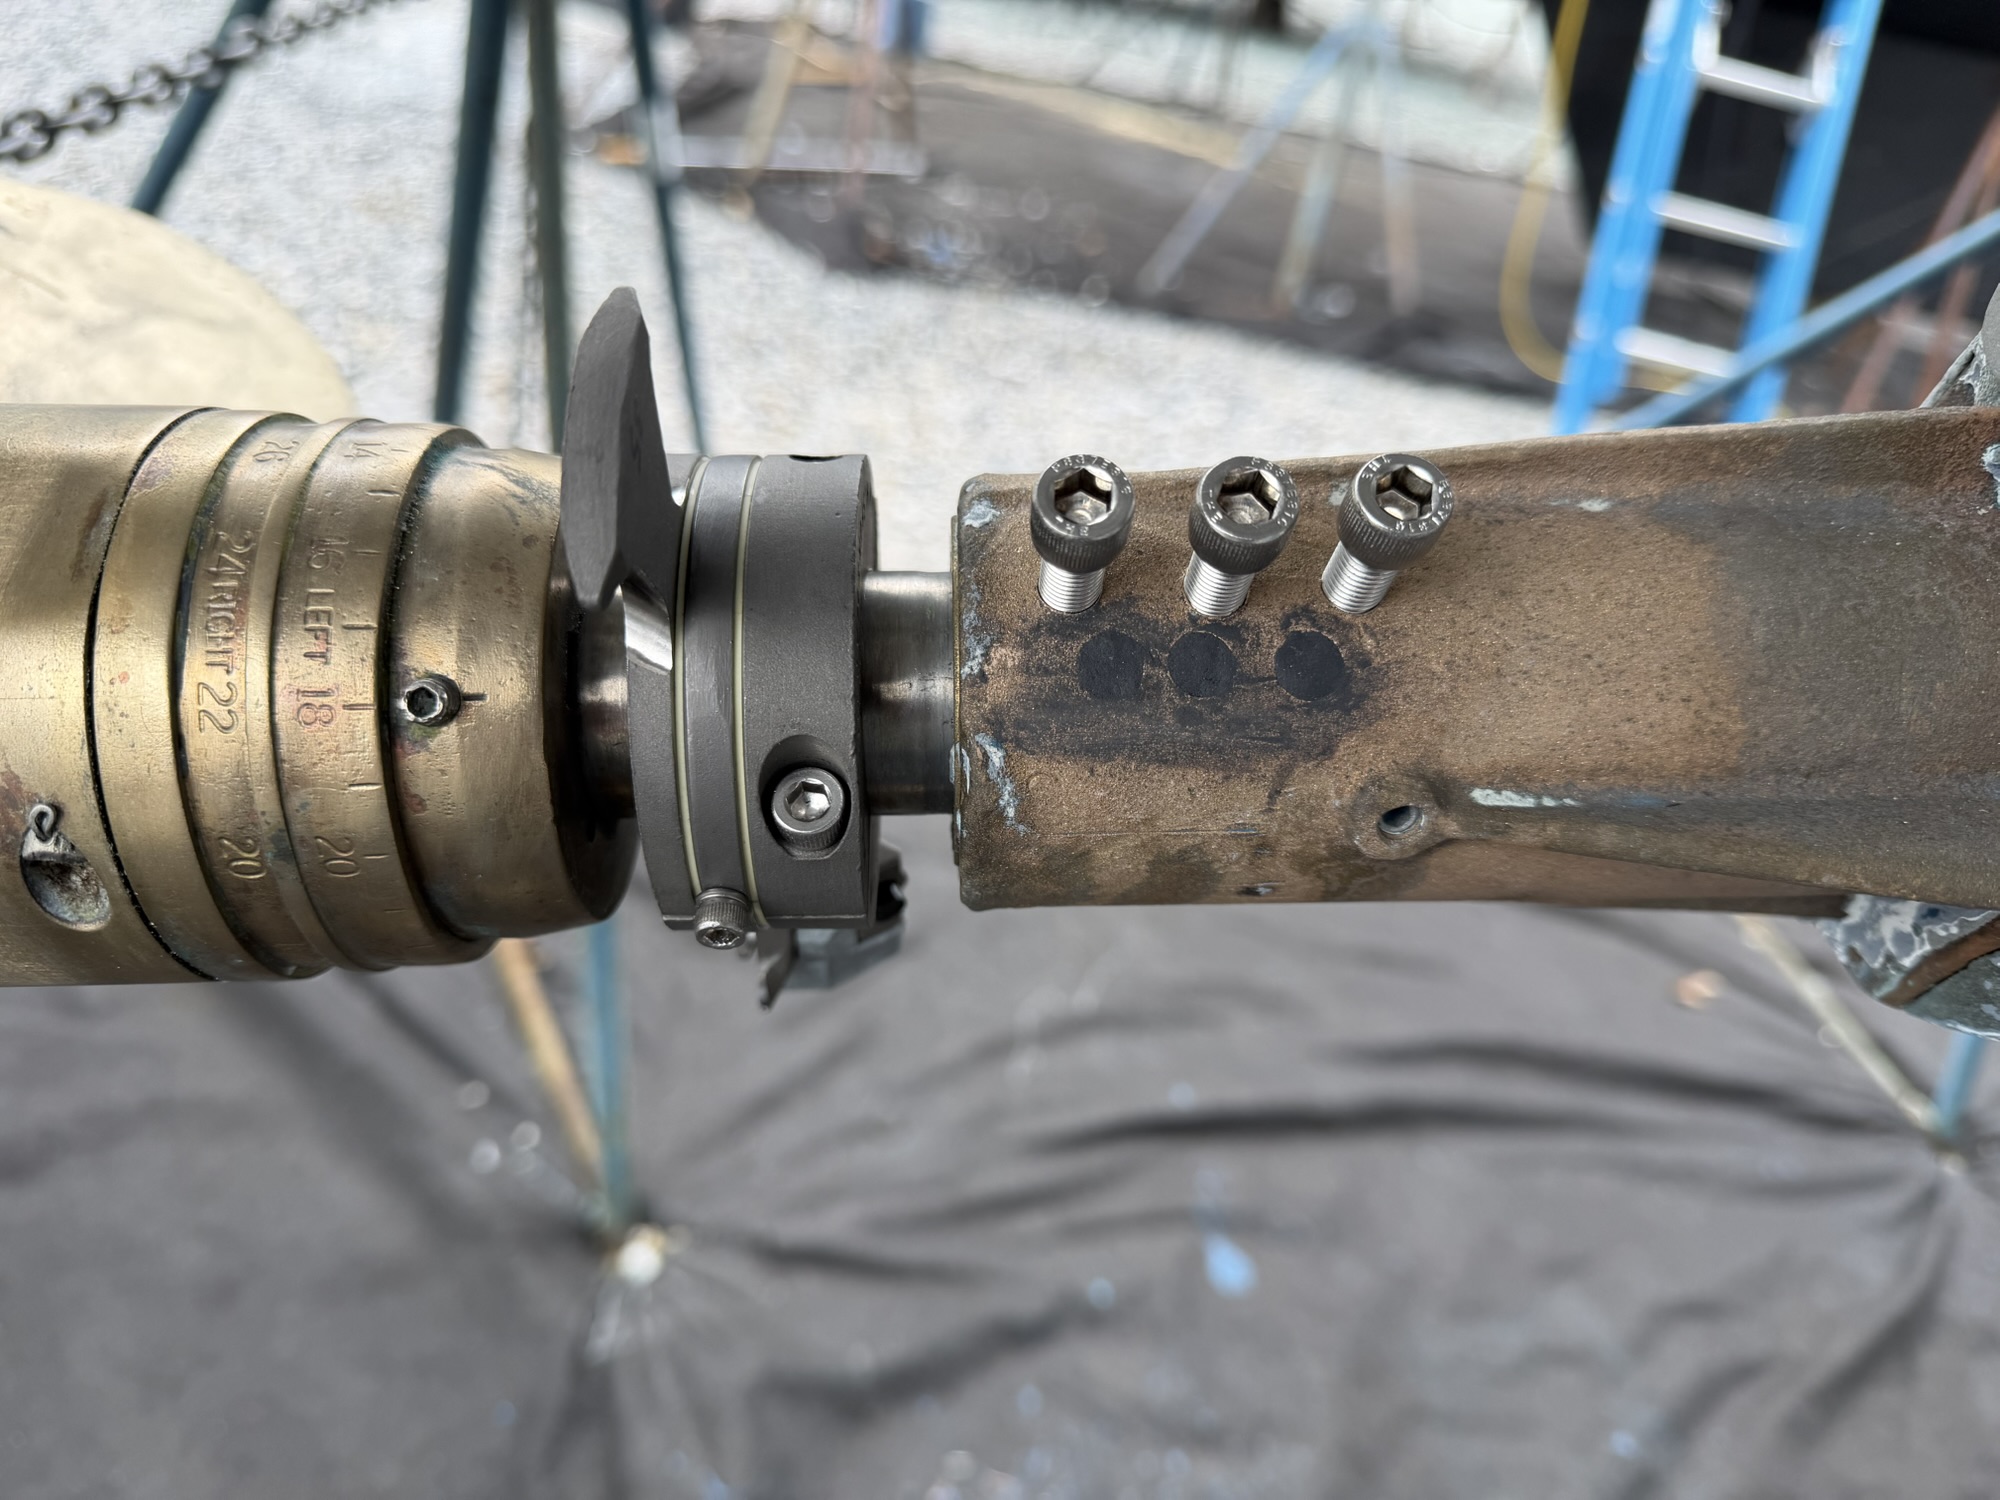
I filled the original holes with JB Weld Steel Stick. The final installation looked great, and I had this whole unit installed in just a couple of hours under the boat on stands in the yard. This installation will not allow me to use a shaft zinc, and so therefore, we anticipate having the change the propeller zinc / anode more often. Several boats at Bert Jabins Yacht Yard use the Spurs system, and our installation looks identical to those. One thing I’ll note is that most of those installations seem to be lacking the anode and the noise dampening elastomers on the stationary blade. That will be something for us to watch out for.
To finish off this post, I spoke with Spurs on the phone about applying antifoul which they advise against in their instructions. On the call, they said it was fine to coat the Holding Block however we would like to, but they did not want the rest of the components to be coated. The most important piece of information they shared is to keep the Teflon bearings for the stationary blade clean and free of coatings – that a coating could potentially interfere with the movement of those bearings around the shaft.
Greg will coat the bronze shaft housing, the propeller and the specific Spurs parts in PropSpeed before we launch. This was a very easy install – hope you find this informative.
