
On the way back up from Oxford while we were trying to enjoy a wing-on-wing downwind (motor) sail, something caused me to ask Rachel to go down and take a look at the engine. I can’t remember what it was. She didn’t see anything. A few minutes later, I asked her to helm and I went down below, opened up the doors, turned on our very bright LED lights (thank you again, Ray), and instantly saw that the center engine bilge was almost full of sea water. My eyes got as big as golf balls. You’ll have to live with that vivid sight in your mind — no pictures taken — (it’s my side of the story).
I quickly deduced that the raw water pump was leaking. We were running deep with the engine at around 1500 RPM. The pump leaked more with higher RPM, so we creanked it back down to 1000 RPM. As I was using a hand vacuum pump to empty the engine bilge, the leak just about stopped. We had no more drama the entire rest o fthe trip, thankfully. It was clear, however, that I needed to rebuild the raw water pump before we took the boat out again.
We removed the raw water supply and discharge hoses and then removed the pump from the engine. I didn’t waste any time disassembling the pump in the garage on my bench.

Heree’s what I did:
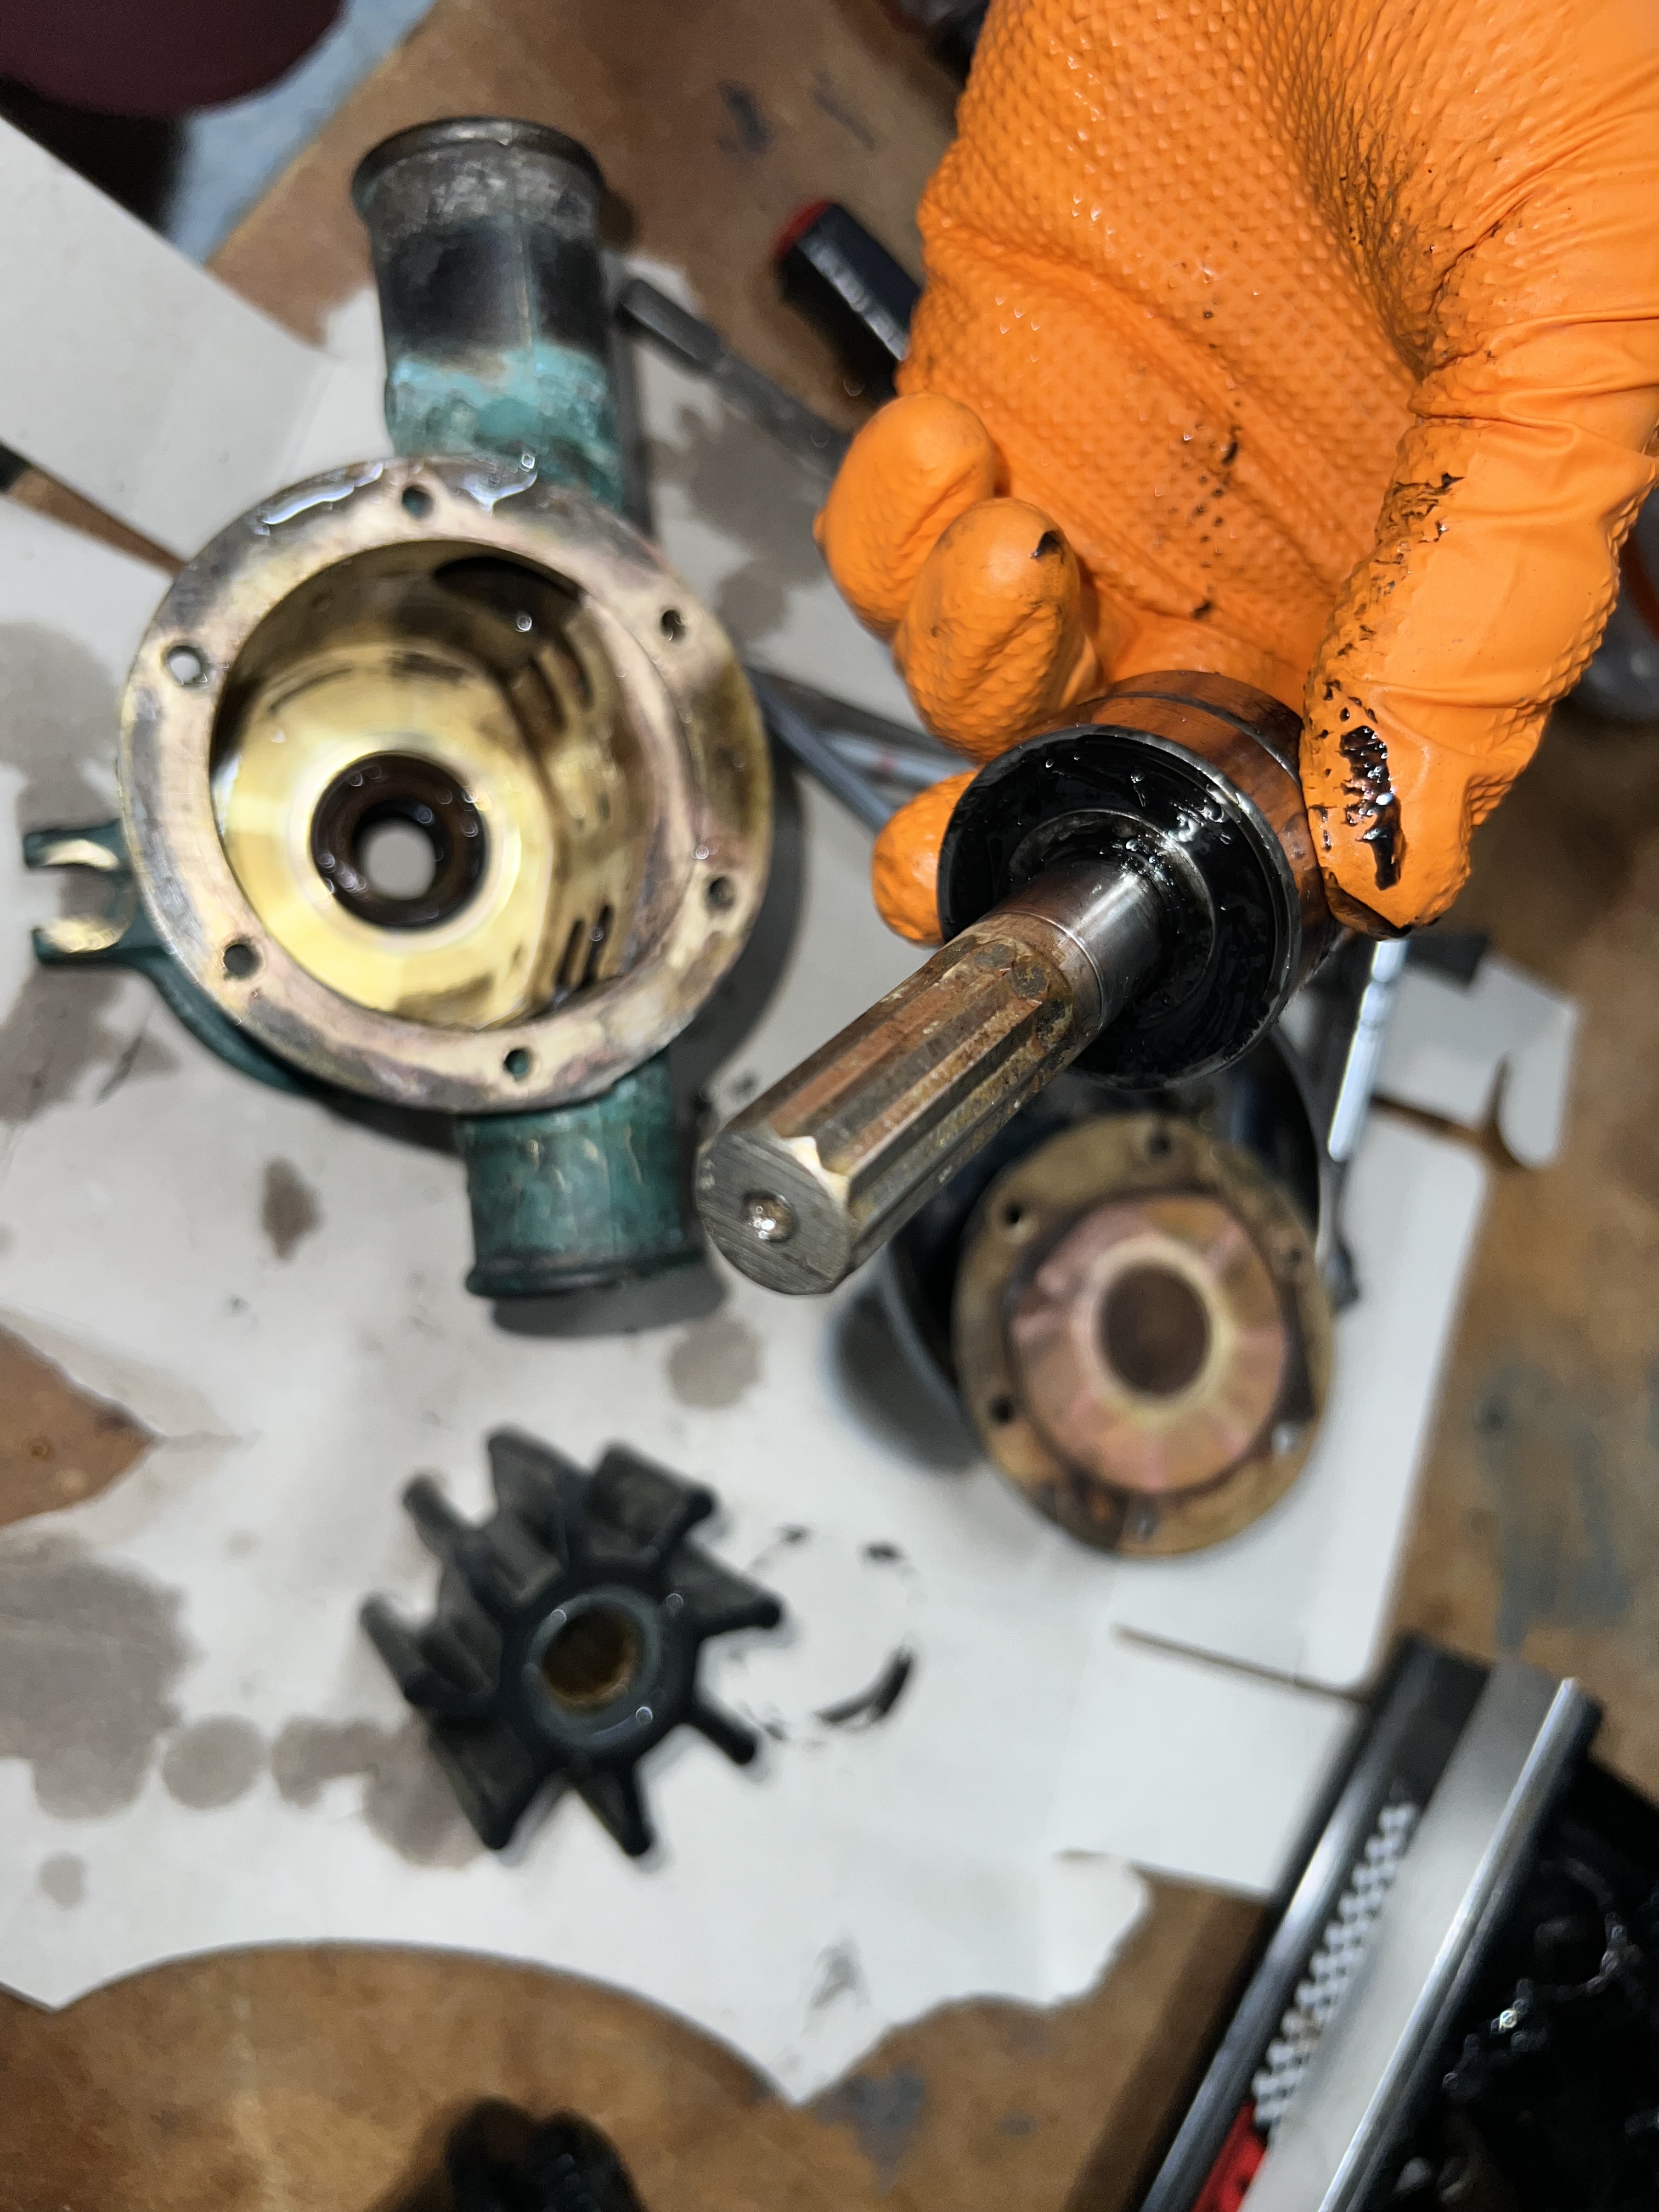
I opened up the pump face and removed the impeller. Then I hammered the shaft to remove it with the bearings in tact.

Then I pulled out the two seals — the raw water side and the engine side. I observed that the raw water seal was compromised as the steel spring was broken.

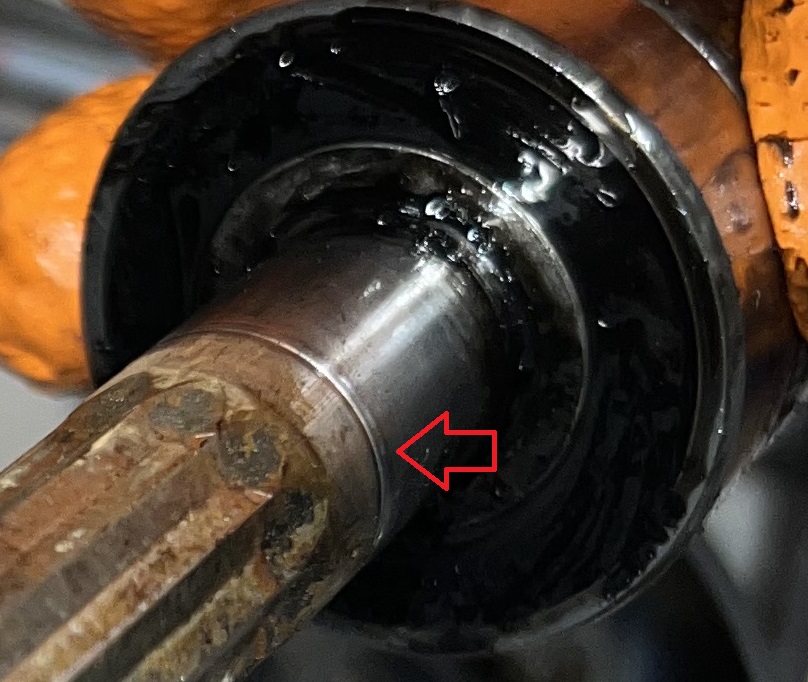
Disassembling the pump further, I noticed something shimmering in the light on the shaft.
Inspecting this more closely, two small grooves were worn into the shaft at the place where the seals were fixed in position. If I ignored this, I could have taken the risk to re-install the old shaft and hope that the new seals sealed around these grooves and did not leak.

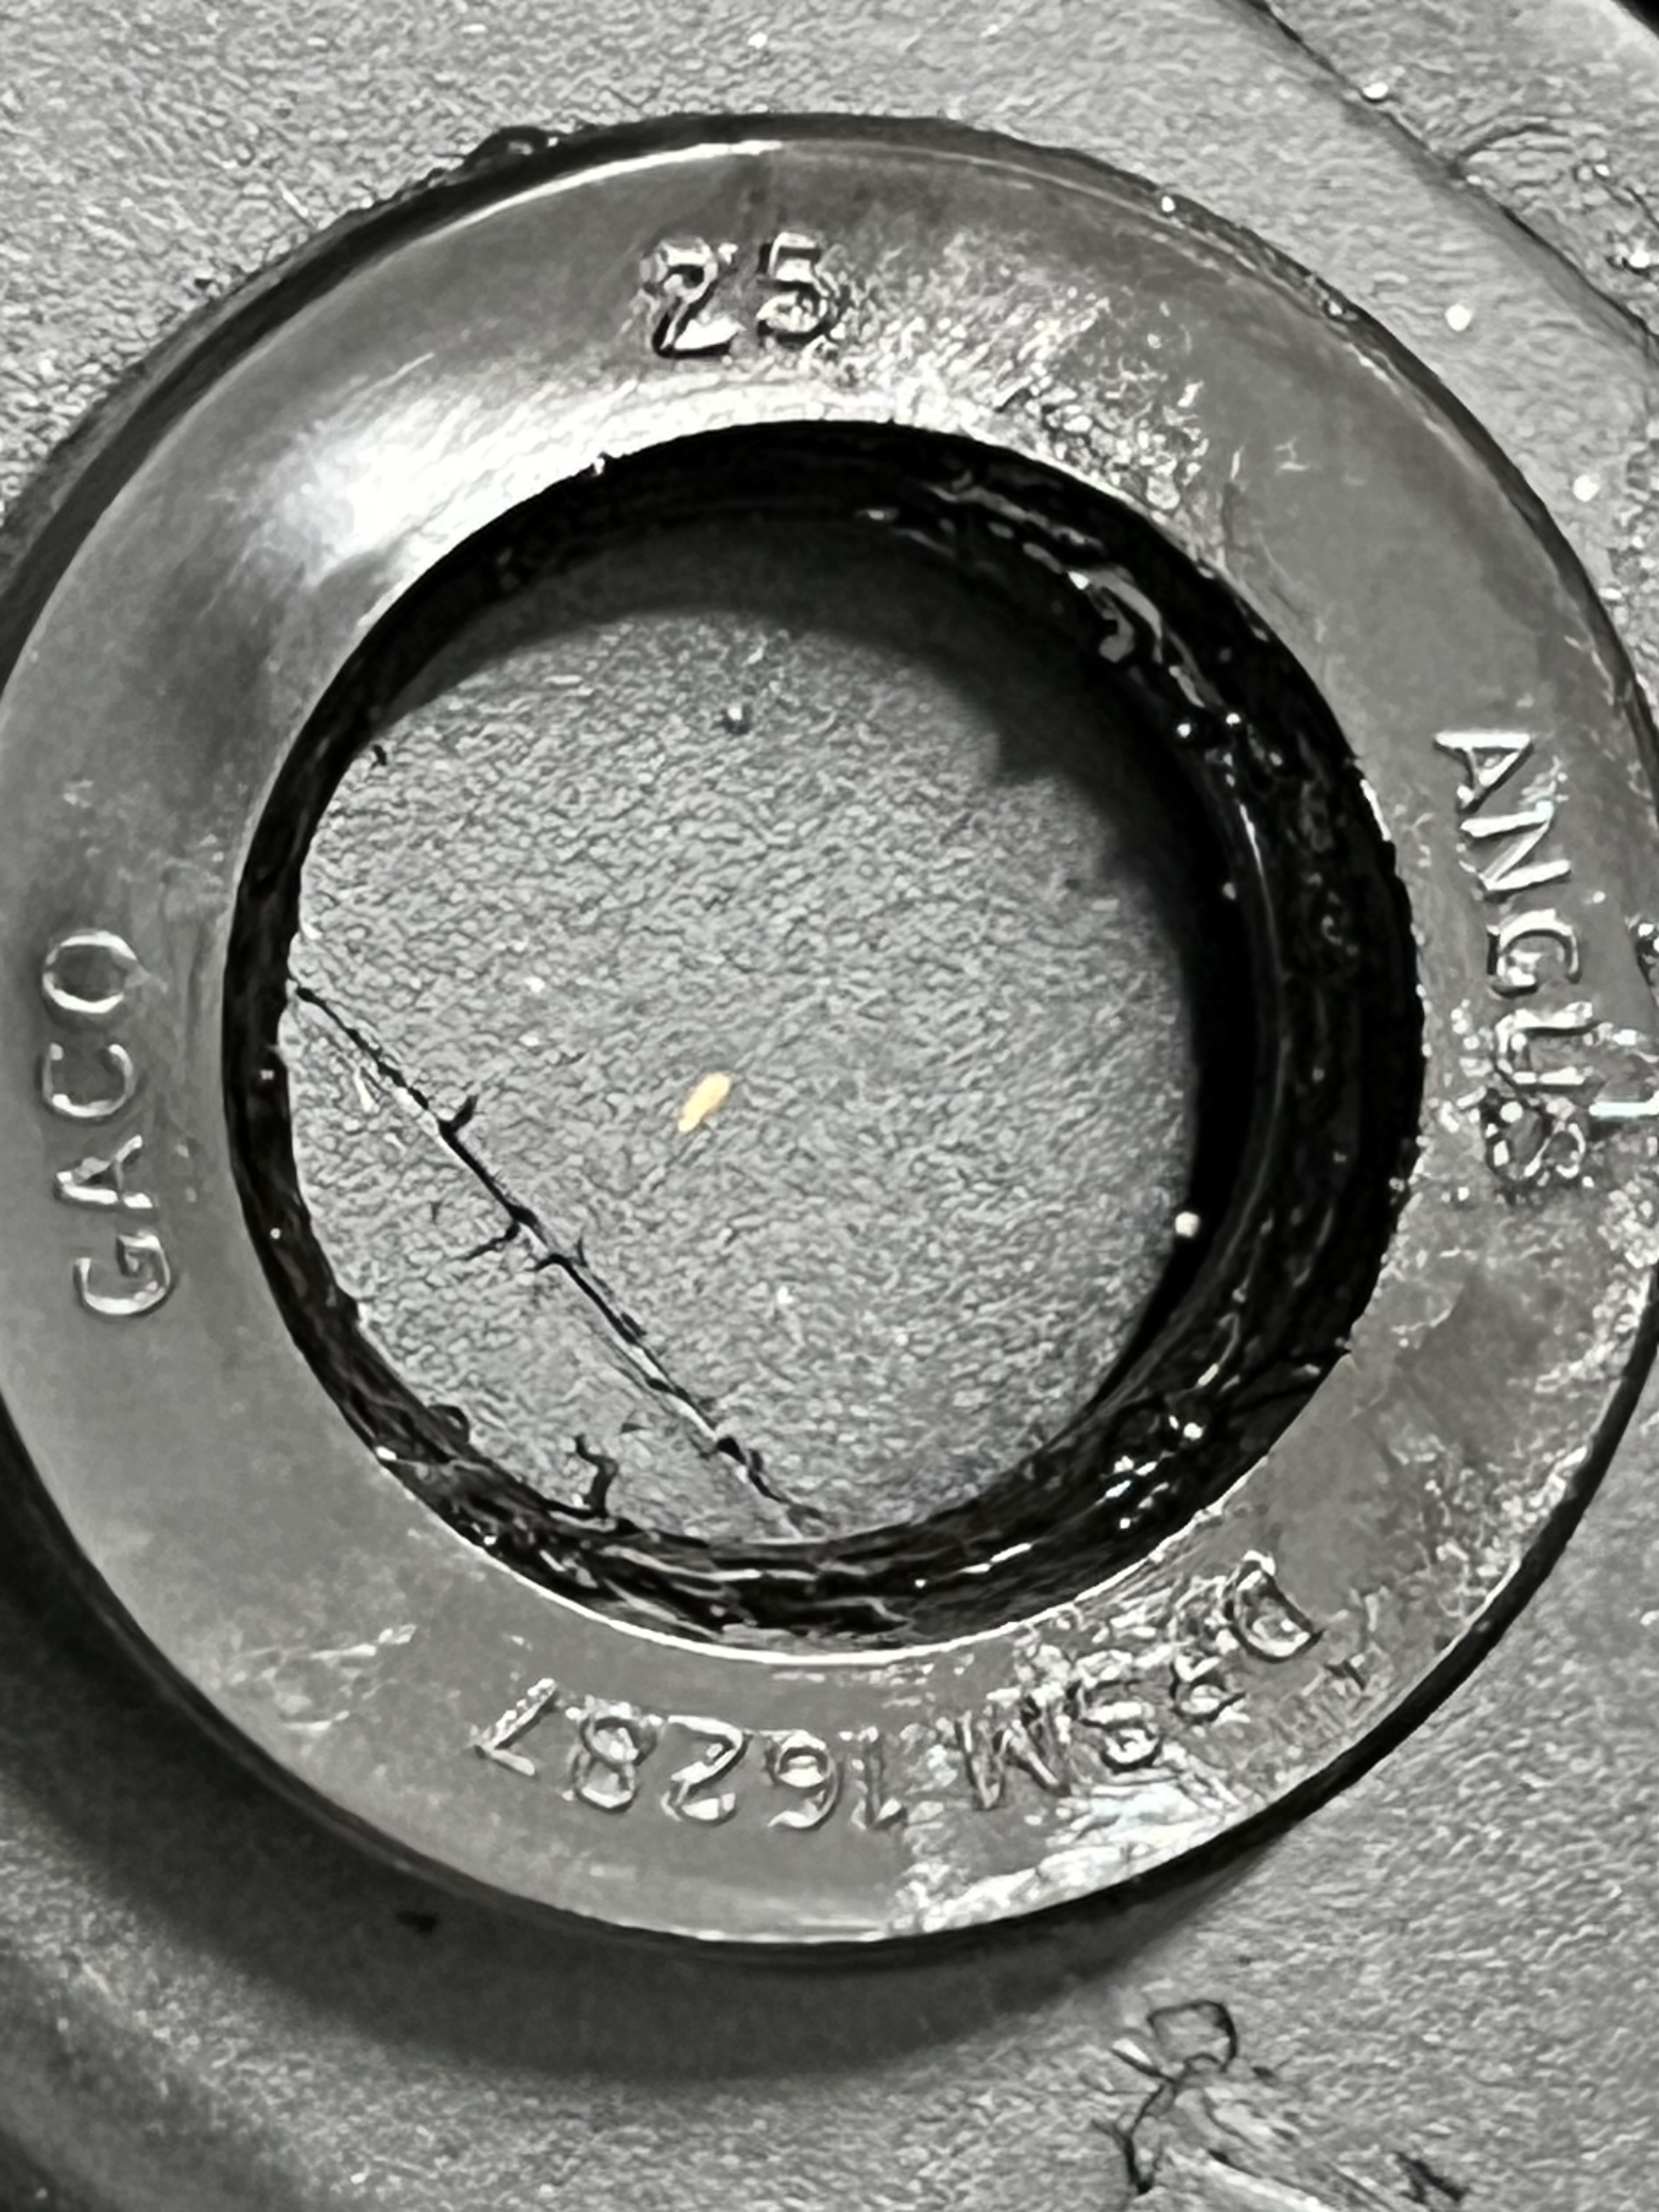
The original Volvo front cover also had a groove wore in it from the impeller. So I purchased a pump rebuild kit from Stay Cool Pumps as well as a brand new shaft and pre-installed bearings.
Within just a few days, the parts arrived, and I installed the new seals in the pump body with the spring side facing the service side for both raw water and engine. My seal installation tool from Harbor Freight came in handy to install the seals flush and flat. While I did this, I was sure to place the small o-ring and spacer in between both seals.
Then I put the new shaft with bearings in the freezer for about 15 minutes and grabbed an ice cream desert. After the desert, I pulled the shaft out of the freezer and pushed the new shaft through the seals and into position with ease. I applied high temperature grease between the outer bearing and void area adjacent to the oil seal. The tricky part was to get the new shaft to go through the spacer and the small o-ring.

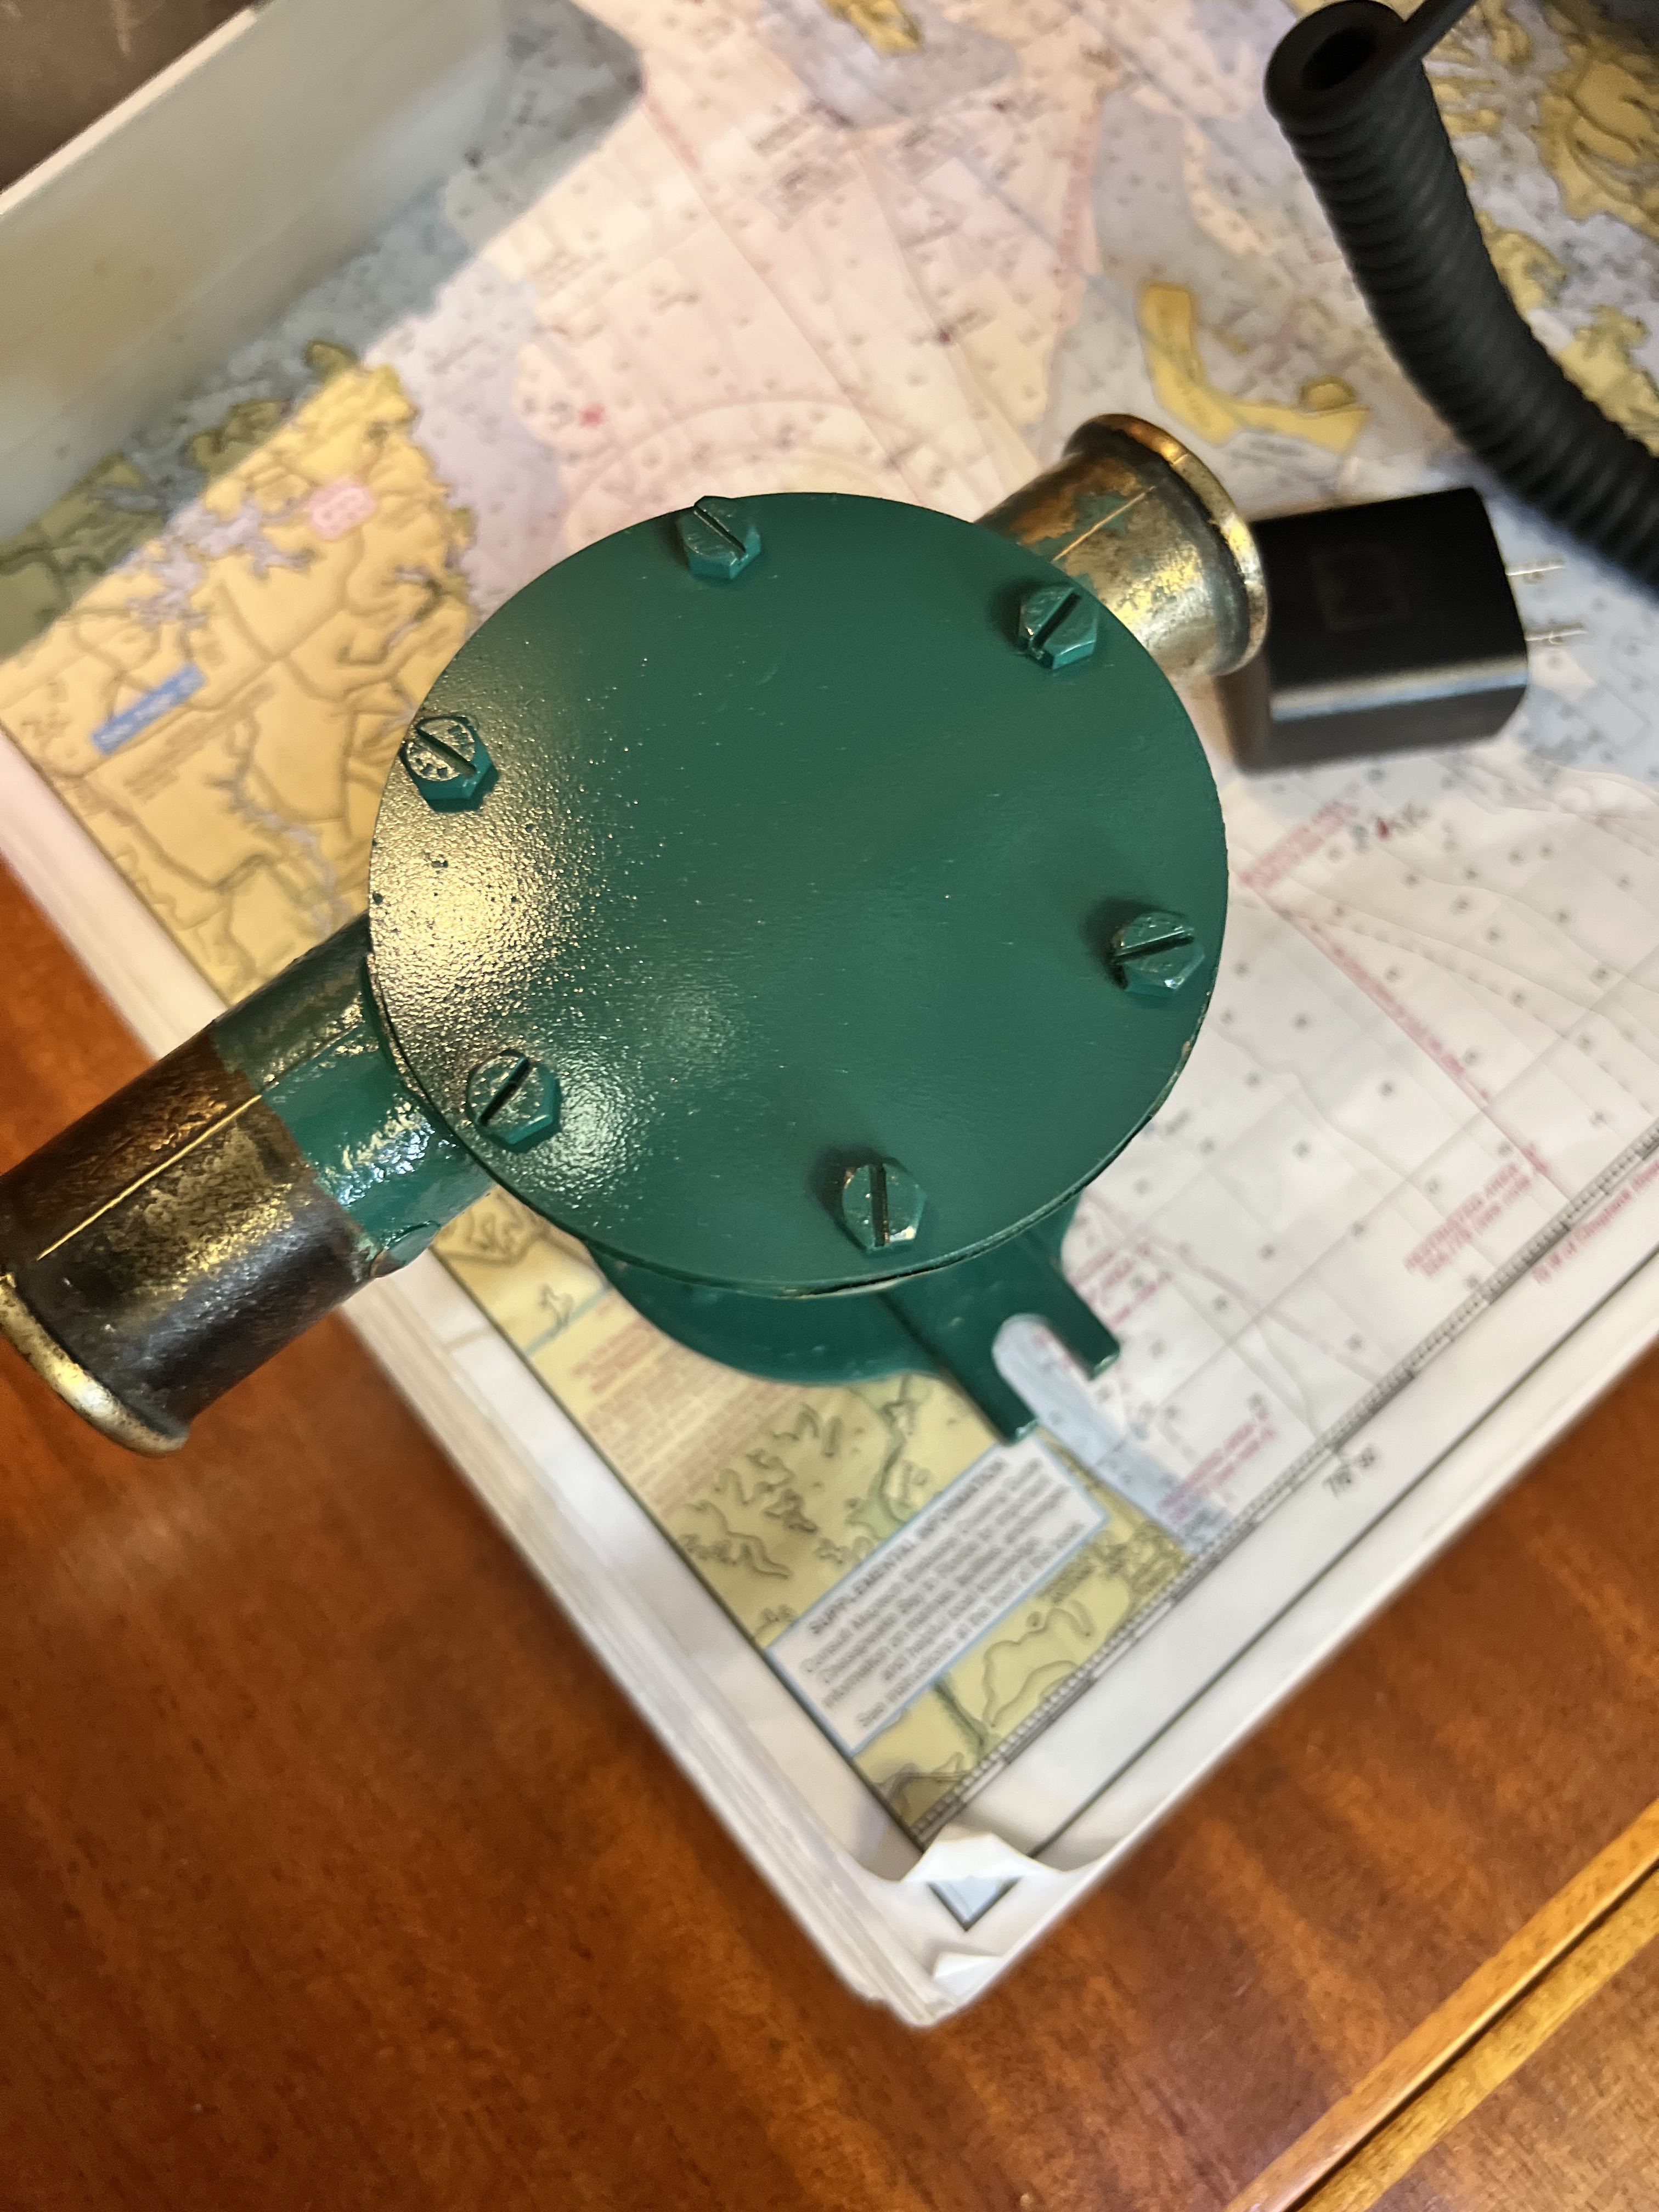
Finally, I replaced the eccentric plate with the new one from the kit and a new screw and then installed the new impeller, new flat gasket and the new cover plate. A quick clean up with a scouring pad, assembly, Zinc primer and then Volvo green spray paint made the pump into “like new” condition.
Racing back to the boat, I installed the pump starting with a new housing-to-engine block o-ring. Then I greased the inner bearing and installed the new shaft connector (dogbone).

The only thing left to do was to tighten the pump assembly onto the engine block and secure the hoses. No more drips! Incidentally, a new pump was anywhere from $800-1100 online; the rebuild kit cost me about $150.
Except…our original 3/4″ Guidi strainers installed for the freezer and the air conditioner were leaking and slowly filling our forward bilge. They hadn’t been cleaned out since we owned the boat since we haven’t run either unit much at all. With all of the nettles in the Bay and getting both systems running more frequently, I recently cleaned nettles out of these strainers. That must have caused the gaskets/o-rings to fall apart.
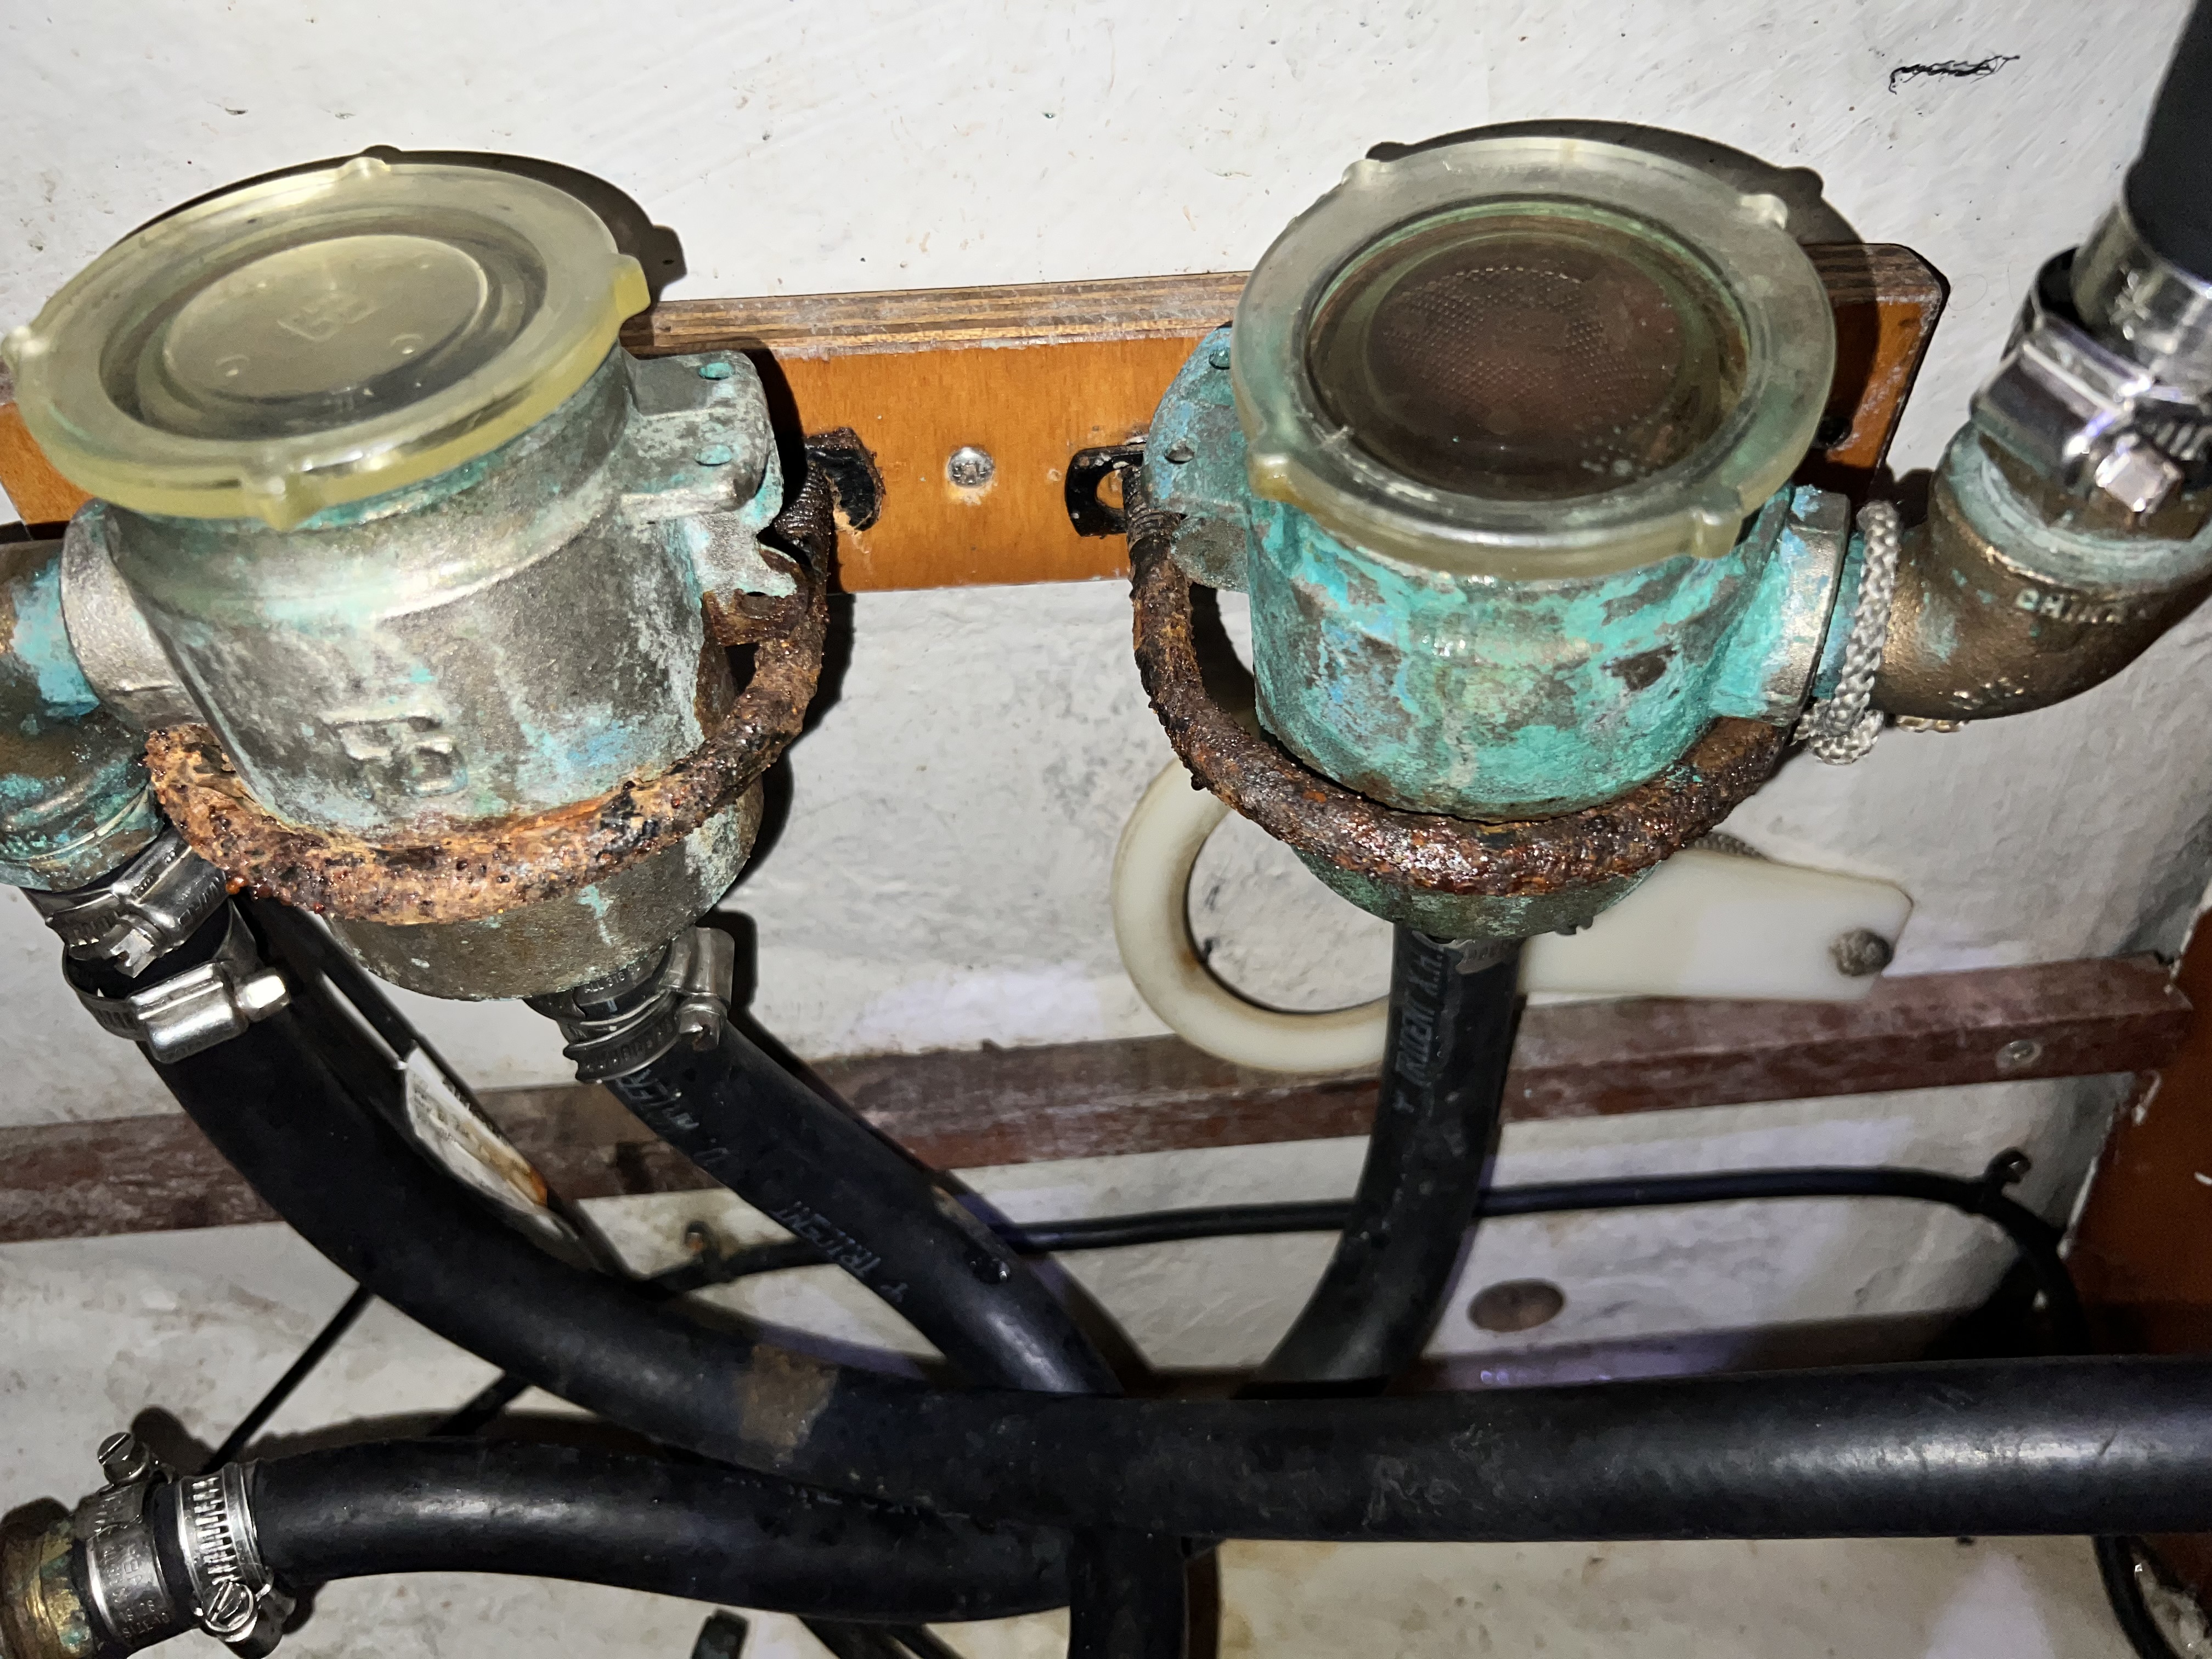
I did what I always do, I improved the design of the system to have inlet shutoff valves. Everything is now based on Groco bronze bodies with plastic strainers. I sealed all threads with 5200. Then I built a small 3/4″ marine plywood backing and gave it a quick run past my can of Epifanes varnish. I made up a jig to ensure the new holes in the backing lined up with the original holes.
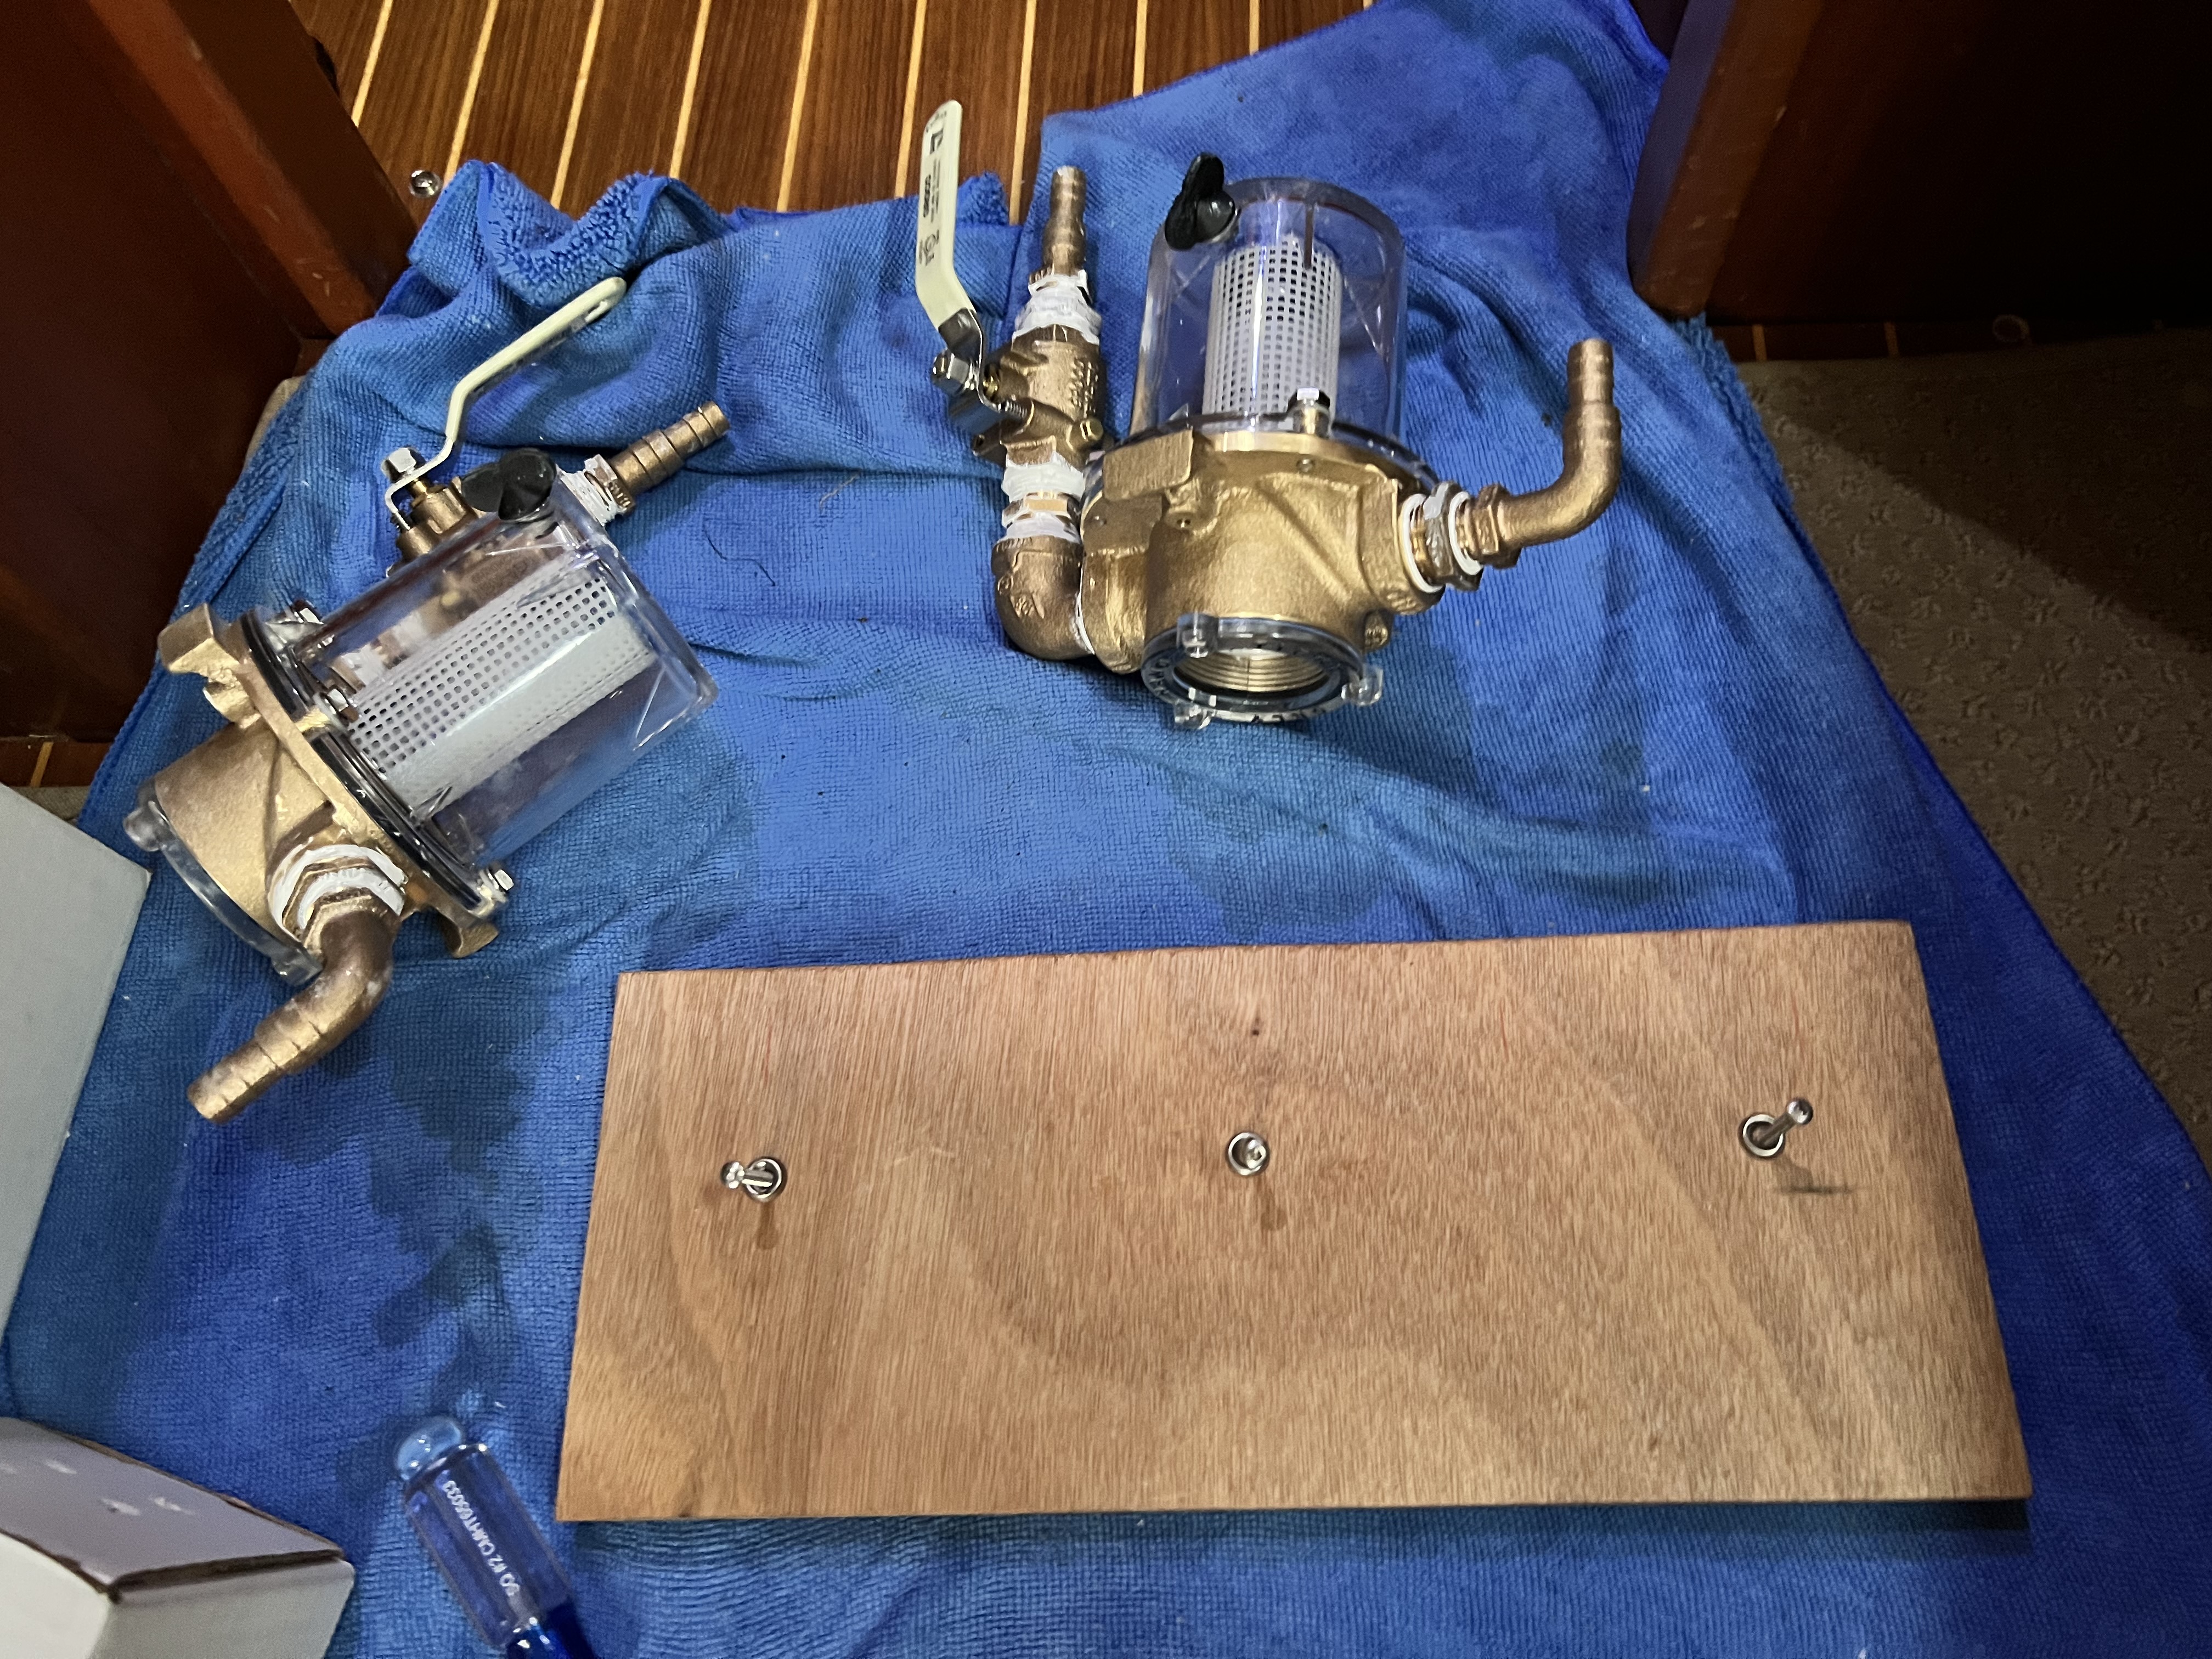
The test install of the backing plate was a perfect fit.

All that was left was to mount the new strainers and connect the original 5/8″ hoses. Perfect alignment, easy access, and no more drips. The original hoses might be a little short, but that would be an easy swapout. Mostly, I like having a way to isolate each strainer with the 3/4″ ball valves I added to the design.

Skyward is an entirely dry boat. There is very rarely water in places that it shouldn’t be, which is why we look for water ingress and collection in bilges such as the instrument bilge, the main bilge, the engine bilge as well as the rudder area bilge. We caught these drips because we pay a lot of attention to sounds and also we also have a regimen for climbing onto the boat and making it ready for sail.
Hope this helps you in your journey to improve and maintain your floating home!
